Creating a contact form
You can create a form from the Web > Forms module. This is a system extension which needs to be activated by your administrator. It is written in TypoScript and is fully documented in the Form Framework system extension manual.
This module provides a guided interface for editors to create any kind of form such as a contact form, newsletter subscription or even a survey. TYPO3 comes with one pre-defined form already built, which you can use to get started.
-
In the Web > Forms module, click the + Create new form button. The Create new form wizard displays.

Launching the Create new form wizard
-
Choose whether you want to create a blank form or use a predefined form. In this case, choose Predefined Form.
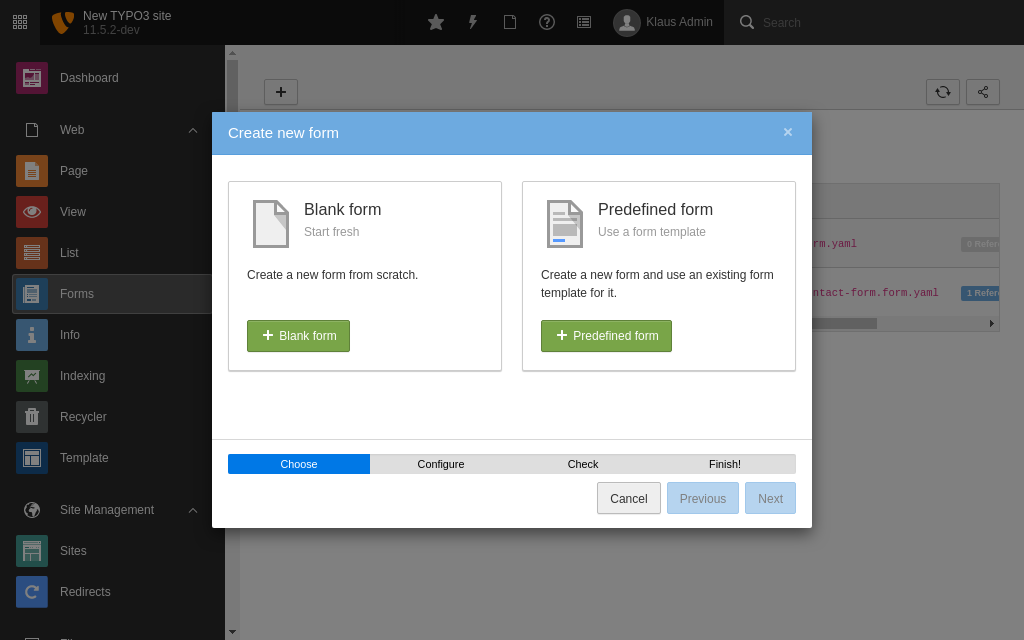
Choose Predefined form
-
Choose the predefined Simple contact form and enter a name.
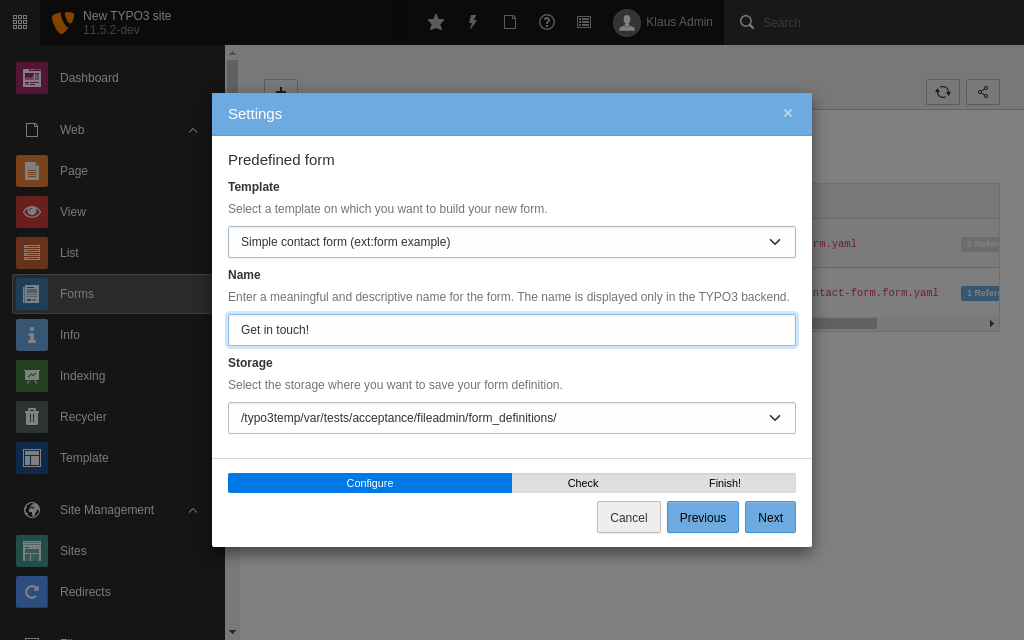
-
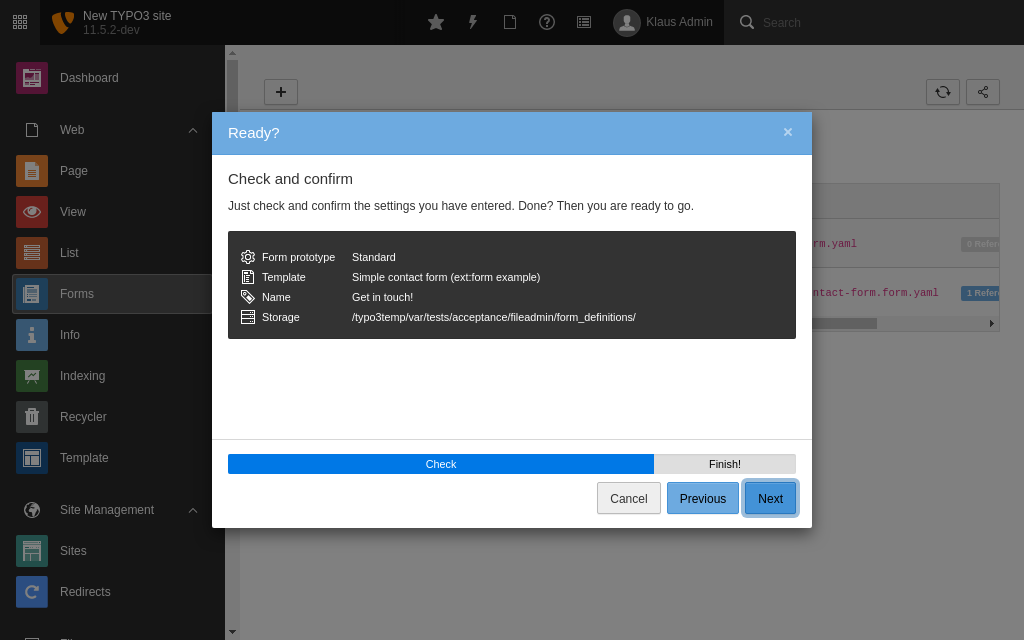
Check the settings and click Next once more.
- In the Start template list, select 'Simple contact form', and then type a name for the form.
-
Click Next and then click Finish. Your new form displays.
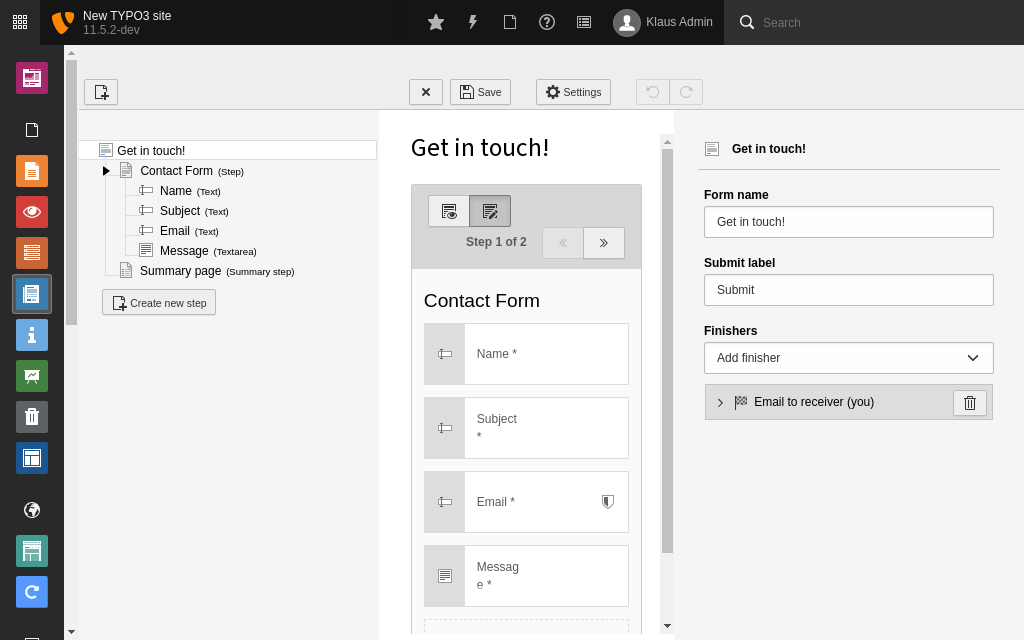
New form based on template
The predefined 'Simple contact form' comes with some settings already configured, but you can edit these settings and add more fields. For example, you might want to delete the Summary page, and change the labels on the buttons.
- Add your form to a page the same way you would add any content element. On the Form elements tab, choose 'Form'.
-
In the form content element, go to the Plugin tab and in the Form definition list, choose your form.
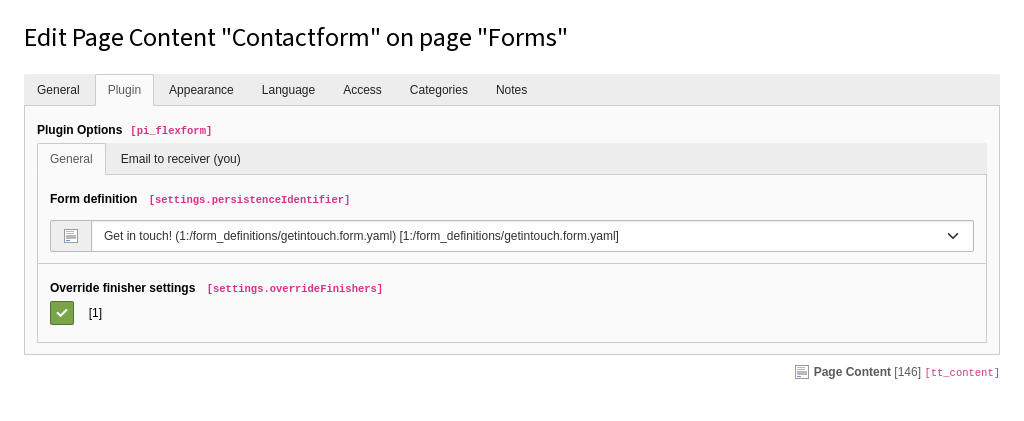
Choose your form on the Plugin tab
-
On the General tab, type a header for your form, then save and close the record.
Preview the page and it should look something like this:

The contact form in the frontend
Create a form from scratch
- In the Web > Forms module, click the + Create new form button.
- In the Create new form wizard, choose to create a blank form.
-
Give your form a name, then click Next and Finish.
A blank form displays.
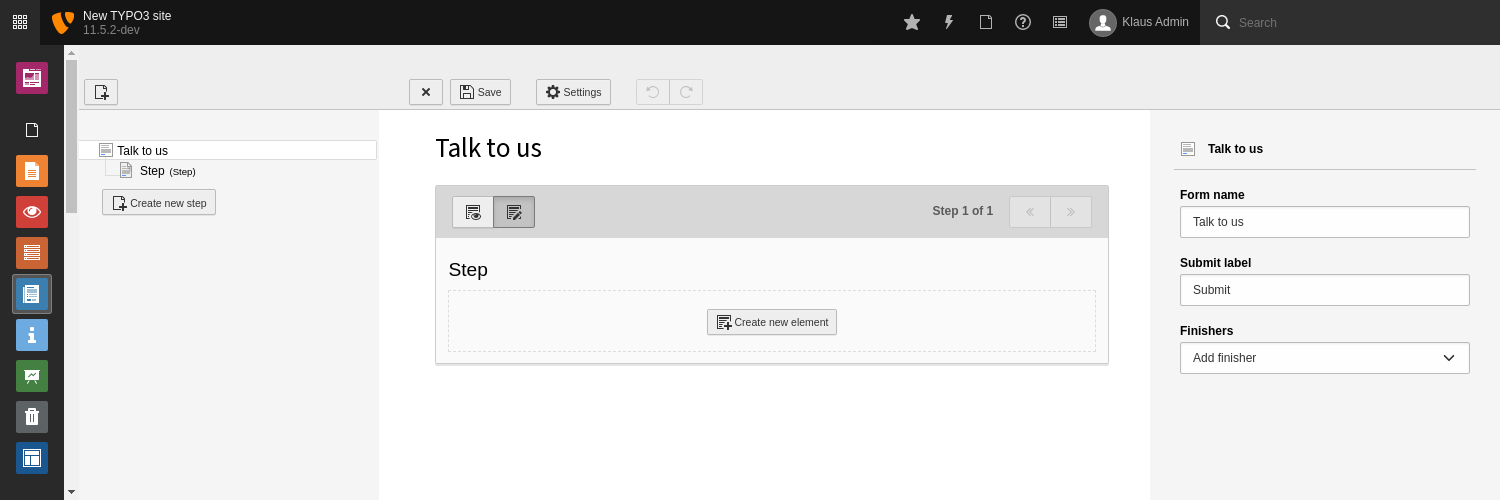
Create a new form from scratch
-
Click the Create new element button. The New element window displays.
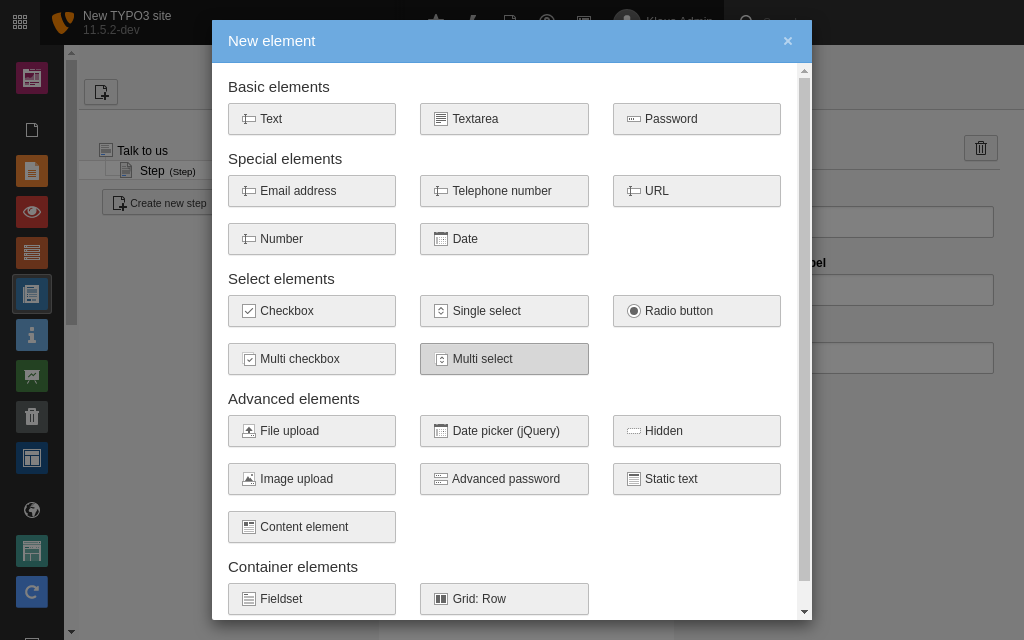
Create new element in form
TYPO3 comes with over twenty form fields by default, including:
- Basic elements like text or password fields
- Special elements requiring specific format validation, like phone numbers or dates
- Select elements like checkboxes or multiple choice
- Advanced elements that have special rules, like user uploads or calendar date pickers
- Container elements to visually organize surveys
Once you’ve selected a form element, you can customize the settings for how the field is displayed.
-
Choose the Text element and the field is added to your form. You can configure settings for the field (such as placeholder text and field validation) on the right-hand side of the screen .
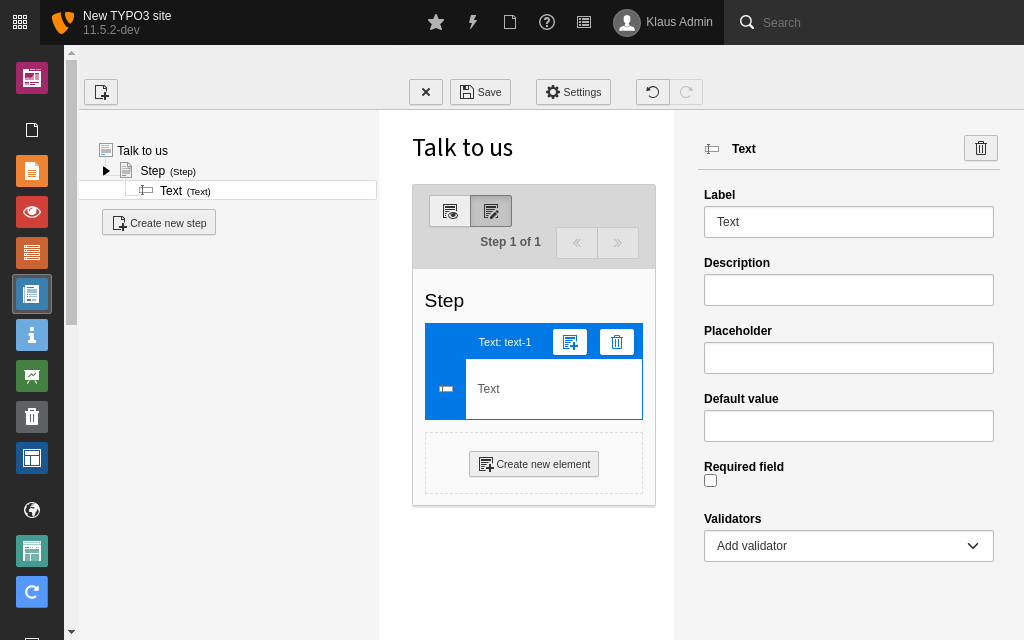
Create a new form from scratch
-
Click the Preview mode icon to see an indication of how your form will display on the frontend. Use the Edit mode icon to return to editing your form.
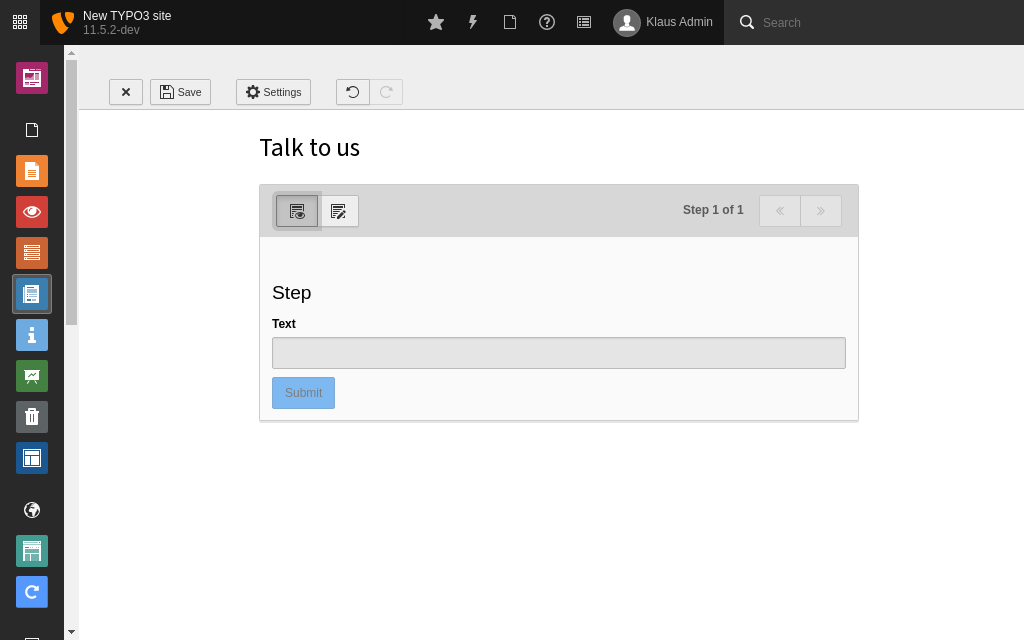
Create a new form from scratch
Working with forms
When you have added multiple fields to your form, you can drag and drop them to rearrange their order.
Click the Settings button at the top of the form to add Finishers like a confirmation message or redirection to another page.

You can integrate extensions with existing forms. For example, if you're running a sales operation, you can integrate with Mautic and any changes to a TYPO3 form will update Mautic to give you seamless lead tracking.
Tip
There are many more properties that can be defined. They are described in the "Form Framework" system extension manual.
