Attention
This manual is no longer being maintained for TYPO3 versions 11.5 and above. The majority of the content has been migrated to the Extbase or Fluid sections in "TYPO3 Explained".
Make Products Persistent
The model \MyVendor\StoreInventory\Domain\Model\Product allows us
to use "Products" in our application, however we do not have any way to store them yet,
meaning they are stored in memory and are deleted by PHP after the page request was completed.
To make our products available across requests, we must "persist" it.
The most common way to persist objects is to store them in the database.
To be able to do that, we need to define a database scheme in the file
EXT:store_inventory/ext_tables.sql:
CREATE TABLE tx_storeinventory_domain_model_product (
   name varchar(255) DEFAULT '' NOT NULL,
   description text NOT NULL,
   quantity int(11) DEFAULT '0' NOT NULL
);
This file gets read by the TYPO3 database analyzer which then takes care
of creating the table. If you inspect your database, you may notice more
columns (like pid or uid) - these are necessary for administrative
purposes and will be created automatically.
Your product's characteristics name, description and quantity
appear as columns, too.
To make your products editable / creatable by the backend of TYPO3, you need a configuration file specifying how your editing form should look like. The configuration is stored in a PHP array, the Table-Configuration-Array (in short: TCA).
See also
You can find the full documentation for all Table Configuration Array options in the TCA Reference
Create your configuration in the file:
EXT:store_inventory/Configuration/TCA/tx_storeinventory_domain_model_product.php.
The file returns an array with all information, TYPO3 needs to render the list and detail view for the records of this extension.
<?php
return [
    'ctrl' => [
        'title' => 'LLL:EXT:store_inventory/Resources/Private/Language/locallang_db.xlf:tx_storeinventory_domain_model_product',
        'label' => 'name',
        'iconfile' => 'EXT:store_inventory/Resources/Public/Icons/Product.svg',
    ],
    'columns' => [
        'name' => [
            'label' => 'LLL:EXT:store_inventory/Resources/Private/Language/locallang_db.xlf:tx_storeinventory_domain_model_product.item_label',
            'config' => [
                'type' => 'input',
                'size' => '20',
                'eval' => 'trim',
            ],
        ],
        'description' => [
            'label' => 'LLL:EXT:store_inventory/Resources/Private/Language/locallang_db.xlf:tx_storeinventory_domain_model_product.item_description',
            'config' => [
                'type' => 'text',
                'eval' => 'trim',
            ],
        ],
        'quantity' => [
            'label' => 'LLL:EXT:store_inventory/Resources/Private/Language/locallang_db.xlf:tx_storeinventory_domain_model_product.stock_quantity',
            'config' => [
                'type' => 'input',
                'size' => '4',
                'eval' => 'int',
            ],
        ],
    ],
    'types' => [
        '0' => ['showitem' => 'name, description, quantity'],
    ],
];
This file consists of several sections.
In the section ctrl basic characteristics of the table are configured, like the title or the icon.
The section columns describes how each table column is rendered in the backend forms.
The section types defines in which sequence the table columns are rendered.
See also
You can find a complete listing of all options at TYPO3 Core APIs.
TYPO3 is able to group all records of an extension in the new record wizard.
To define the name of this group, create a language file
EXT:store_inventory/Resources/Private/Language/locallang_db.xlf
and add the key extension.title.
<?xml version="1.0" encoding="UTF-8"?>
<xliff version="1.0">
    <file source-language="en" datatype="plaintext" original="messages" date="2017-11-27T17:38:32Z"
        product-name="store_inventory">
        <header/>
        <body>
            <trans-unit id="extension.title">
                <source>Store Inventory Records</source>
            </trans-unit>
            <trans-unit id="tx_storeinventory_domain_model_product">
                <source>Product</source>
            </trans-unit>
            <trans-unit id="tx_storeinventory_domain_model_product.item_label">
                <source>Item Label</source>
            </trans-unit>
            <trans-unit id="tx_storeinventory_domain_model_product.item_description">
                <source>Item Description</source>
            </trans-unit>
            <trans-unit id="tx_storeinventory_domain_model_product.stock_quantity">
                <source>Stock Quantity</source>
            </trans-unit>
        </body>
    </file>
</xliff>
After installing the extension, we can create our first products in the backend.
Like shown in image 4-2, we create a sys folder to store the products (see 1 in figure 4-2). Let's create some items: (see 2 in figure 4-2 and 3 in 4-3).
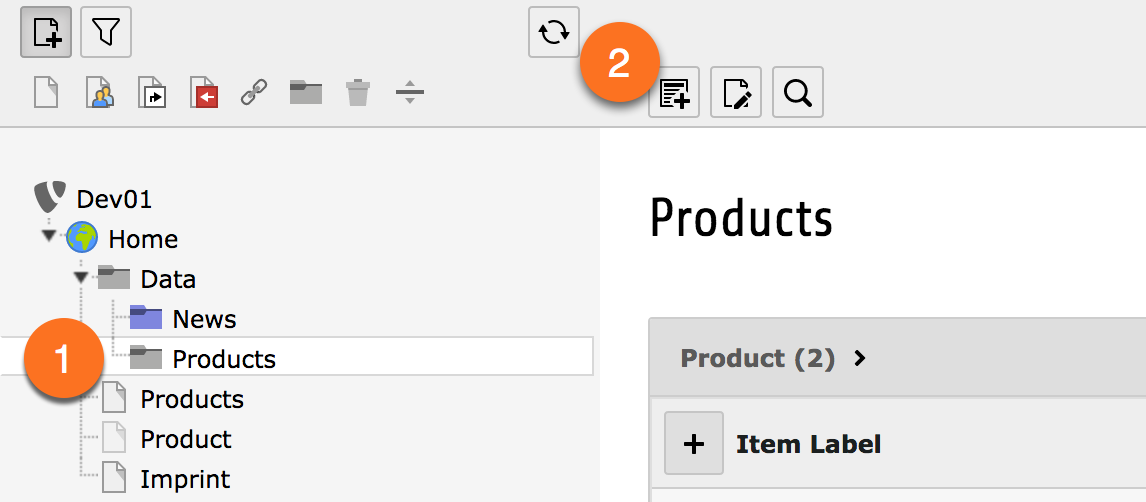
Figure 4-2: Create a new product
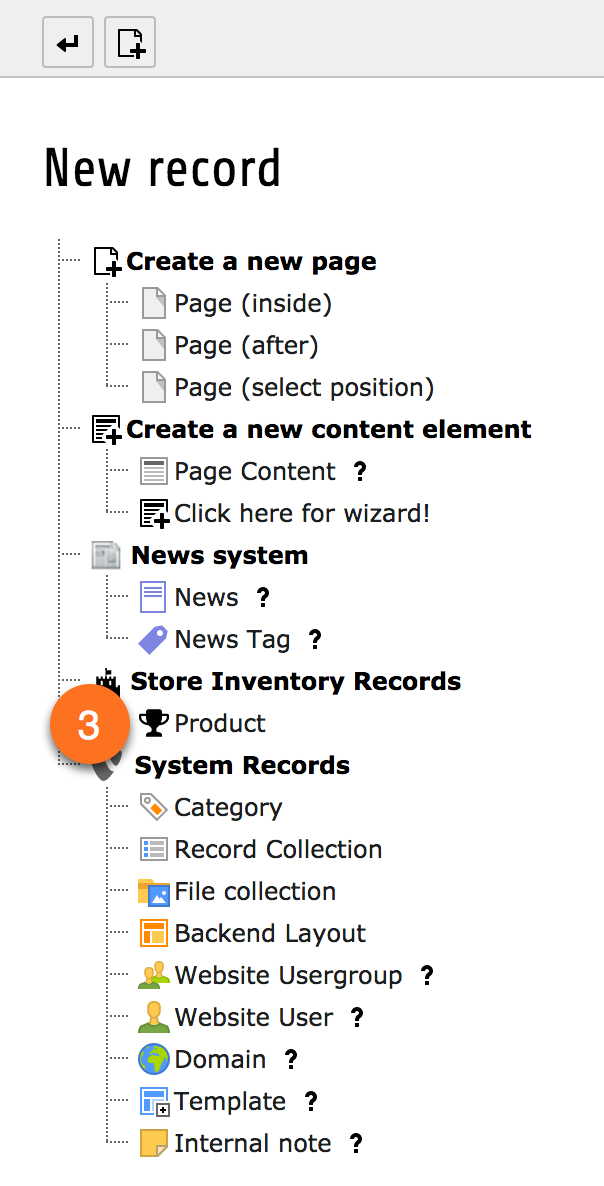
Figure 4-3: The new record wizard.
In this section we created a copy (or a model) of the reality. We did not model the full set of properties a product might have, but restricted the model to those we need in order to build our application (these are the properties relevant to our current domain).
After creating the items in the backend, we now want to display them in the frontend.
To get data from the database with Extbase, we need a repository.
Create a class MyVendor\StoreInventory\Domain\Repository\ProductRepository (see below).
The repository is our connection to the database and retrieves products.
As we do not need any special functionality, the Repository class is very short in our case:
<?php

namespace MyVendor\StoreInventory\Domain\Repository;

use TYPO3\CMS\Extbase\Persistence\Repository;

class ProductRepository extends Repository
{

}
Our ProductRepository must be derived by \TYPO3\CMS\Extbase\Persistence\Repository
and inherits all methods.
It can remain empty as we only need the parent methods in our simple example.
The file ProductRepository.php should be stored in the directory
EXT:store_inventory/Classes/Domain/Repository/.