Attention
TYPO3 v11 has reached end-of-life as of October 31st 2024 and is no longer being maintained. Use the version switcher on the top left of this page to select documentation for a supported version of TYPO3.
Need more time before upgrading? You can purchase Extended Long Term Support (ELTS) for TYPO3 v11 here: TYPO3 ELTS.
Installing TYPO3
Welcome to the TYPO3 installation guide. This guide covers each of the steps required to install TYPO3 using Composer.
For more information on how to deploy TYPO3 to a live environment, visit the deploying TYPO3 chapter.
Pre-installation Checklist
- Command line (CLI) access with the ability to create directories and symbolic links.
- Access to Composer via the CLI (for local development)
- Access to the web server's root directory
- Database with appropriate credentials
Execute Composer Create-Project
Execute this Composer command in the web server's root directory.
composer create-project typo3/cms-base-distribution example-project-directory "^11"composer create-project "typo3/cms-base-distribution:^11" example-project-directory# Create a directory for your project
mkdir example-project-directory
# Go into that directory
cd example-project-directory
# Tell DDEV to create a new project of type "typo3"
# 'docroot' MUST be 'public'
ddev config --project-type=typo3 --docroot=public
# Start the ddev instance
ddev start
# Fetch a basic TYPO3 installation composer.json
ddev composer create "typo3/cms-base-distribution:^11" --no-install -y
# And do the installation
ddev composer installThis command pulls down the latest release of TYPO3 and places it in the
example-.
After this command has finished running, example-
will contain the following structure:
.
├── .gitignore
├── composer.json
├── composer.lock
├── LICENSE
├── public
├── README.md
├── var
└── vendorVerify Installation
Create an empty file called FIRST_ in the /public directory:
touch example-project-directory/public/FIRST_INSTALLecho $null >> public/FIRST_INSTALLddev exec touch public/FIRST_INSTALL.
├── .gitignore
├── composer.json
├── composer.lock
├── LICENSE
├── public
├── FIRST_INSTALL
├── README.md
├── var
└── vendorAccess TYPO3 via a web browser
After you have configured your web server to point at the public directory of your project,
TYPO3 can be accessed via a web browser. When accessing a new site for the first time, TYPO3 automatically
redirects all requests to /typo3/ to complete the installation process.
Tip
When accessing the page via HTTPS, a "Privacy error" or similar warning is likely to occur. In a local environment it is safe to ignore this warning by forcing the browser to ignore similar exceptions for this domain.
The warning is due to the fact that self-signed certificates are being used.
If there is a trusted error on initial access, accessing TYPO3 without HTTPS (http://) is also an option.
Scan Environment
TYPO3 will now scan the host environment. During the scan TYPO3 will check the host system for the following:
- Minimum required version of PHP is installed.
- Required PHP extensions are loaded.
- php.ini is configured.
- TYPO3 is able to create and delete files and directories within the installation's root directory.
If no issues are detected, the installation process can continue.
In the event that certain criteria are not met, TYPO3 will display a list of issues it has detected accompanied by a resolution for each issue.
Once changes have been made, TYPO3 can re-scan the host environment by reloading the page https://.
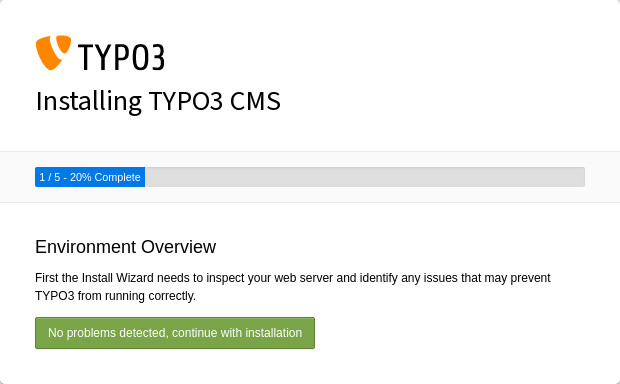
Install Tool in 1-2-3 mode, first step.
Select A Database
Select a database connection driver and enter the credentials for the database.
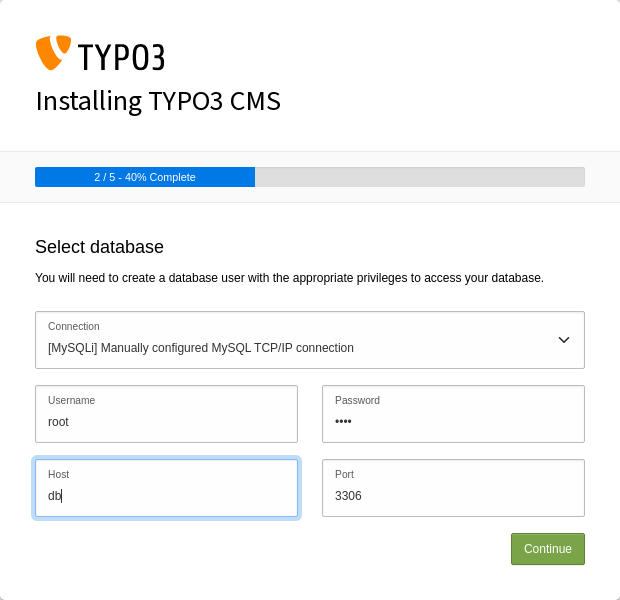
Install Tool in 1-2-3 mode, second step.
TYPO3 can either connect to an existing empty database or create a new one.
The list of databases available is dependent on which database drivers are installed on the host.
For example, if an instance of TYPO3 is intended to be used with a MySQL database then the PHP extension 'pdo_mysql' is required. Once it's installed, 'MySQL Database' will be available as an option.(Review)
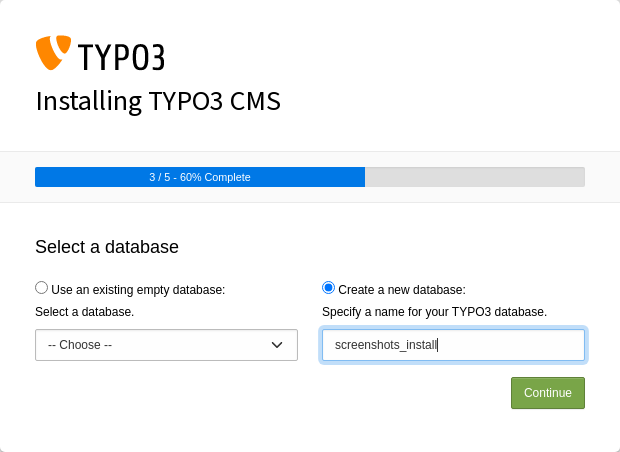
Install Tool in 1-2-3 mode, third step.
Create Administrative User & Set Site Name
An administrator account needs to be created to gain access to TYPO3's backend.
An email address for this user can also be specified and a name can be given.
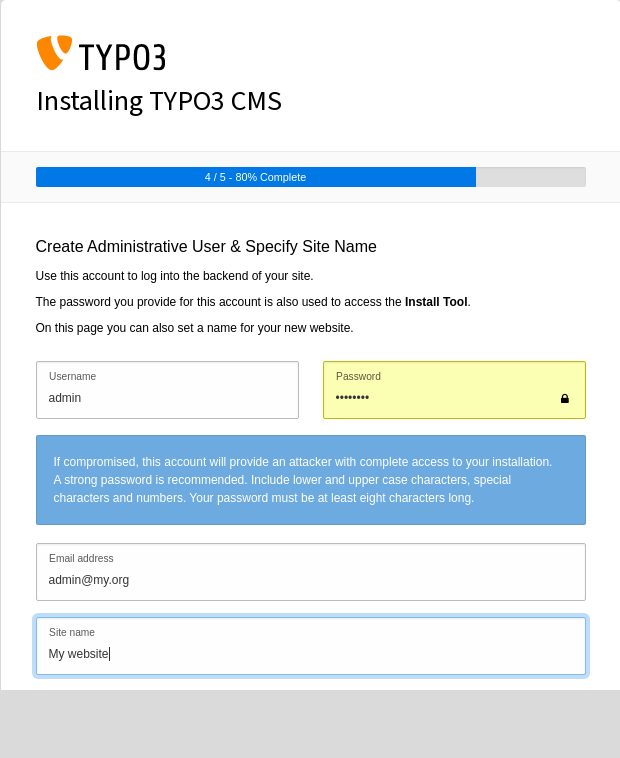
Install Tool in 1-2-3 mode, forth step.
Initialise
TYPO3 offers two options for initialisation: creating an empty starting page or it can go directly to the backend administrative interface. Beginners should select the first option and allow TYPO3 to create an empty starting page. This will also generate a site configuration file.
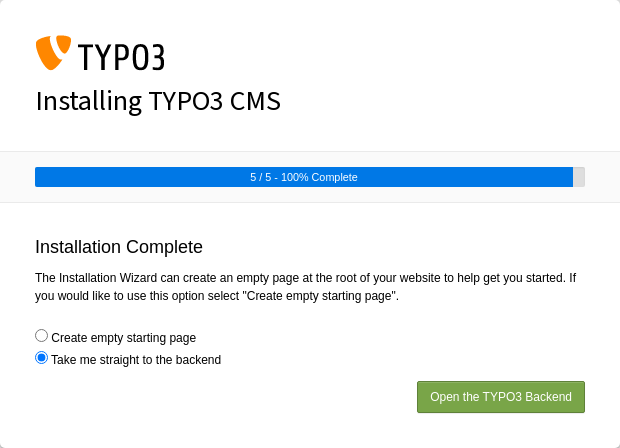
Install Tool in 1-2-3 mode, fifth step.
Next Steps
Now that installation is complete, TYPO3 can be configured.
Using DDEV
We also provide a step-by-step tutorial on how to Install TYPO3 using DDEV. The tutorial also includes a video.