Attention
TYPO3 v8 has reached its end-of-life March 31st, 2020 and is not maintained by the community anymore. Looking for a stable version? Use the version switch on the top left.
There is no further ELTS support. It is recommended that you upgrade your project and use a supported version of TYPO3.
Working with Images
Since we are working with a "Text & Images" content element, let's add images to it!
Move to the "Images" tab.
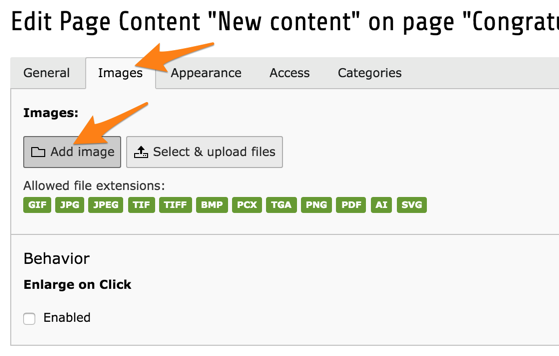
Clicking the "Add image" button will open a window for selecting an image.
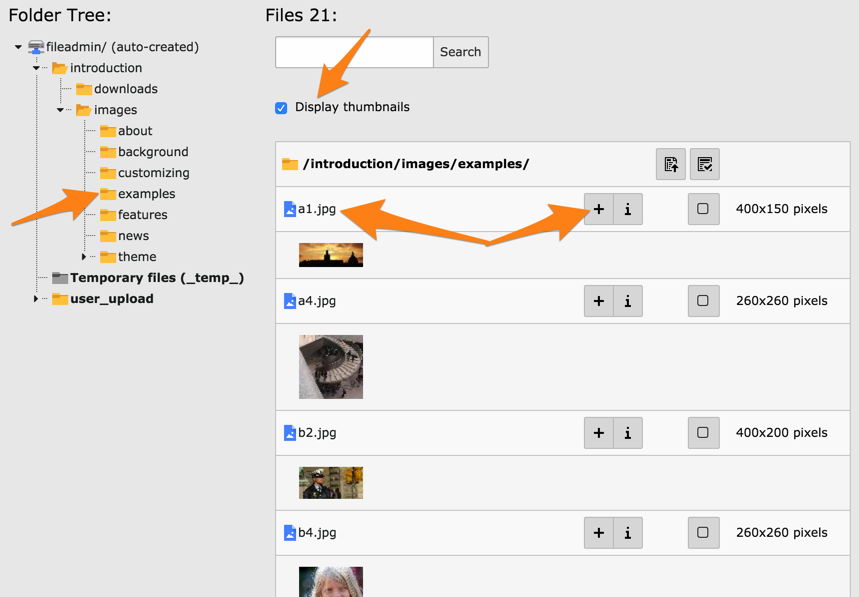
Navigate the file tree to get to the examples folder.
Clicking on it will trigger the display of the files it contains
in the right part of the window. You may want to check the
"Display thumbnails" box to get a preview of each image.
You have two ways of selecting an image. Clicking on its name will select the image and close the window. Clicking on the "+" icon will only select the image, making it possible to select multiple images before closing the window.
Once you are back in your content element, you can perform a number of actions or configure the image further.

First of all some information is display about the image (1): thumbnail and file name. The arrow next to the thumbnail is used to collapse the display of the image details.
A series of icons (2) let you act the image or its relation to the content element:
The "Edit" icon lets you edit the chosen image's metadata. Beware as this might impact other places where the image is used.
The "Delete" icon will remove the image from the content element, not delete the image itself.
The "Move" icon (rightmost) is used by dragging and dropping for changing the order of images
The central area (3) lets you edit the image's metadata with regards to its current relation to the content element. If you check the corresponding "Override?" boxes, you can set a specific title, alternative text and caption for the relation of that image to the current content element.
You can experiment with the image editor (4), which will let you crop the image.
Finally if you check the "Enlarge on click" box (5), the image will be linked to the original file in a lightbox display.
Image appearance
Moving the "Appearance" tab of the content element, you can set further behaviors of the images attached to the content element.
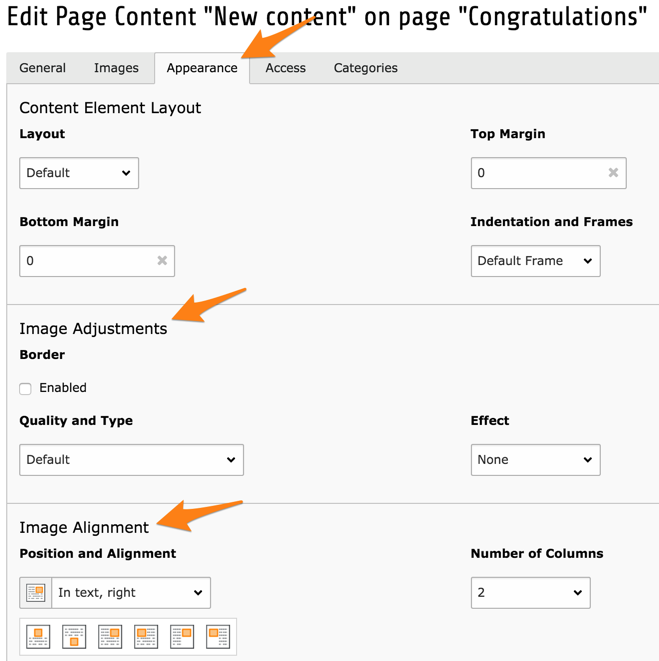
In "Image Adjustments" you can choose to apply a border or a special effect to the images. You can also choose a specific quality for these images.
In "Image Alignment" you can choose where the images should be positioned with regards to the text. Images are automatically arranged in columns, two by two. You can change this behaviour with the "Number of Columns" field.
New images
New images can be added using upload buttons found in the image selector window or by using the FILE > Filelist module.
Usage of the Filelist module is covered in the Getting Started Tutorial.