Google Consent Mode V2
Important
Category sorting order matters. The cookie manager executes service scripts in the order
their categories appear in the backend. The Required category must come first so that
window.dataLayer and window.gtag are defined before any other service tries to use them. Use the List Module to reorder categories if needed.
Recommended category order in the backend:
- Required Cookies (Essential) - defines
window.gtagand consent defaults - Performance/Functional - updates functional/performance consent signals
- Analytics - loads Google Tag Manager
- Marketing/Advertising - updates advertising consent signals
If the Analytics or Marketing category runs before Required, the window.gtag function will
not exist yet and consent calls will fail.
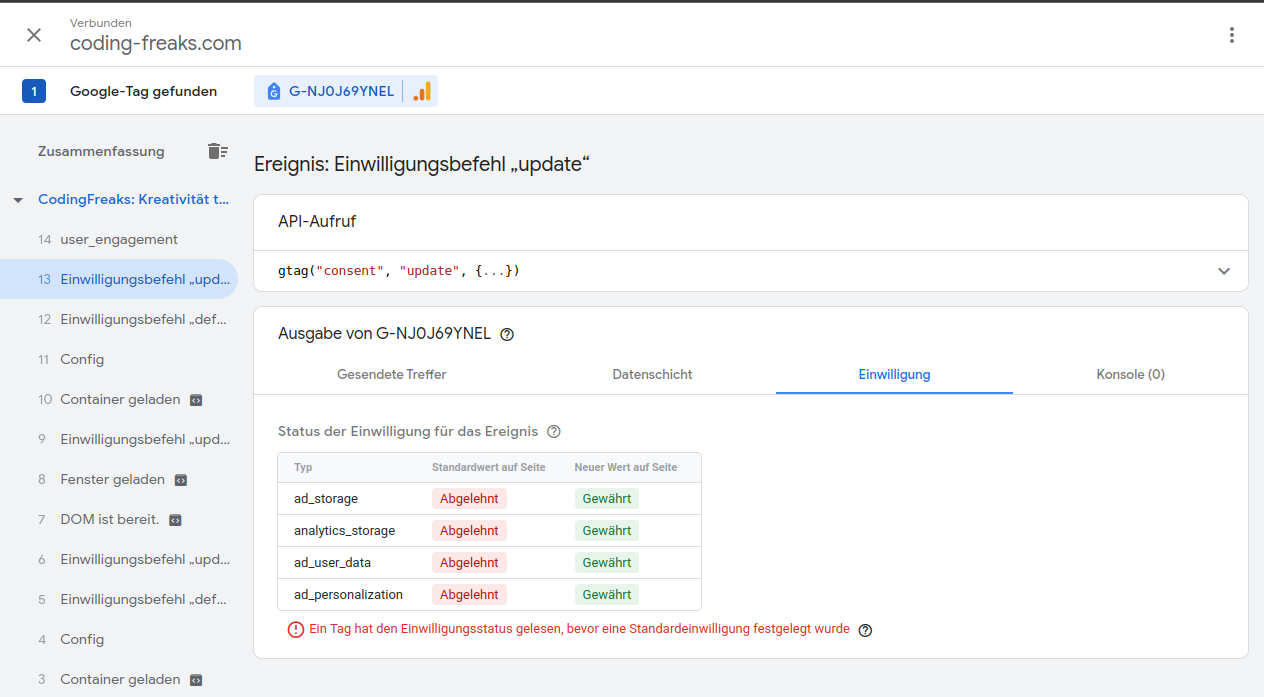
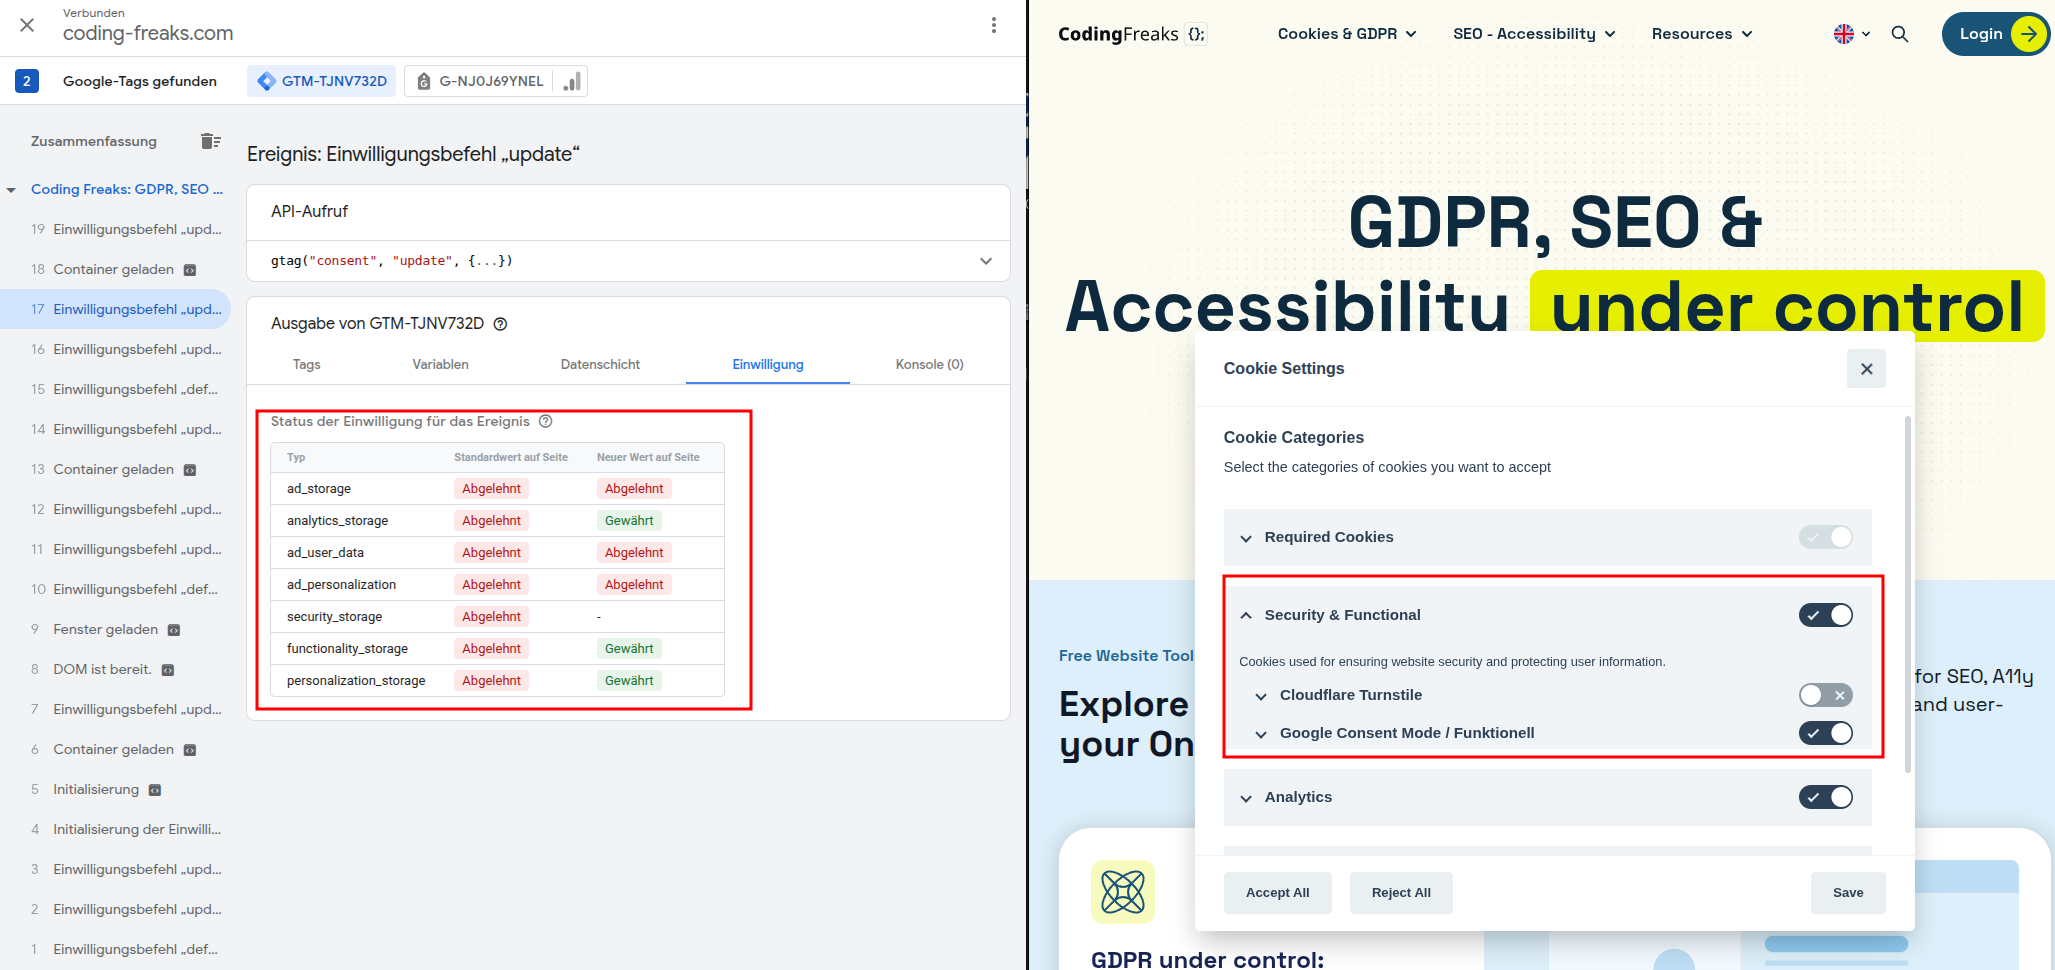
Google Consent Mode V2 allows Google Tags (Analytics, Ads..) to adjust their behavior based on user consent. It uses seven consent signals that map to four cookie categories:
| Signal | Purpose | Category |
|---|---|---|
security_storage | Enables storage related to security such as authentication, fraud prevention, and other user protection | Essential |
functionality_storage | Enables storage that supports the functionality of the website or app, for example language settings | Functional |
personalization_storage | Enables storage related to personalization, for example video recommendations | Functional |
analytics_storage | Enables storage such as cookies related to analytics, for example visit duration | Analytics |
ad_storage | Enables storage such as cookies related to advertising | Marketing |
ad_user_data | Sets consent for sending user data to Google for online advertising purposes | Marketing |
ad_personalization | Sets consent for personalized advertising and remarketing | Marketing |
We recommend using four separate categories (Essential, Functional, Analytics and Marketing) so users have granular control over their consent as required by GDPR.
All seven consent signals default to denied. The user decides what to opt into.
Basic vs Advanced Mode
There are two ways to implement Consent Mode V2:
- Basic Mode (Recommended by me)
- Google Tag Manager only loads after the user gives consent. No data is sent to Google before consent. This is the GDPR-safe approach because no connection to Google servers is made until the user explicitly opts in.
- Advanced Mode (Recommended by Google)
- Google Tag Manager loads on every page visit with all consent signals set to
denied. Google still receives cookieless pings for modeled conversions, even without user consent. This may not be GDPR compliant because data is transmitted to Google servers before the user has given consent.
Important
We recommend Basic Mode for secure GDPR compliance. In Advanced Mode, Google Tag Manager sends cookieless pings to Google servers on every page load, even when the user has not given consent. Loading the Tag Manager only after consent ensures no data leaves the browser without explicit user permission.
Why you must use window.gtag
Warning
Do NOT use function gtag(){dataLayer.push(arguments);} in your opt_in_code.
Always use window.gtag = function(){dataLayer.push(arguments);}; instead.
The cookie manager executes opt_in_code and opt_out_code inside JavaScript callback functions
(onAccept and onChange). This causes two problems with a bare function gtag(){} declaration:
- 1. Function Scoping
- A
function gtag(){}declaration inside a callback is scoped to that callback. It does not become available onwindow, so other code blocks (likeopt_out_code) cannot access it. - 2. Function Hoisting (the hidden trap)
-
JavaScript hoists
functiondeclarations to the top of their enclosing function - even when they appear inside anelsebranch. This means the cookie manager's generated code looks like:// Generated onChange callback (simplified) cf_cookieconfig.onChange = function(cookie, changed_preferences) { // JavaScript hoists "function gtag(){}" from the else branch to HERE // creating a local variable: var gtag = undefined; if (!cc.allowedCategory('googletagmanager')) { // OPT-OUT BRANCH // typeof gtag === 'function' → FALSE (local gtag is undefined, NOT window.gtag) // The denied signal is NEVER sent! } else { // OPT-IN BRANCH function gtag(){dataLayer.push(arguments);} // hoisted above! } };Copied!The hoisted
function gtag(){}creates a local variablegtag = undefinedthat shadowswindow.gtagin the entire callback - including the opt-out branch where it was never assigned. This is whytypeof gtag === 'function'fails even whenwindow.gtagexists.
The fix: Use window.gtag everywhere. The assignment window.gtag = function(){...} is not
hoisted and explicitly places the function on the global object. Referencing window.gtag in
opt_out_code bypasses the local scope entirely.
Service Architecture
Consent Mode signals are Google-specific. Other marketing providers (Facebook Pixel, LinkedIn Insight,
TikTok, etc.) do not use gtag consent mode - they manage their own consent through their own scripts.
In the cookie manager, opt_in_code and opt_out_code live on Services, not on Categories.
This means you cannot add consent mode code to a category directly. Instead, you create dedicated
services for the consent mode signals.
Important
Why consent defaults must live in the Required category:
The window.dataLayer, window.gtag function and consent defaults must be defined in a
service in the Required category so they are always available - regardless of which
optional categories the user accepts.
If window.gtag is only defined when the user accepts Analytics, then a user who accepts
Marketing but not Analytics would cause the Marketing consent updates to be silently lost
(window.gtag would not exist). When the user later accepts Analytics and GTM loads,
it would not know that Marketing was already granted.
By defining window.gtag and dataLayer in a Required service:
window.gtagis always available - notypeofguards needed anywhere- Consent updates from any category are always pushed to
dataLayer dataLayeris a queue - when GTM eventually loads, it processes all queued entries from the beginning, including consent updates that were pushed before GTM existed- The order in which the user accepts categories does not matter
This is still Basic Mode, not Advanced Mode. window.dataLayer is just a local JavaScript
array and window.gtag is just a local function that pushes to that array. No network requests
are made, no data leaves the browser, and no connection to Google servers is established.
What makes Advanced Mode "advanced" is loading the GTM <script> tag on every page - that is
what triggers cookieless pings to Google. In Basic Mode, the GTM script still only loads when the
user accepts the Analytics category.
The recommended service structure:
| Category | Service | Purpose |
|---|---|---|
| Required | Google Consent Mode Defaults | Defines window.gtag, dataLayer and sets all consent defaults to denied |
| Analytics | Google Tag Manager | Loads the GTM script and grants analytics_storage |
| Marketing | Google Consent Mode | Grants/denies ad_storage, ad_user_data, ad_personalization |
| Marketing | Facebook Pixel | Loads/removes FB pixel script (independent, no gtag) |
| Marketing | LinkedIn Insight | Loads/removes LinkedIn script (independent, no gtag) |
| Functional | Google Consent Mode | Grants/denies functionality_storage, personalization_storage |
The Google Consent Mode services in Marketing and Functional are lightweight - they do not load any
scripts or set any cookies. They only exist to fire the window.gtag('consent', 'update', ...) calls
when the user toggles that category. Other providers in the same category manage their own
loading/unloading independently.
Note
The window.gtag('consent', 'update', ...) calls are additive. Updating analytics_storage
does not affect the marketing or functional signals and vice versa. Each update only
changes the signals you explicitly specify.
Basic Mode Setup (Recommended)
Service 1: Google Consent Mode Defaults (Required Category)
This service always runs because it is in the Required category. It defines window.dataLayer
and window.gtag globally and sets all seven consent signals to denied by default.
Create a new service called "Google Consent Mode Defaults" in the Required category. Mark it as required and readonly so users cannot disable it.
opt_in_code
window.dataLayer = window.dataLayer || [];
window.gtag = function(){dataLayer.push(arguments);};

window.gtag('consent', 'default', {
  'security_storage': 'denied',
  'functionality_storage': 'denied',
  'personalization_storage': 'denied',
  'analytics_storage': 'denied',
  'ad_storage': 'denied',
  'ad_user_data': 'denied',
  'ad_personalization': 'denied'
});Since this service is in the Required category, the opt_out_code is not needed - it can never
be disabled.
Service 2: Google Tag Manager (Analytics Category)
This service only loads the GTM script and grants analytics_storage. The consent defaults
and window.gtag are already defined by the Required service above.
Add the Service
- Open the Backend Module and open the Analytics Category.
- Search for "Google Tag Manager" in services and add it to the Analytics Category.
- Save the Category.
Configure the Variable Provider
- Open the "Google Tag Manager" Service (detail-view).
- Switch to the Scripts Tab.
- Scroll down to the Variable Provider Section and create an assignment for your Google Tag Manager ID (
GT_TRACKING_ID).
opt_in_code
var script = document.createElement('script');
script.type = 'text/javascript';
script.async = true;
script.src = 'https://www.googletagmanager.com/gtm.js?id=[##GT_TRACKING_ID##]';
script.onload = function() {
  window.gtag('js', new Date());
  window.gtag('config', '[##GT_TRACKING_ID##]');

  window.gtag('consent', 'update', {
    'analytics_storage': 'granted'
  });
};
document.head.appendChild(script);opt_out_code
window.gtag('consent', 'update', {
  'analytics_storage': 'denied'
});Service 3: Google Consent Mode (Marketing Category)
This is a lightweight service that only handles Google's advertising consent signals. It does not load any scripts or set any cookies on its own.
Create a new service called "Google Consent Mode" in the Marketing category.
opt_in_code
window.gtag('consent', 'update', {
  'ad_storage': 'granted',
  'ad_user_data': 'granted',
  'ad_personalization': 'granted'
});opt_out_code
window.gtag('consent', 'update', {
  'ad_storage': 'denied',
  'ad_user_data': 'denied',
  'ad_personalization': 'denied'
});Service 4: Google Consent Mode (Functional Category)
This is a lightweight service that only handles Google's functional consent signals. It does not load any scripts or set any cookies on its own.
Create a new service called "Google Consent Mode" in the Functional category.
opt_in_code
window.gtag('consent', 'update', {
  'functionality_storage': 'granted',
  'security_storage': 'granted',
  'personalization_storage': 'granted'
});opt_out_code
window.gtag('consent', 'update', {
  'functionality_storage': 'denied',
  'security_storage': 'denied',
  'personalization_storage': 'denied'
});Advanced Mode Setup
Warning
Advanced Mode sends cookieless pings to Google on every page load, even without user consent. This may not be compliant with GDPR. Only use this mode if your legal team has confirmed it is acceptable for your use case.
In Advanced Mode, the Tag Manager and consent defaults are loaded globally on every page via TypoScript,
before any consent is given. The cookie manager services then fire consent update calls when the
user opts in or out.
Step 1: Load Tag Manager globally via TypoScript
Add the following to your TypoScript setup to load Tag Manager with all consent signals denied on every page:
page.headerData {
  99 = TEXT
  99.value (
    <script>
      window.dataLayer = window.dataLayer || [];
      window.gtag = function(){dataLayer.push(arguments);};

      window.gtag('consent', 'default', {
        'security_storage': 'denied',
        'functionality_storage': 'denied',
        'personalization_storage': 'denied',
        'analytics_storage': 'denied',
        'ad_storage': 'denied',
        'ad_user_data': 'denied',
        'ad_personalization': 'denied'
      });
    </script>
    <script async src="https://www.googletagmanager.com/gtm.js?id=YOUR-GTM-ID"></script>
    <script>
      window.gtag('js', new Date());
      window.gtag('config', 'YOUR-GTM-ID');
    </script>
  )
}Replace YOUR-GTM-ID with your Google Tag Manager Container ID.
Since the Tag Manager and window.gtag are loaded via TypoScript in Advanced Mode, the Google Consent
Mode Defaults service in the Required category is not needed. The remaining services are the same
as Basic Mode:
Google Tag Manager Service (Analytics Category)
opt_in_code:
window.gtag('consent', 'update', {
  'analytics_storage': 'granted'
});opt_out_code:
window.gtag('consent', 'update', {
  'analytics_storage': 'denied'
});Google Consent Mode Service (Marketing Category)
opt_in_code:
window.gtag('consent', 'update', {
  'ad_storage': 'granted',
  'ad_user_data': 'granted',
  'ad_personalization': 'granted'
});opt_out_code:
window.gtag('consent', 'update', {
  'ad_storage': 'denied',
  'ad_user_data': 'denied',
  'ad_personalization': 'denied'
});Google Consent Mode Service (Functional Category)
opt_in_code:
window.gtag('consent', 'update', {
  'functionality_storage': 'granted',
  'personalization_storage': 'granted'
});opt_out_code:
window.gtag('consent', 'update', {
  'functionality_storage': 'denied',
  'personalization_storage': 'denied'
});Testing Consent Mode
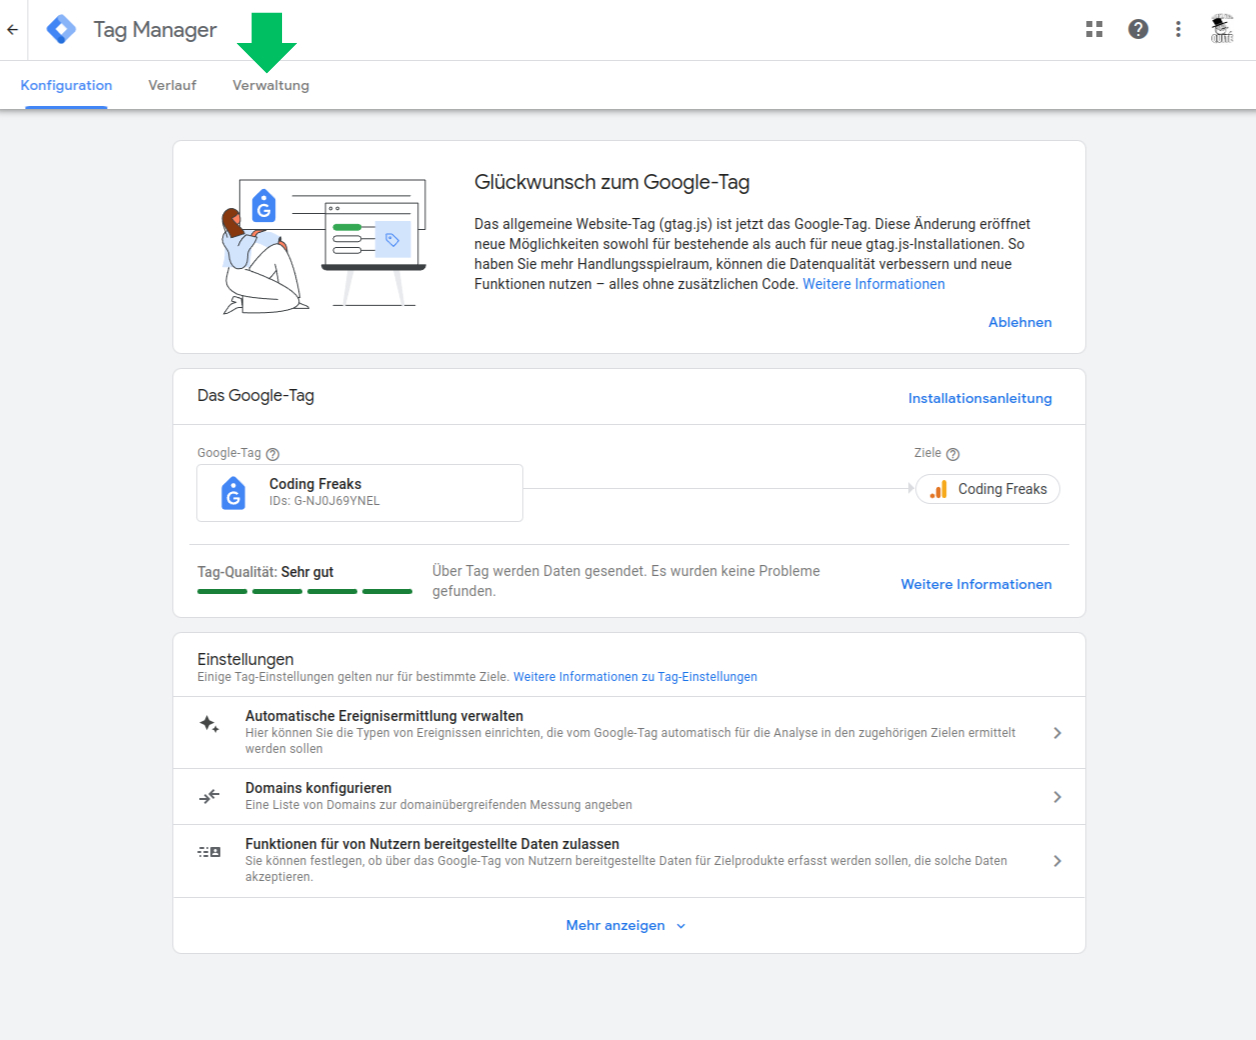
- Go to your Tag Manager Admin page to test the Consent Mode configuration.
-
- Open https://tagmanager.google.com/# and select your account or tag to open the admin page.
- Open the Tag Manager Configuration Page.
- Select the "Administration" Tab and open the "Container Settings" section.

- Press the "Enable Consent Mode" Button to enable the consent mode updates.
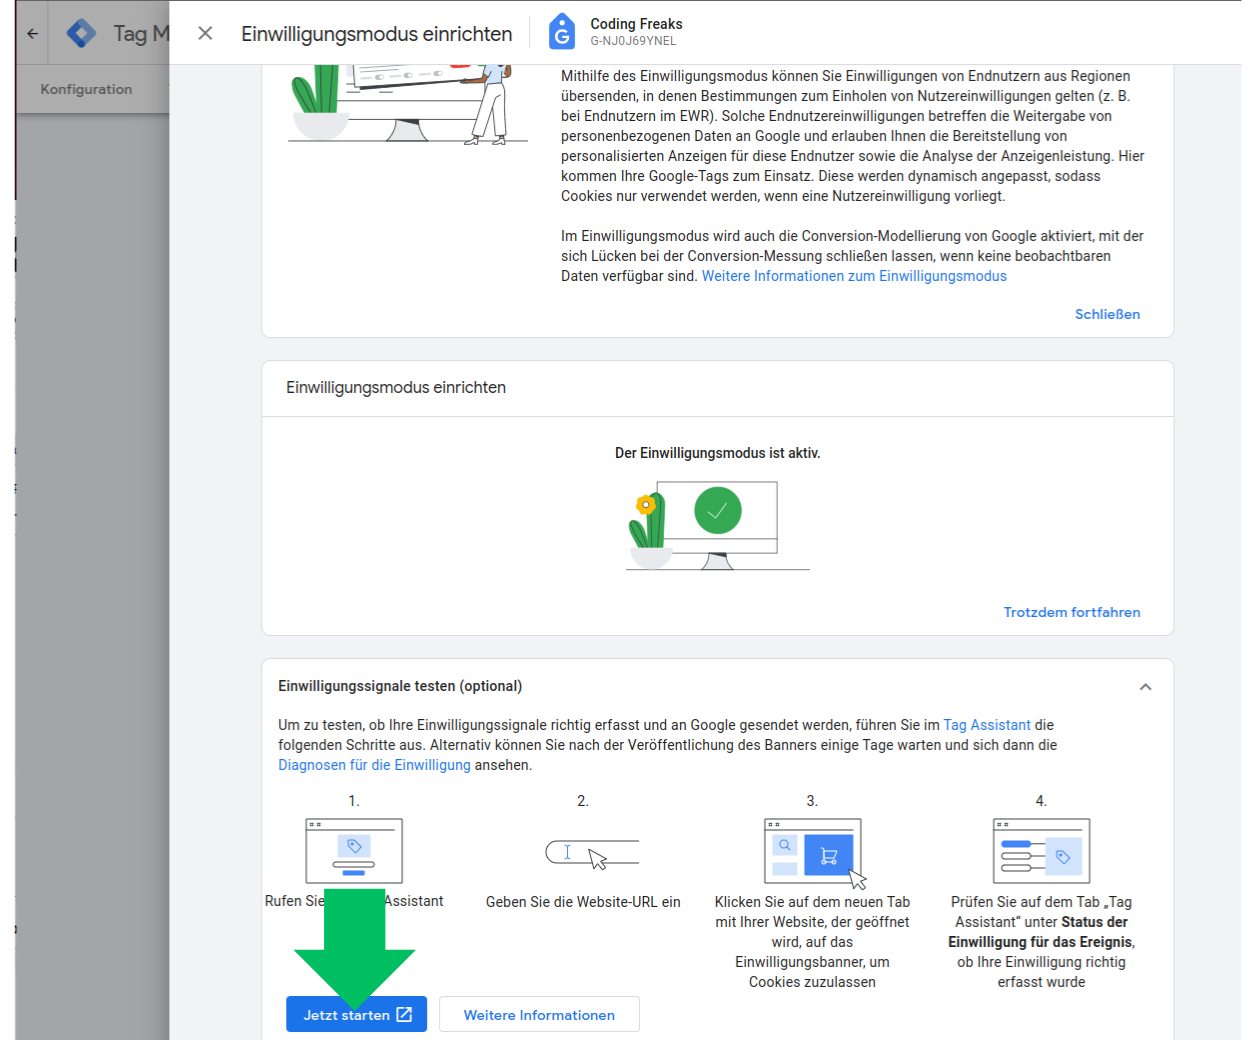
- Switch back to your "Workspace" and open the "Preview / Debug" mode. And open your website in the new opened tab. (Accept all cookies in the cookie manager to see the default state of the consent mode signals)
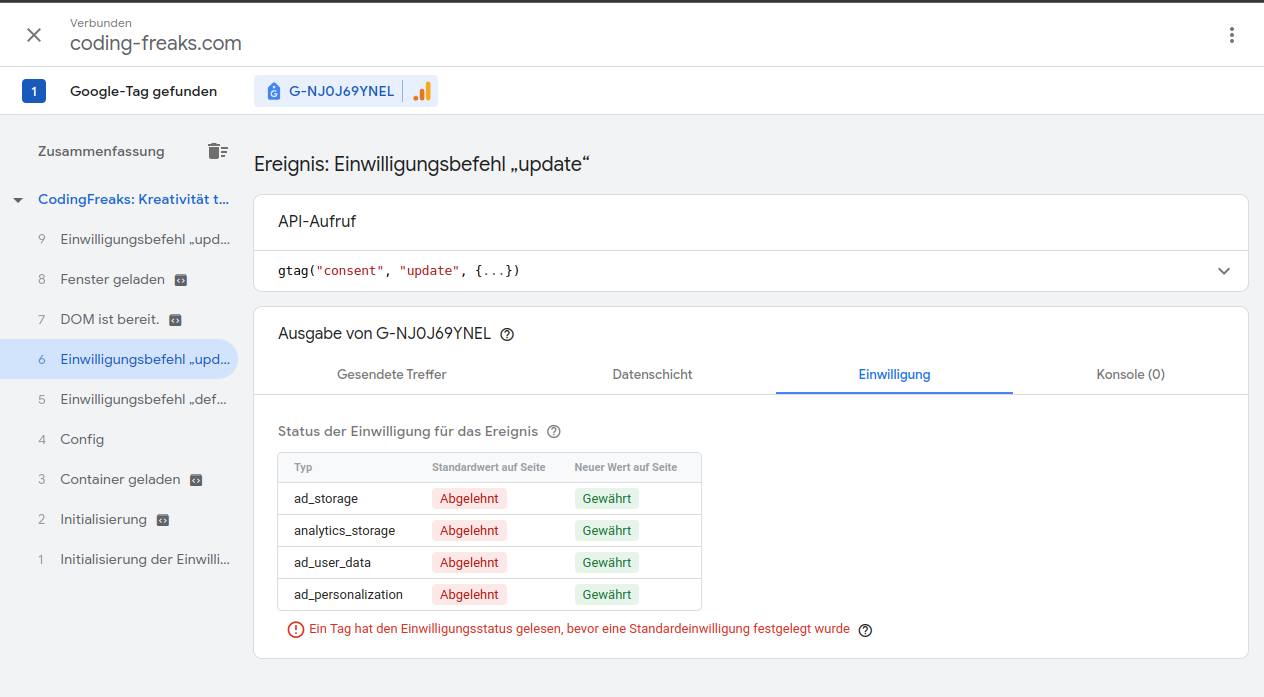
- Opt Out in the Cookie Manager in your TYPO3 Frontend to load the Tag Manager with all consent signals set to granted. (Just accept all)
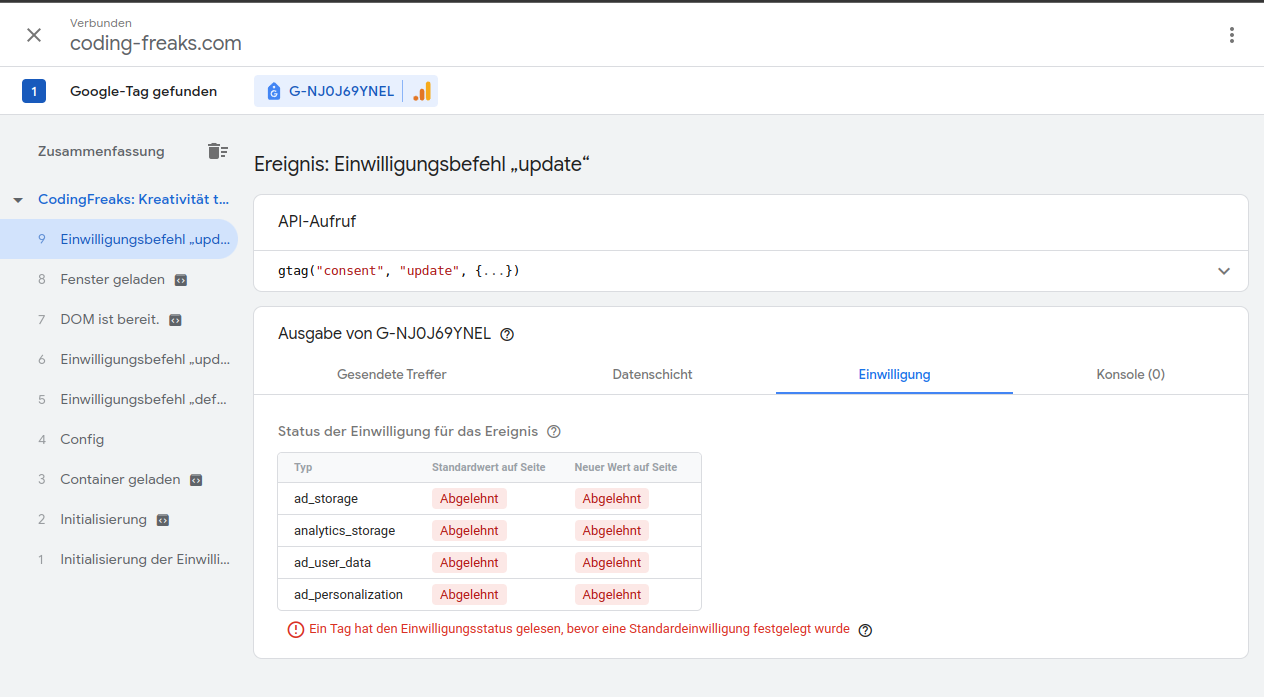
- Opt Out some categories or deny all in the Cookie Manager in your TYPO3 Frontend:
- Try some combinations of accepted and denied categories in the Cookie Manager in your TYPO3 Frontend:
With this setup, you can verify that the correct consent signals are being sent to Google based on the user's choices in the cookie manager. You should see the consent updates reflected in the Tag Manager debug console as you toggle different categories on and off, confirming that the integration is working as expected. You can Customize the opt-in and opt-out code to fit your specific tag needs, such as adding additional consent signals or integrating with other marketing providers.
Hope this helps you get started with Google Consent Mode V2 in the CodingFreaks cookie manager! If you have any questions or need further assistance, feel free to ask or join our community Slack channel in the Typo3 Ecosystem.
Links
- Google Consent Mode V2 Documentation: https://developers.google.com/tag-platform/devguides/consent
- Google Tag Manager Admin Page: https://tagmanager.google.com/
- CodingFreaks TYPO3 Slack Channel: https://typo3.slack.com/archives/C04NB2ZP30U
- Google Consent Mode V2 YouTube Tutorial: https://www.youtube.com/watch?v=MqAEbshMv84