Generating Extensions for SAV Library Plus or SAV Libray Mvc
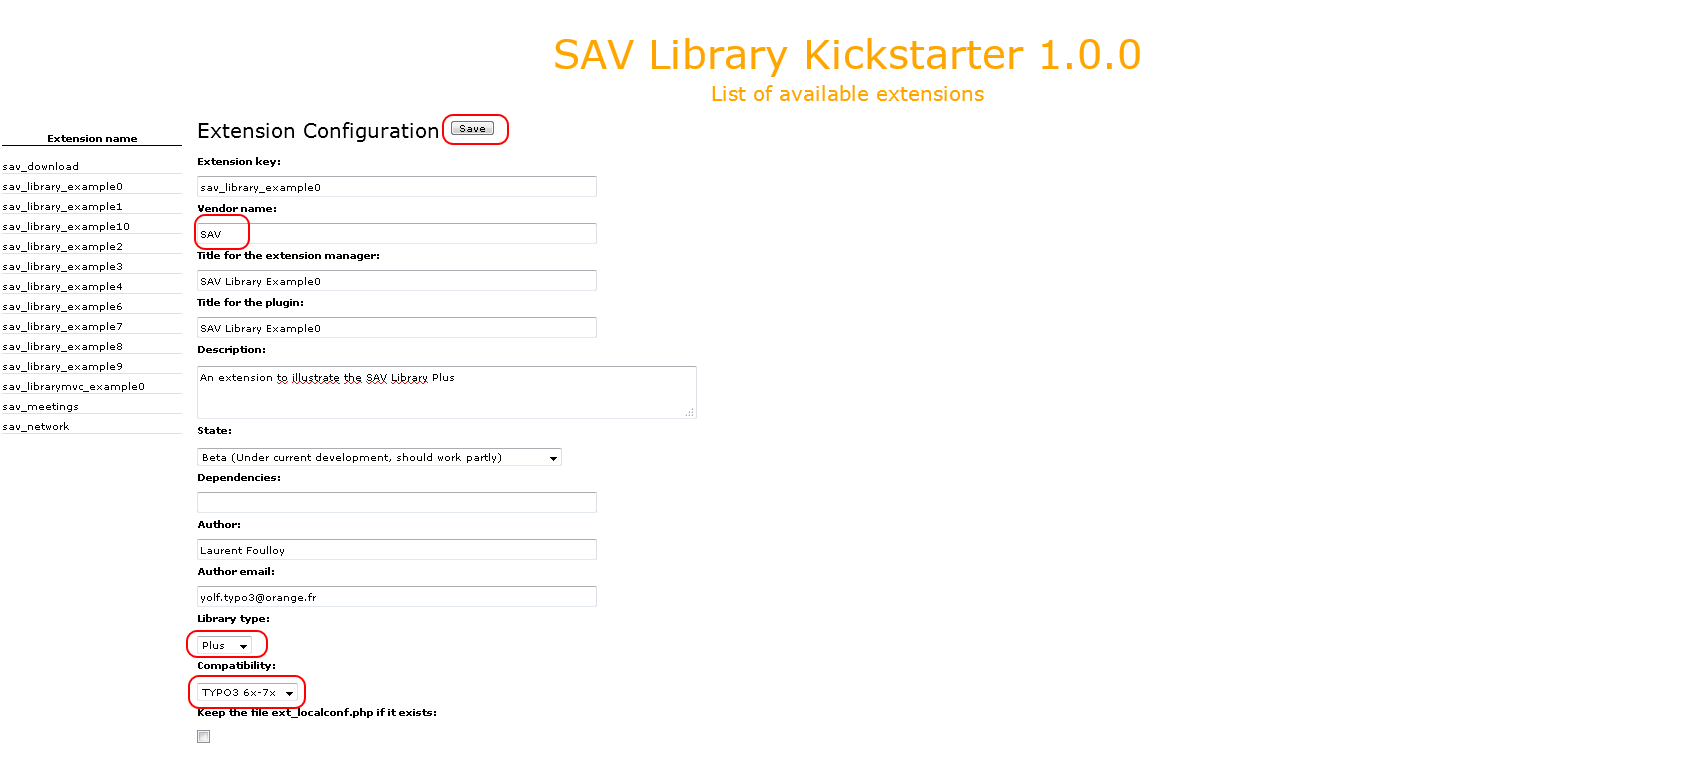
In the following, this tutorial details the first steps used to create from scratch the extension sav_library_example0.
Warning
Do not forget to provide a vendor name which will be used in namespaces
(see https://docs.typo3.org/typo3cms/CoreApiReference/ApiOverview/Namespaces/Index.html).
Important
Since the Library Type is set to Plus this test extension requires the SAV Library
Plus extension to be downloaded from the TER and installed.
Caution
If you want to test the extension with the SAV Library Mvc, set the Library type
to Mvc, download the SAV Livbrary Mvc from the TER and install it.
Tip
Test extensions implementing many features are available in the TER:
sav_library_example0 to be used with SAV Library Plus.
sav_librarymvc_example0 to be used with SAV Library Mvc.
Fill the form and click on the Save button.
The version 0.0.0 of the extension sav_library_example0 is now
created and a redirection to the Extension Configuration form.
A menu is available on the left hand side.
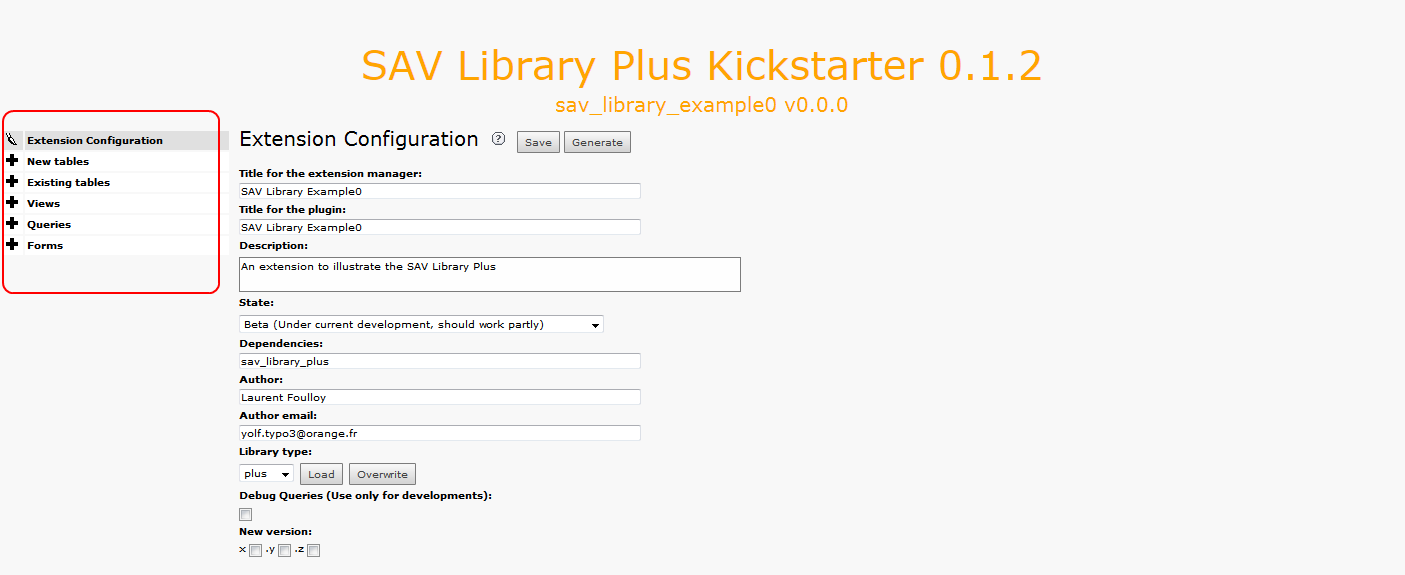
Two types of menu item are displayed : menu items with edit icon
(paintbrush icon) and menu items with new icon (cross icon). The
former opens directly the requested item either by clicking on the
icon or the title (e.g. Extension Configuration). The latter creates
a sub-item by clicking on the icon. By default, the sub-item title is
New.
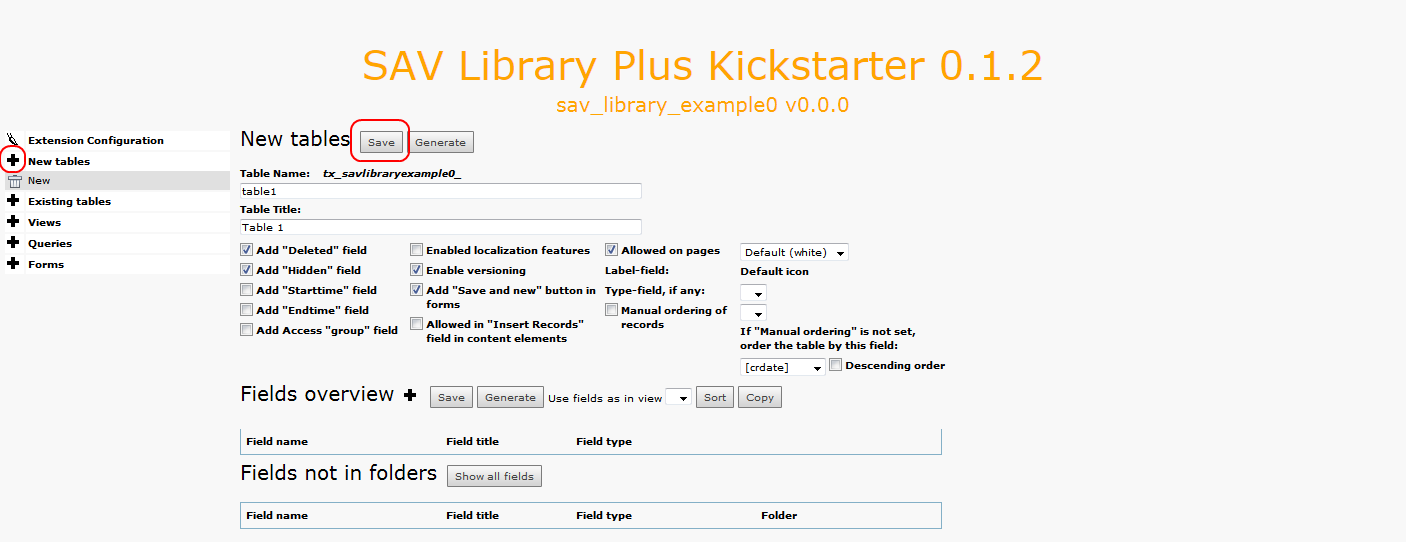
Click on the cross icon of the New tables section, enter a name and a title for
the table, change the flags if necessary and save.
Add the table fields by clicking on the cross icon at the right of the
fields overview. By default, the field name and title are set to
New.
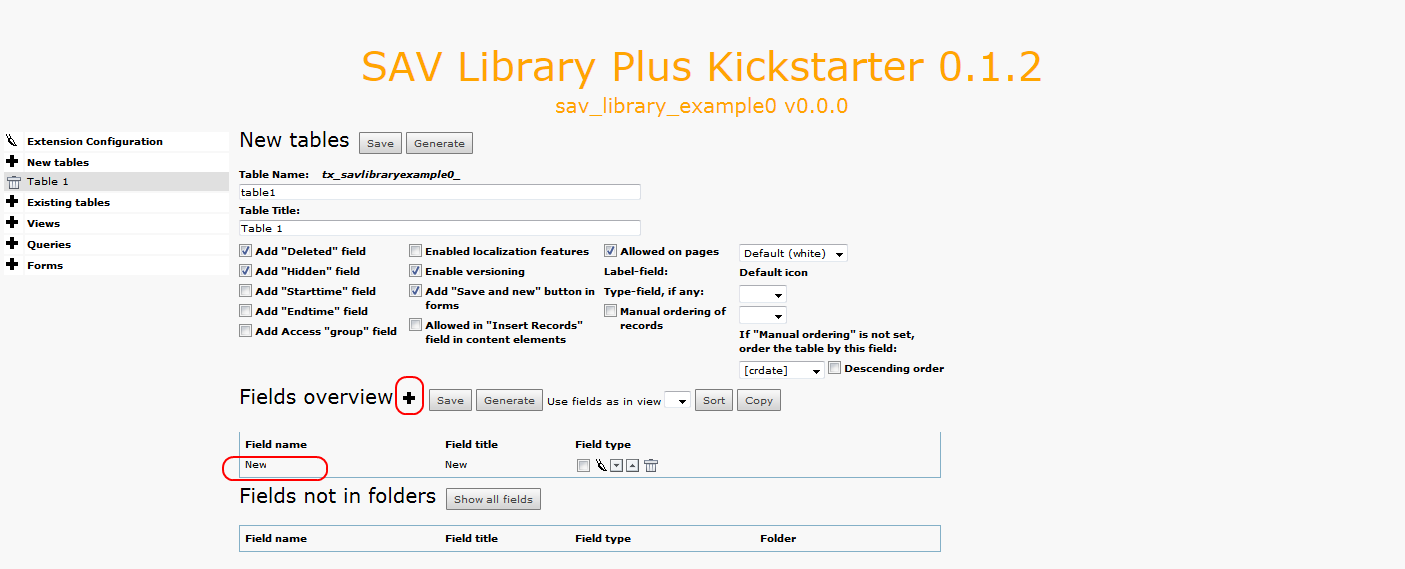
If you have several field, in order to fasten the process, you may click several times on cross icon to add the fields. Each field can be selected ,edited, moved up or down and deleted using the icons.
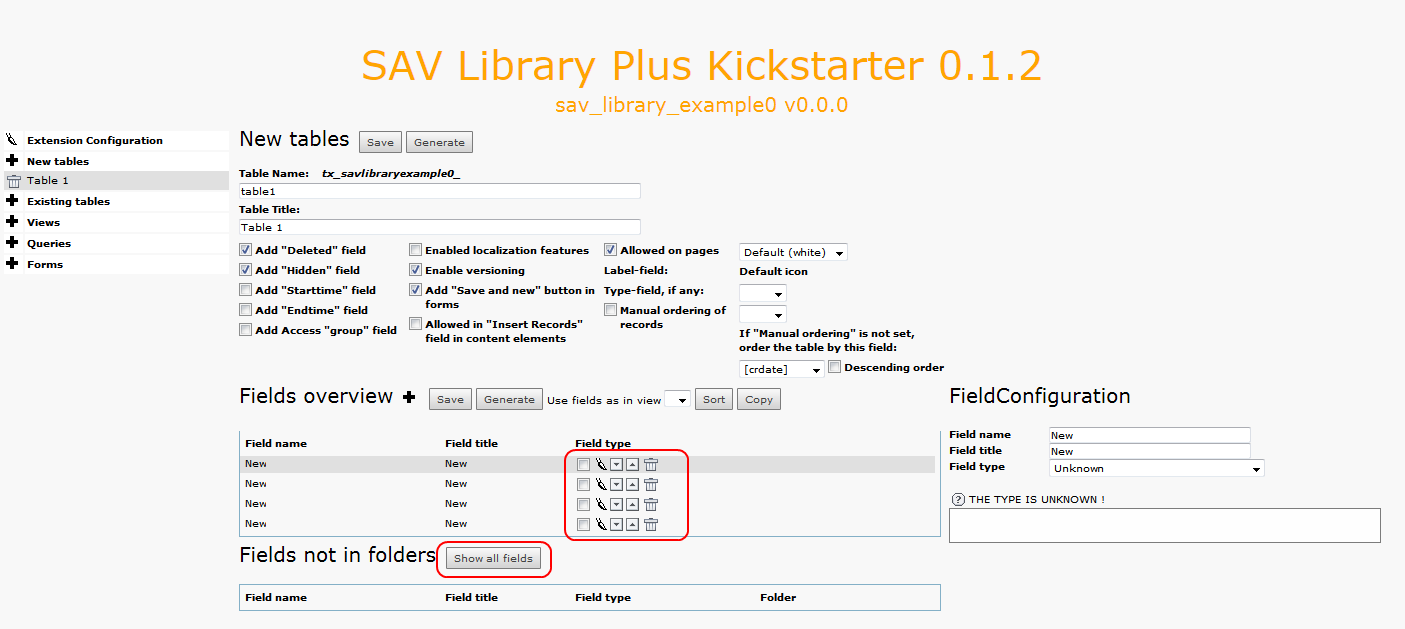
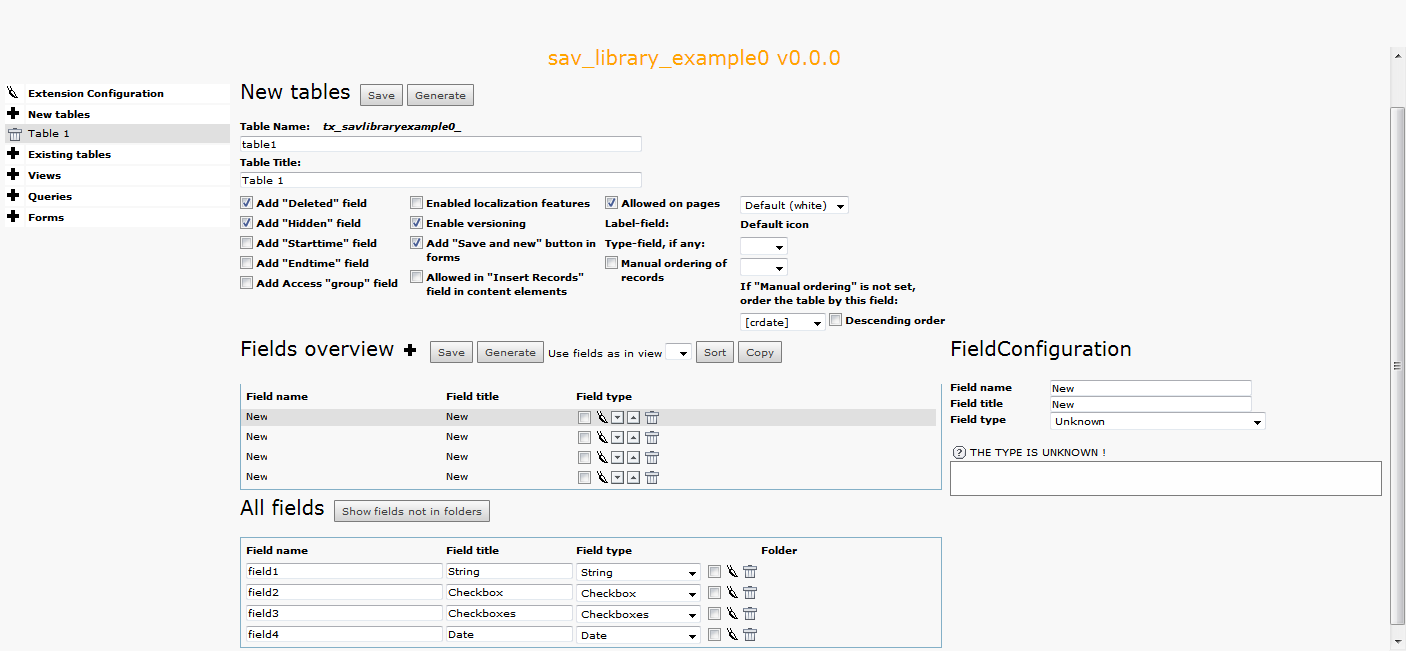
Click on the Show all fields button to set the field names, titles and
types, then save.
To create the views, click on the new icon of the Views menu item.
Provide a name and select the type of the view (List, Single,
Edit, Special) and save .
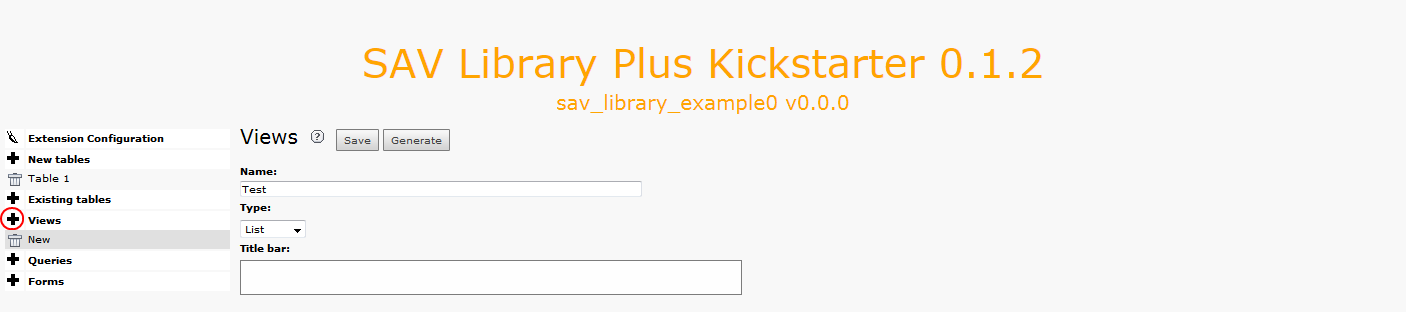
After saving, displayed information will depend on the selected type.
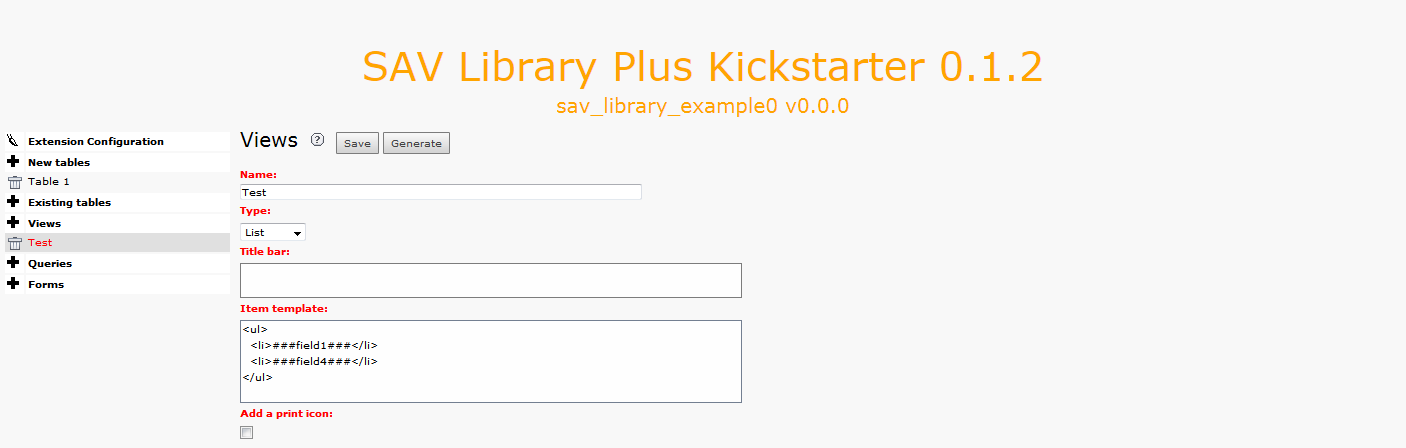
In general, three views are required for one form. A List view, a
single view and an edit view. For the List view, an item template is
required. It contains the HTML code which will be used to display each
item of the list. Markers will be replaced by their values.
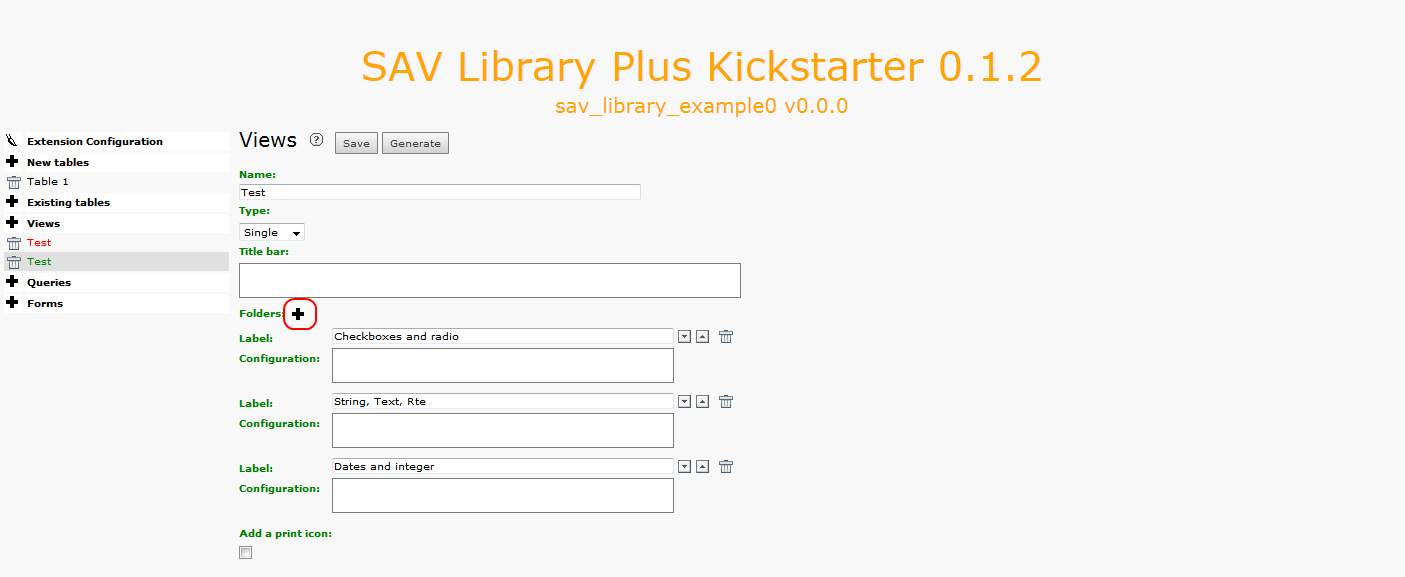
Do the same for the single and edit view. You can use the same name for your view since colors are used to differentiate between them. Single and edit views may contain folders to present the data as explained later. In this example, two folders are introduced in the single view. Click on the new folder icon to add a folder. Each folder can be moved up, moved down or deleted using the icons at the right hand side of the label definition.
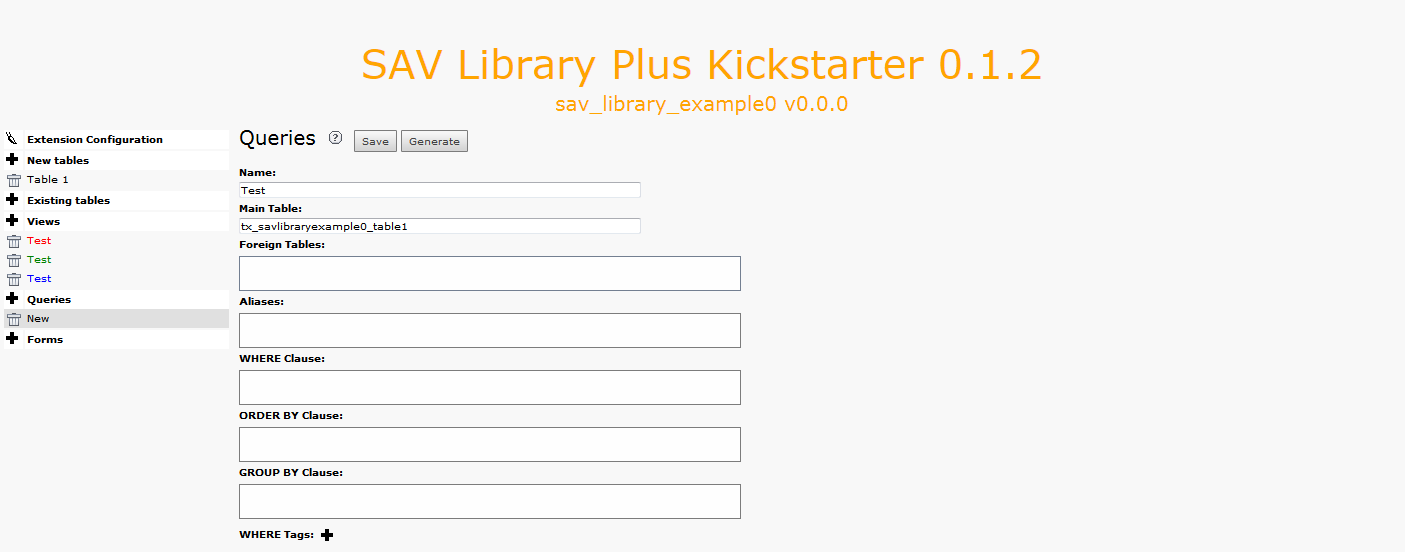
Now, create a new query. Replace the default name and save. Once again, you may use the same name as for the views. By default, the main table will be set to the first table you have defined.
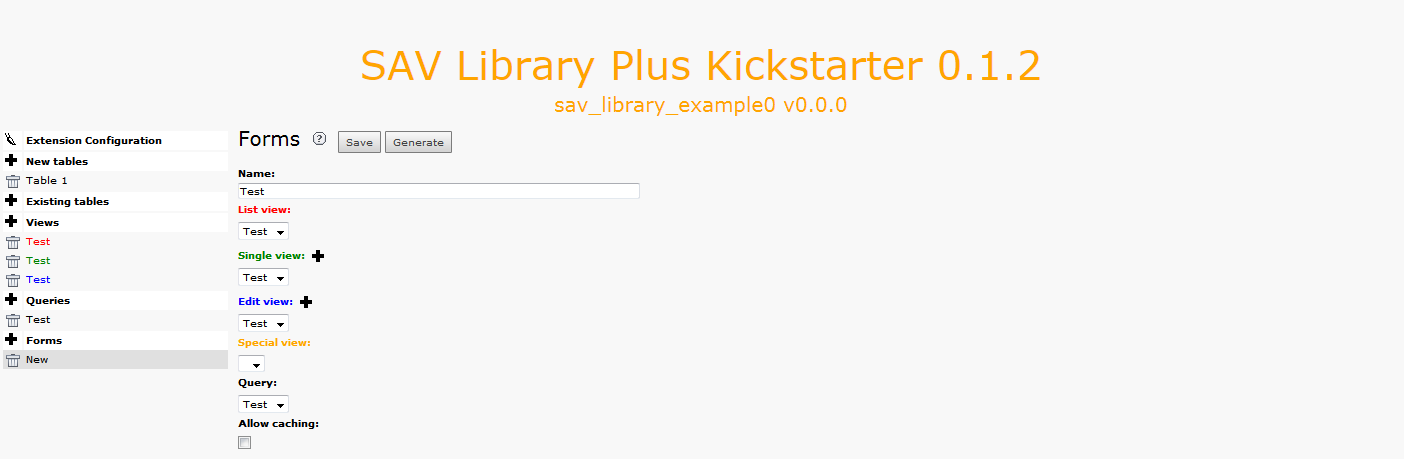
Create a new form, select the list, single, edit views and the query and save.
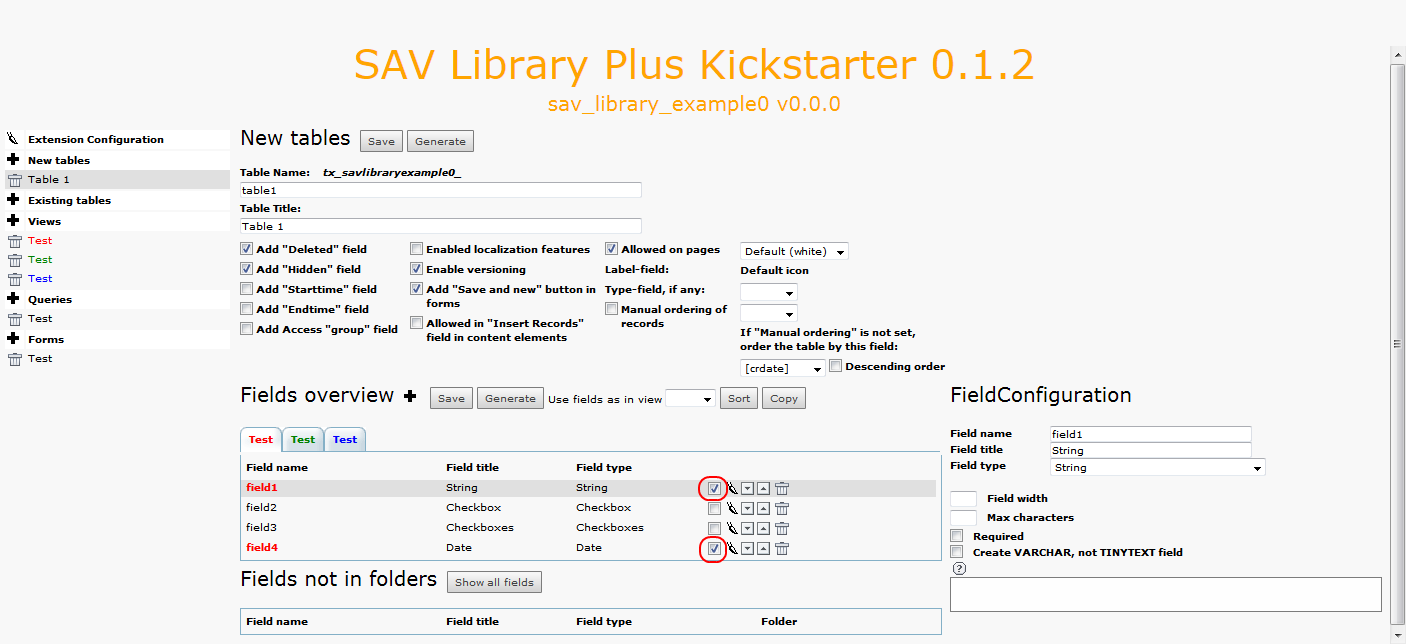
The last step is to define with fields should be displayed in the
views. Edit the table by clicking on Table 1 in the left hand side
menu. In the fields overview section, each view is associated with a
folder tab. Select the fields that must be displayed using the
checkbox and save. For the list view, the items associated with
the markers used in the item template must be selected. Save the
selection. The selected items are displayed in the color of the view,
that is in red for the List view.
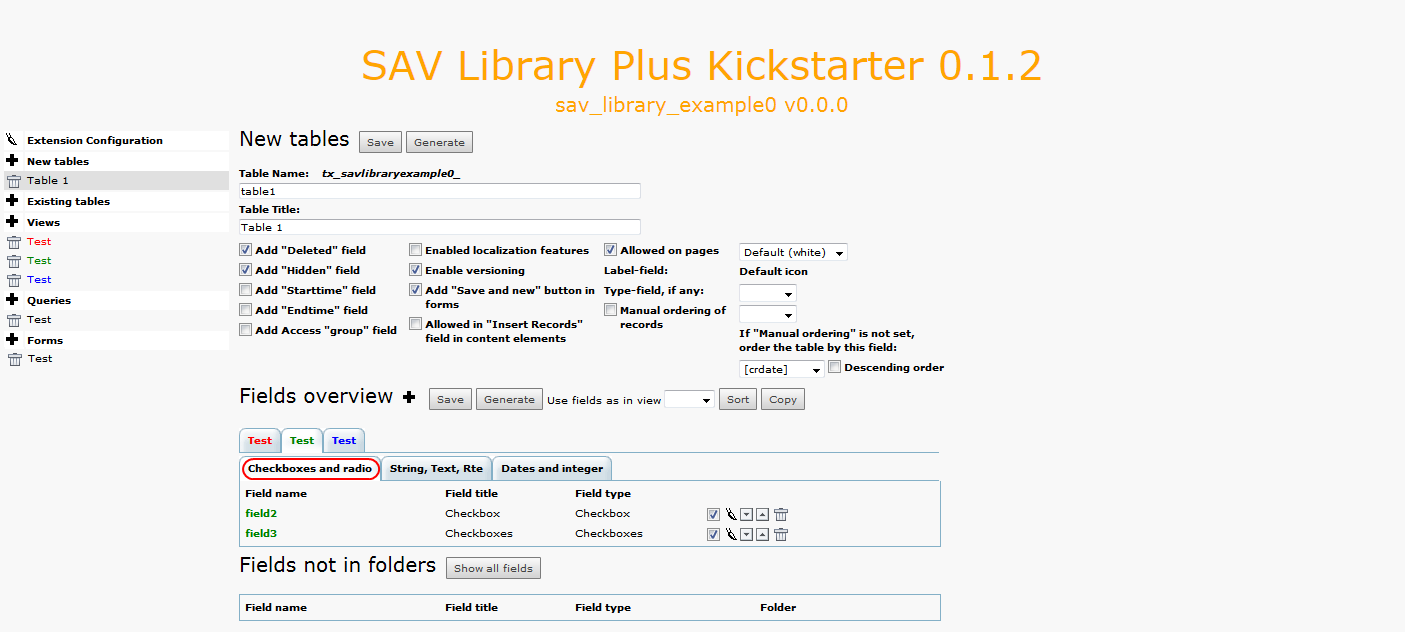
Click on the green folder tab to select the single view. Select the fields you want to display and their associated folder if any then save.
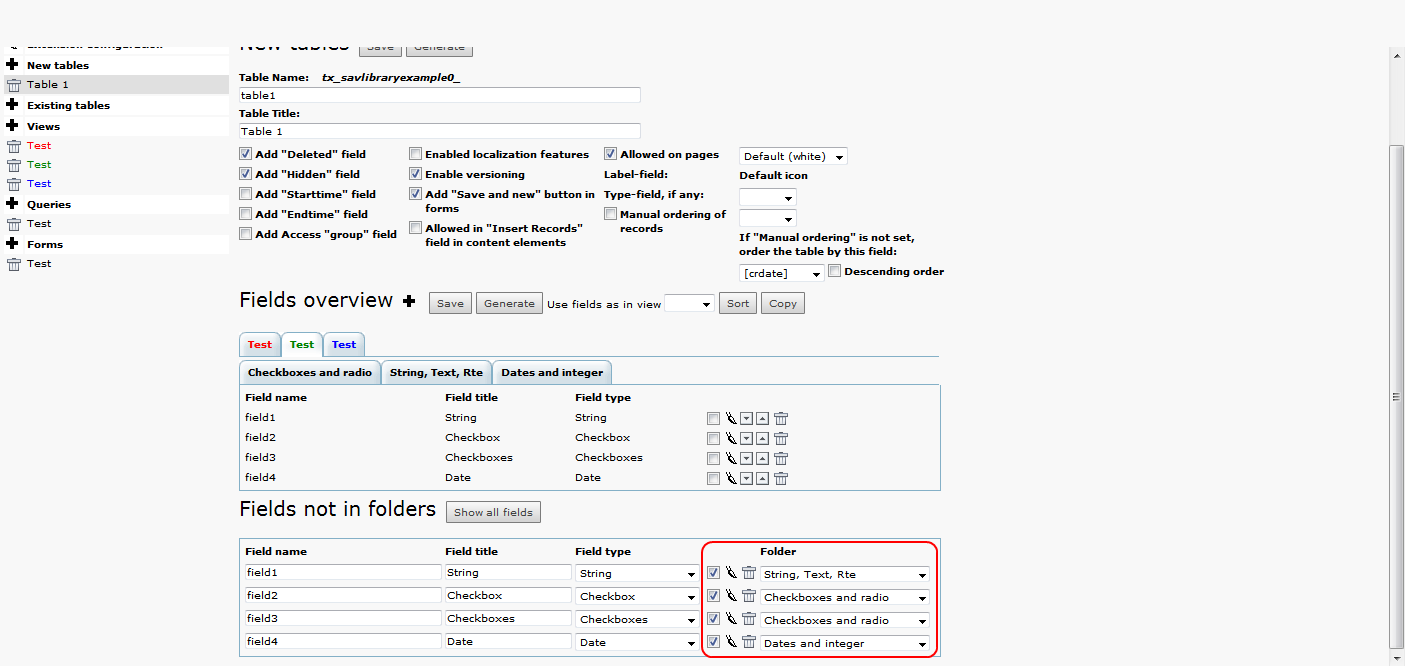
By clicking on a folder, you will see the fields in it which can be edited, moved up and down or deleted.
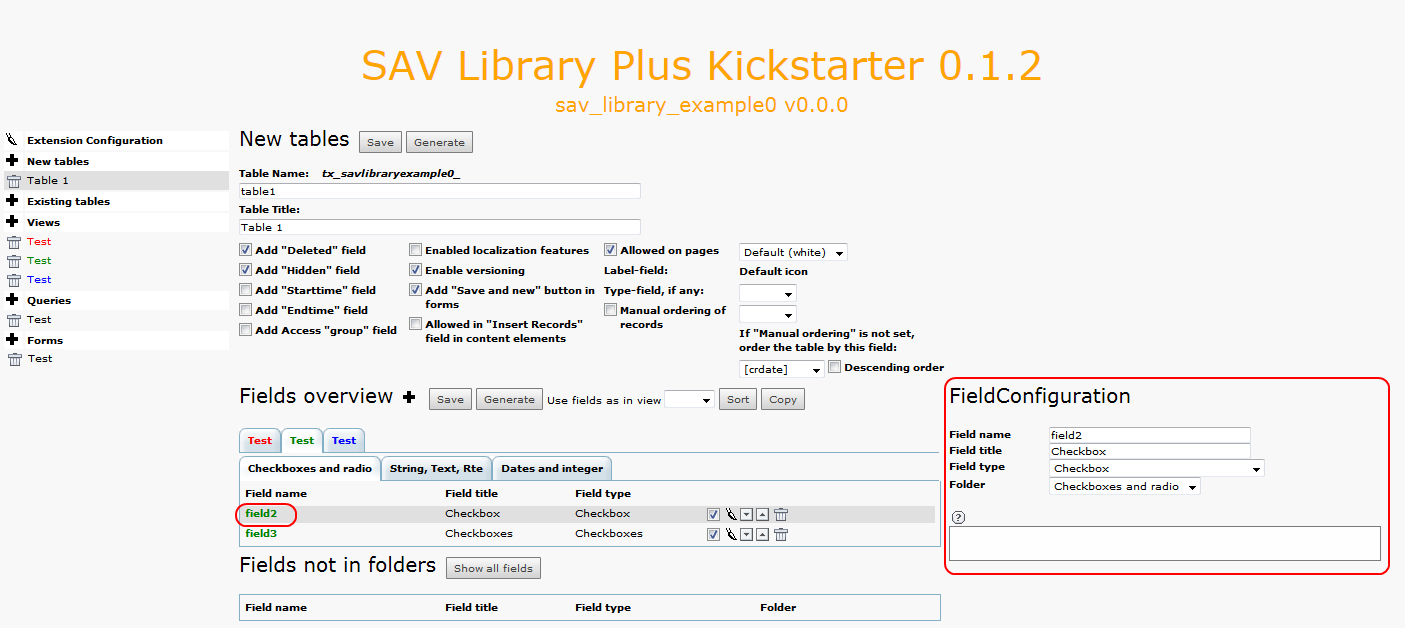
Let us note that if you click on the field name, it gives access to
the field configuration as shown below. In this example, field2 will
be displayed.
Add labels for the each checkbox in field3 by clicking on the cross icon as shown below. It is easier to first add the label fields by clicking three times on the cross icon and then to fill them before saving.

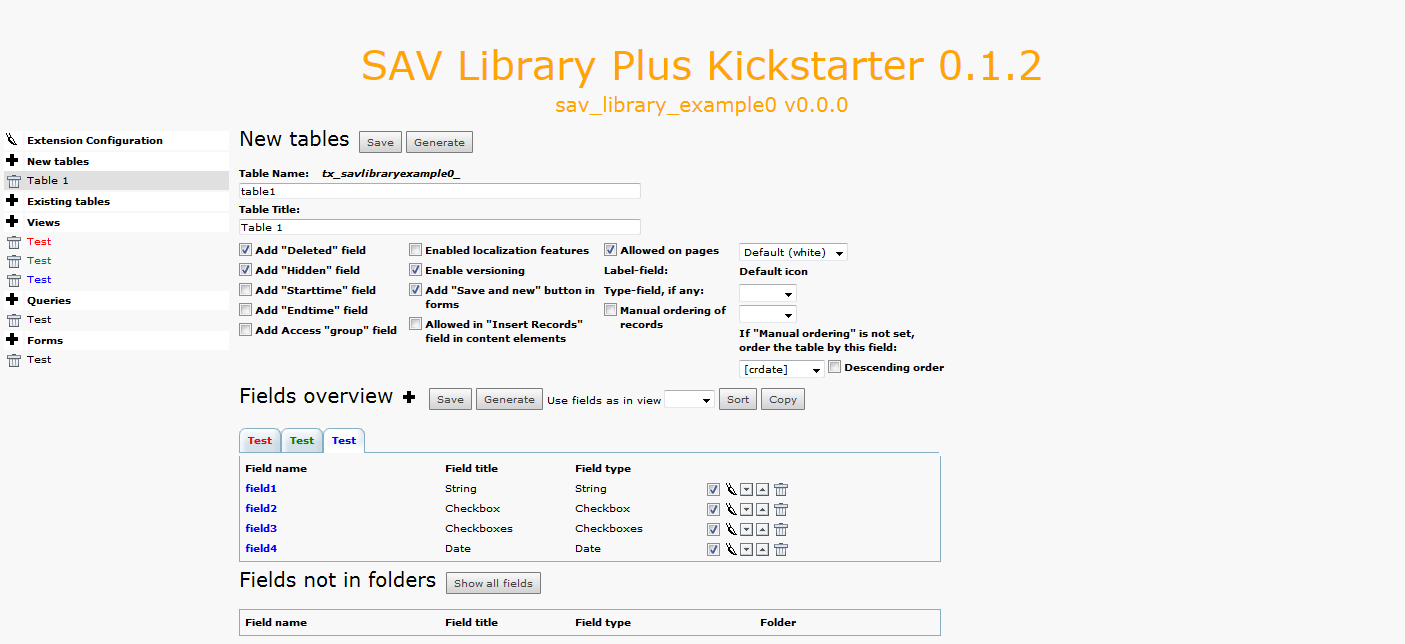
Now click on the blue folder tab to select the edit view. Select the field you want to display. Let us recall that there is no folder associated with this view.
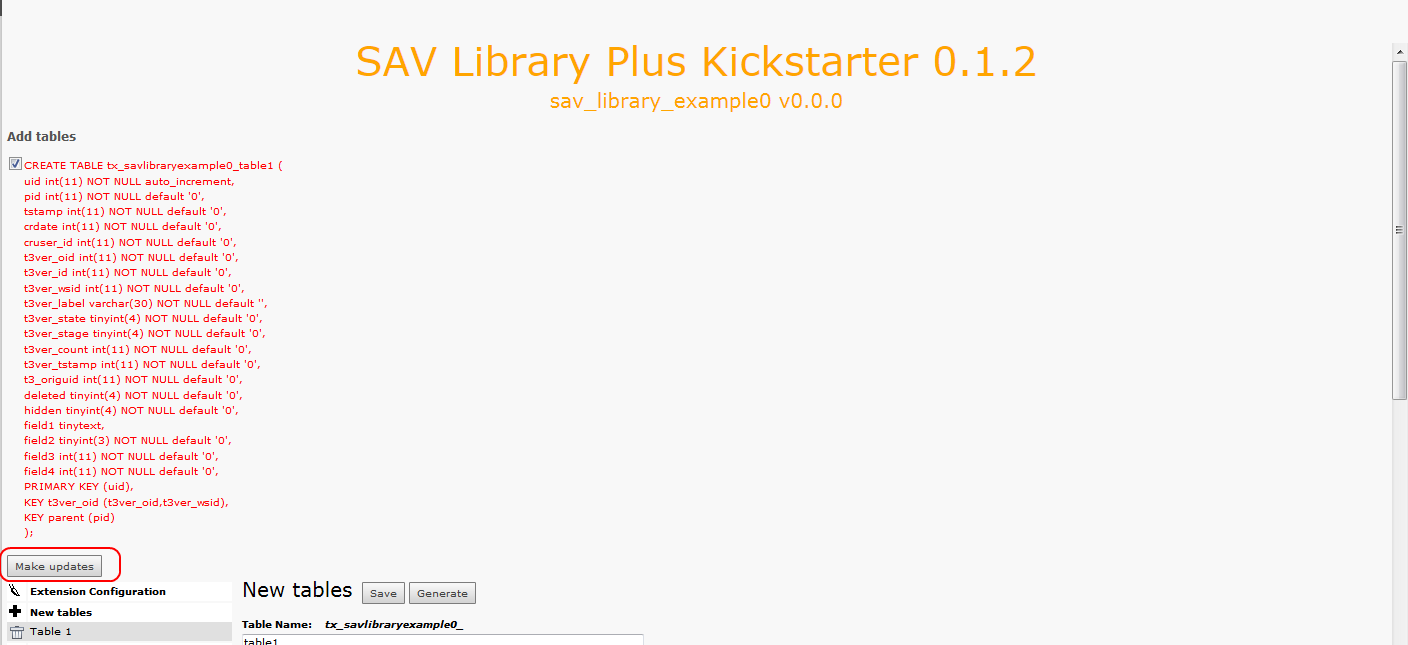
The final step is to generate the extension by clicking on the
Generate button. After the processing, the SQL statement to create
the table is displayed. Click on Make updates to complete the
generation of the extension.
Installing the Extension
Click on the SAV Kickstarter item in the Admin tools menu to
display the extension list and click on the Install icon as shown
below to install it.

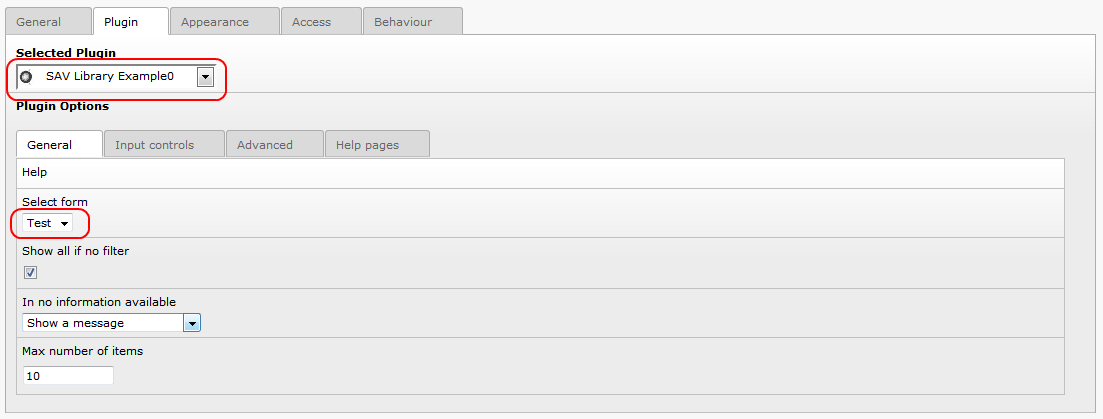
Create a page and insert a plugin content element and select SAV
Library Example0 in the plugin selector.
The configuration of the plugin is performed by means of a flexform
which comes with default values. Just select your form name, that is
Test in the Select form selector, save your content element and
clear the cache.
Go to your page in the frontend and you should see the following caption.

Now, log yourself as a frontend user and reload your page. You should now see the toggle icon to enter in edit mode. Click on it.

A new icon appears at the left hand side of the form. Click on it to add a new item.

Input the data and save using the icons in the title bar.

For example, if you click on the Save and close icon, you will be
redirected to the List view, where the two fields (field1 and field4)
are displayed according to the template item. You can add a new
record, edit or delete the previous one or leave the edit mode by
clicking on the different icons.

Generally, you will want to display the single view associated with a
given item by clicking on a link. Let us assume that, in our example,
this link should be First record in the previous caption. This will
be done with a simple configuration associated with field1 in the
List view.
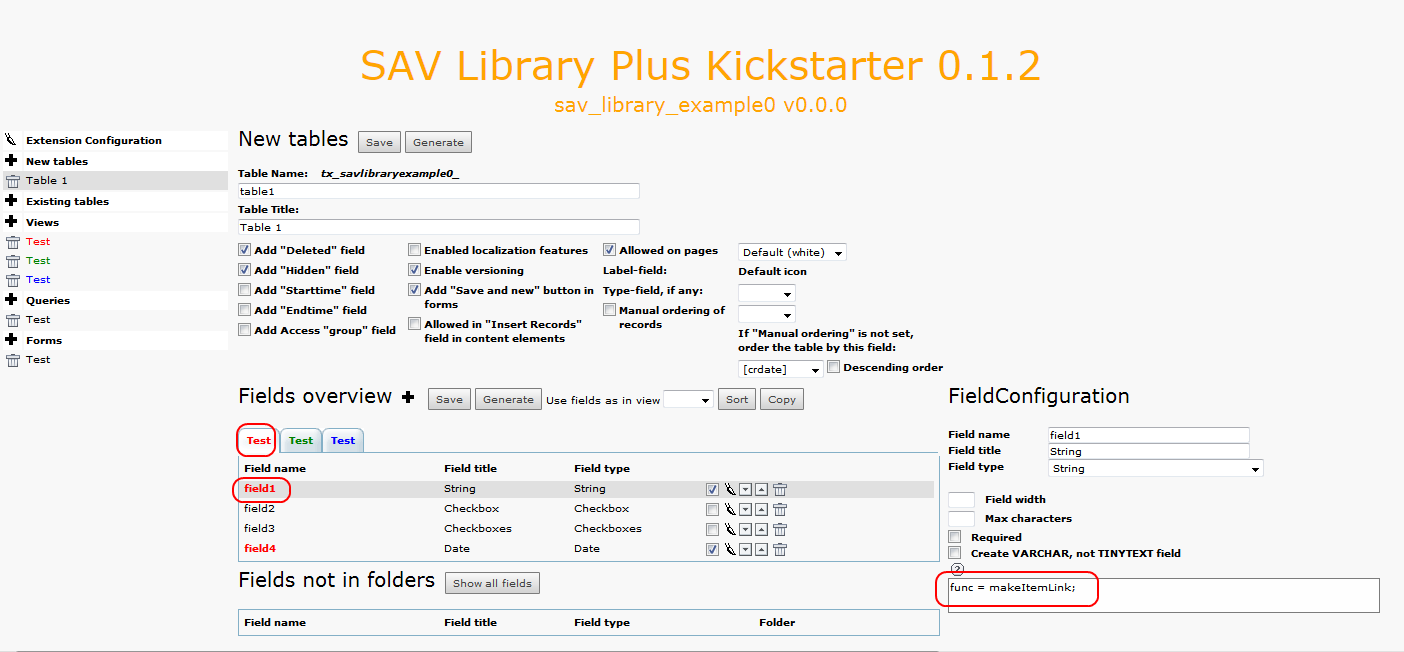
Edit the extension with the SAV Library Kickstarter, click on the
Table 1 item, select the List view and click on field1. In the
configuration text area, type func = makeItemLink;, then click on
Generate.
Go in the frontend and reload your page. Now, a link is associated
with First record. The enter in edit mode icon will be displayed
as long as you are logged as a frontend user.

Click on the link to open the single view. As you can see, the items
are organized with our three folder tabs. The edit icon on the left
hand side will be displayed as long as you are logged as a frontend
user. By clicking on it, you will enter in the edit view.

Click on a folder tab to change the view.

More Information
Please read the reference section for the field configuration (remember that a context sensitive help is also available for each field in the SAV Library Kickstarter).
The tutorials section in the SAV Library Plus documentation provides also several examples.