DEPRECATION WARNING
This documentation is not using the current rendering mechanism and is probably outdated. The extension maintainer should switch to the new system. Details on how to use the rendering mechanism can be found here.
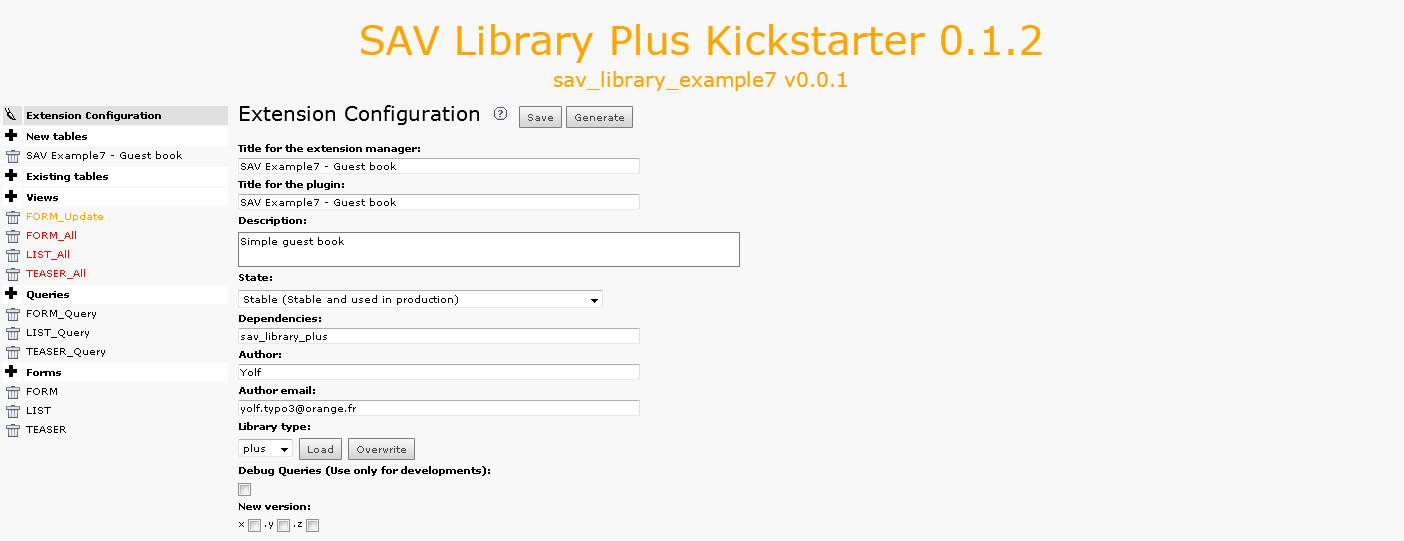
Extension overview
Edit the extension “sav_library_example7” in the SAV Library Kickstarter to get an overview. It contains:
- Three forms (FORM, LIST, TEASER),
- Four views (FORM_update, FORM_All, LIST_All, TEASER_All),
- Three queries (FORM_Query, LIST_Query, TEASER_Query).
The guest input form (FORM)
Click on “FORM” in the “Forms” section. As you can see, the form has a list view, a special view and a query.
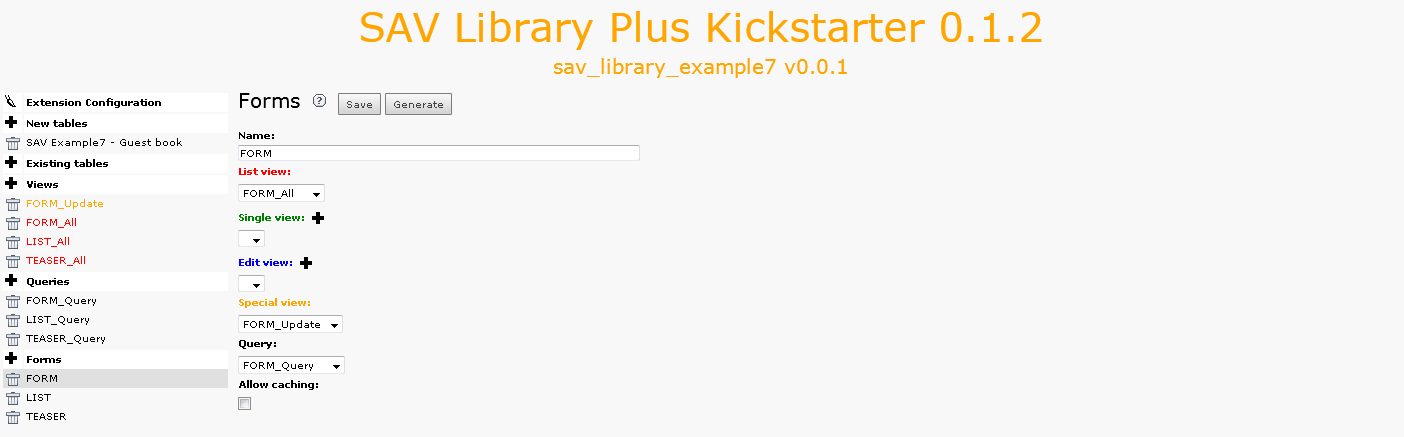
The special view, named “FORM_Update” is used to generate the guest input form. The list view is used to validate the data in the administration mode. Now, let us analyze each view.
The view FORM_Update
Click on “FORM_Update” in the “Form views” section.
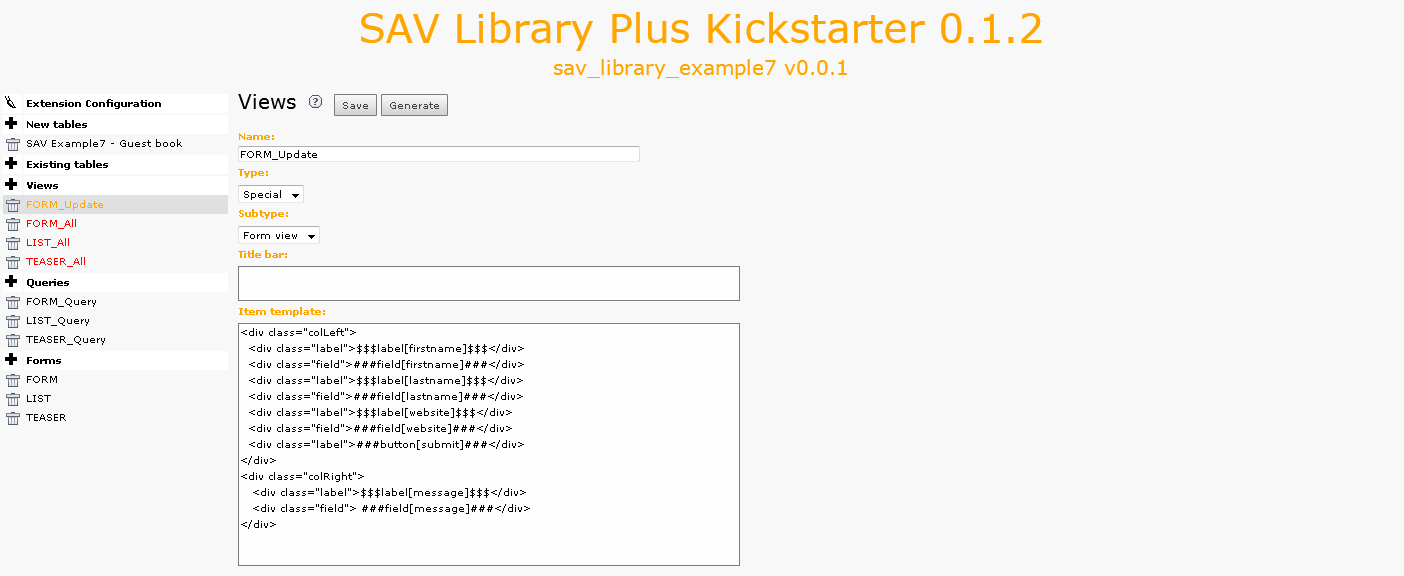
The view is of type “Special” and of sub-type “Form view”. The “Item template” field defines the template. In our case, two <div> are used for having two columns in the form. The SAV Library provides some help to easily implement the view. $$$label[fiedname]$$$ will be replaced by the field title, depending on the localization, while ###field[fieldname]### will be replaced by the input item associated with the type of the field. The CSS classes “field” and “label” are defined in the default CSS of the SAV Library Plus extension. You may overload their properties in your CSS file. Finally, ###button[submit]### creates the submit button.
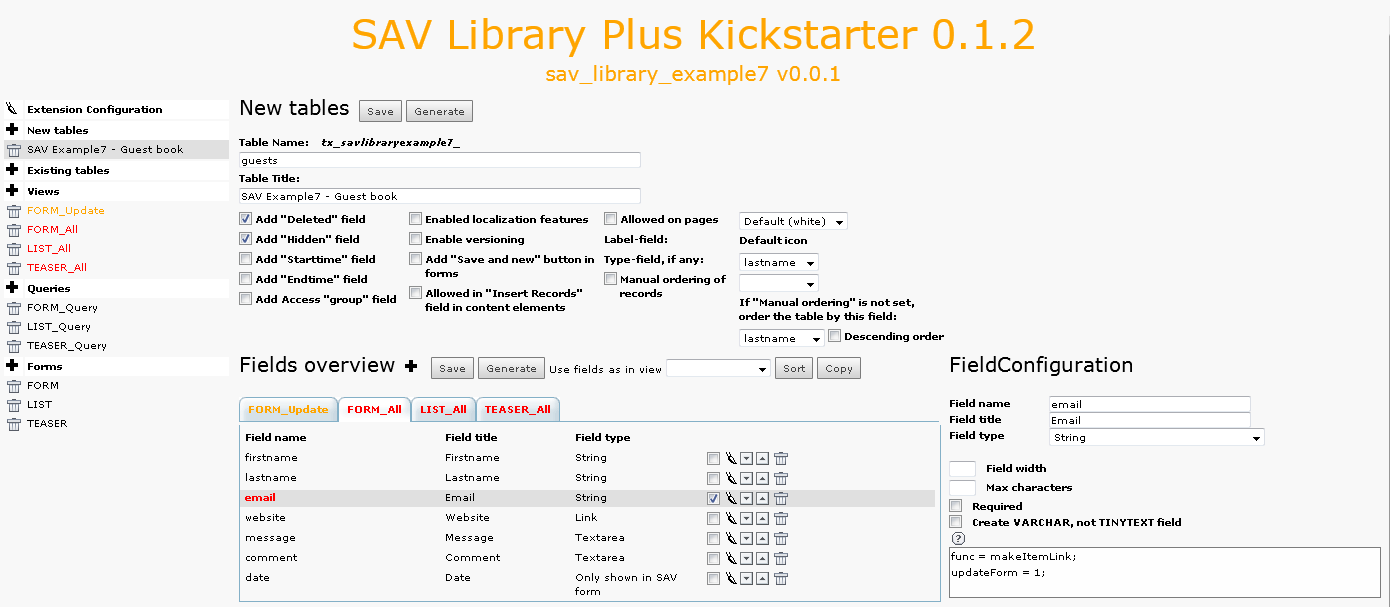
Now, we will analyse the configuration. Click on “SAV Example7 – Guest book” in the section “New tables”, select the “FORM_Update” folder tab and click on “message”, for example.
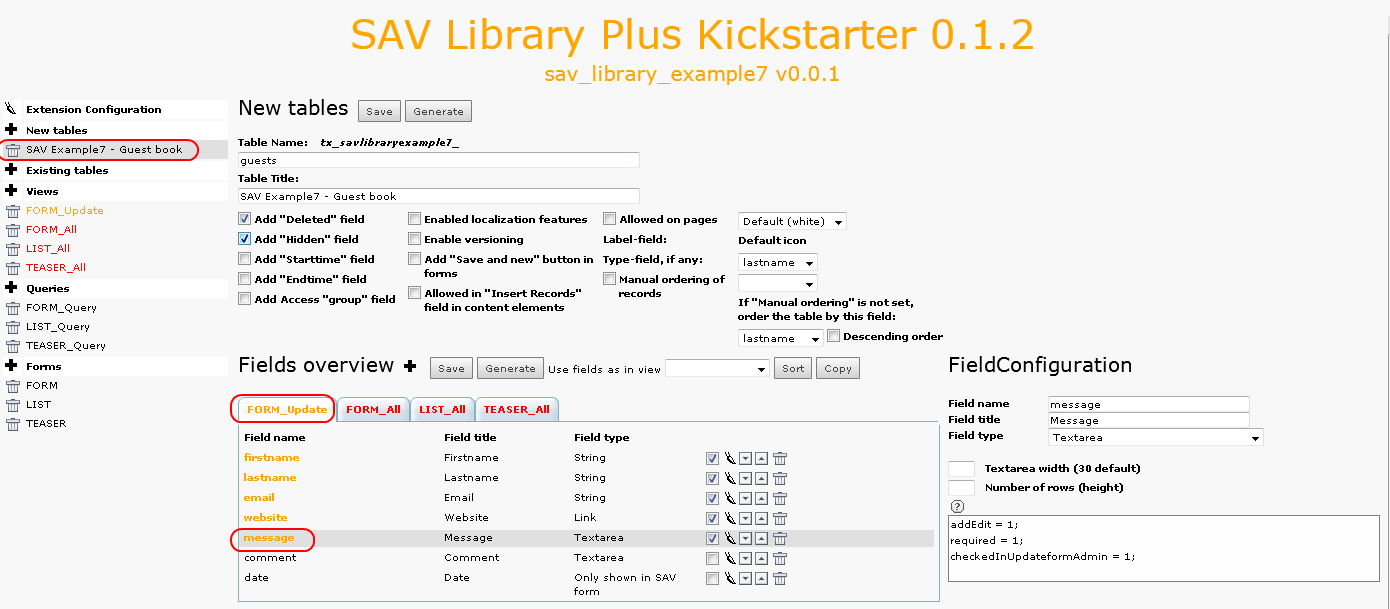
As it can be seen, the configuration is simple since only three attributes are used:
- “addEdit = 1;” means that the field can be edited by the guest, that is it will be displayed in the edit mode for the defined type. For the above example, a textarea is displayed.
- “required = 1;” means that the guest will have to fill the field.
- “checkedInUpdateformAdmin = 1;” means that the field will be pre- checked for the validation in the Admin form as explained in the next section.
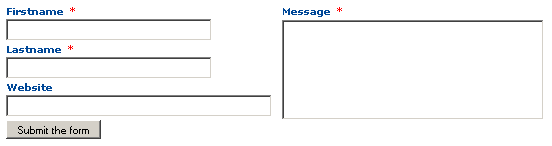
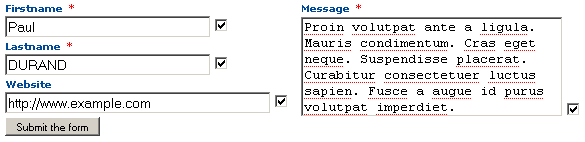
For example, with the above configuration and the provided CSS file, once installed, you should have the following result. Required fields appear with the “*” character.
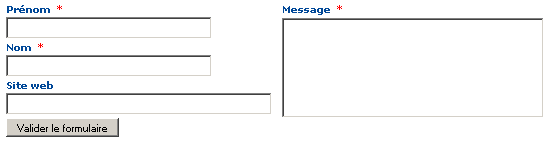
And, thanks to the localization markers $$$label[fieldname]$$$, if you change to the French language, you will get:
The view FORM_All
When a “Form view” is used, information provided by the guest are not directly saved in the table fields. A temporary field, named “_submitted_data_” is automatically added to the table. It used to keep the guest inputs until you have validated them. For that, the “Form view” includes an “Admin” mode in which you have to enter by means of an associated “List” view which will display the new inputs. Since we will use a filter which requests the email of the guest input, it will be used in the view to switch to the “Admin” mode.
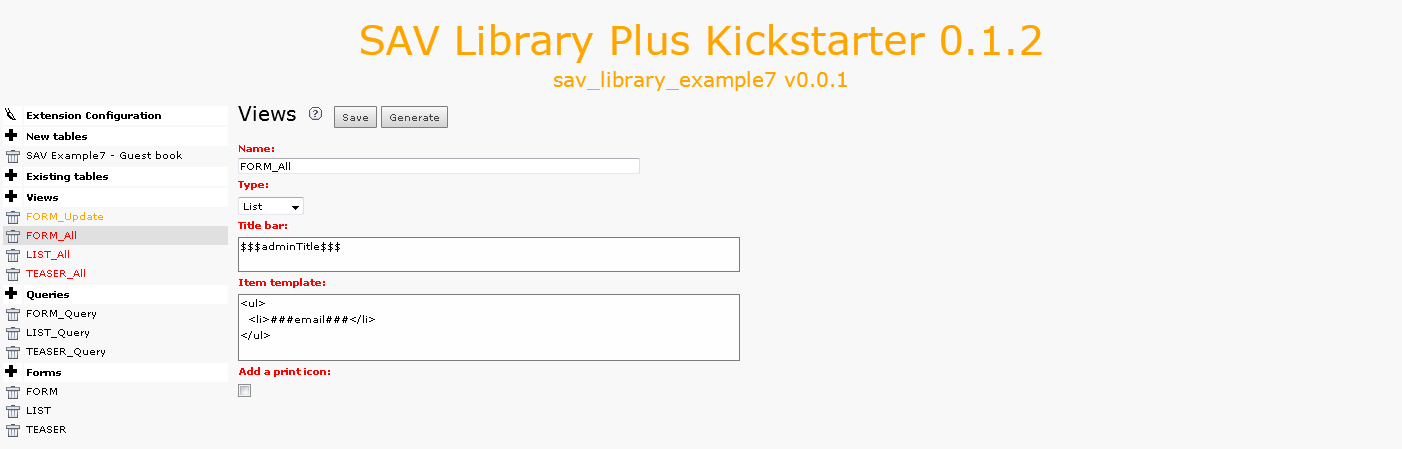
Localization marker $$$adminTitle$$$ is used to the view title bar. Let us recall that the marker is defined in the file locallang.xml in the “Resources/Private/Language” directory of the extension. The template is very simple and contains only the email field which is selected in the configuration.
Two attributes are associated with the field “email”:
- “func = makeItemlink;”, already seen in the previous examples, which creates the link associated to the field value.
- “updateForm = 1;” specifies that the updateform should be opened.
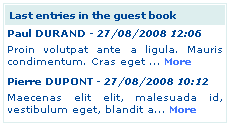
Once correctly installed, if a guest, e.g. “ paul.durand@example.com ” has left a new message, you should have the following output:

Now, by clicking on the link, you will enter in the “Admin” mode. As can be seen, the fields have a checkbox already checked. It is due to the property “checkedInUpdateformAdmin = 1;” set in the “Update view”. Only fields that are checked will be transferred to their respective place in the table when submitting the form.
The query FORM_Query
In order to get only the guest inputs that have not been checked and processed, a special WHERE clause has to be used.
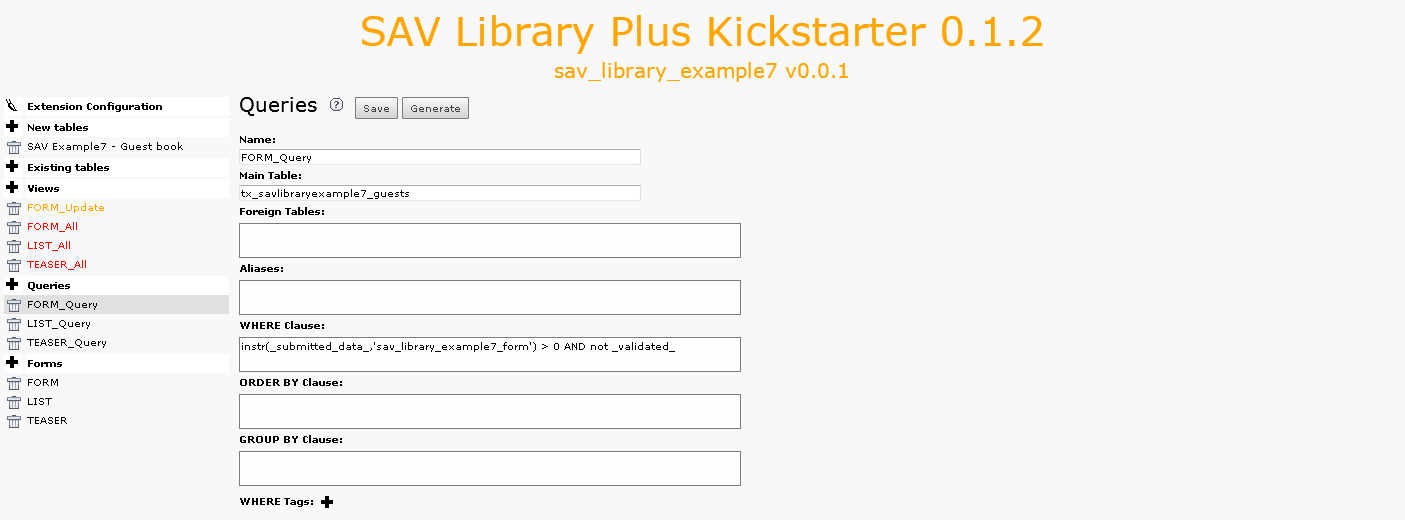
As explained before, the guest entry is not directly saved in the table fields. Information are serialized and temporary saved in the field “_submitted_data_”. Therefore, to check that new entries are present, the WHERE clause checks a substring in the “_submitted_data_” field. The substring is: extensionName_formName in lower case . When data are processed, the field '_validated_” is automatically set. Thus, the WHERE clause will return new entries that have not been processed.
In our example, the extensionName is “sav_library_example7” and the formName is “FORM”, thus the substring to fetch is: “sav_library_example7_form”.
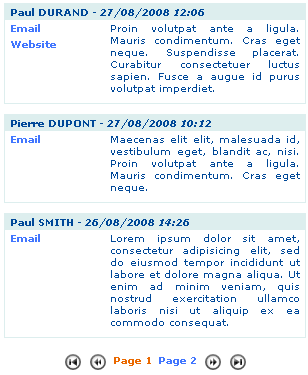
The guest input list (LIST)
Nothing very special here. The form LIST includes a conventional “show All” view. Analyze the view, the query and the field configurations (use the Context Sensitive Help if necessary). Below are two useful comments.
Field “comment”
“addLeftIfNotNull = <strong>$$$label[comment]$$$</strong><br />;”
cutIfNull = 1;
These two properties make is possible to display the label for the field only if the field is not null (addLeftIfNotNull will add the right hand side string to the left of the content if it is not null). The field content is cut if it is null (cutIfNull).
Field “date”
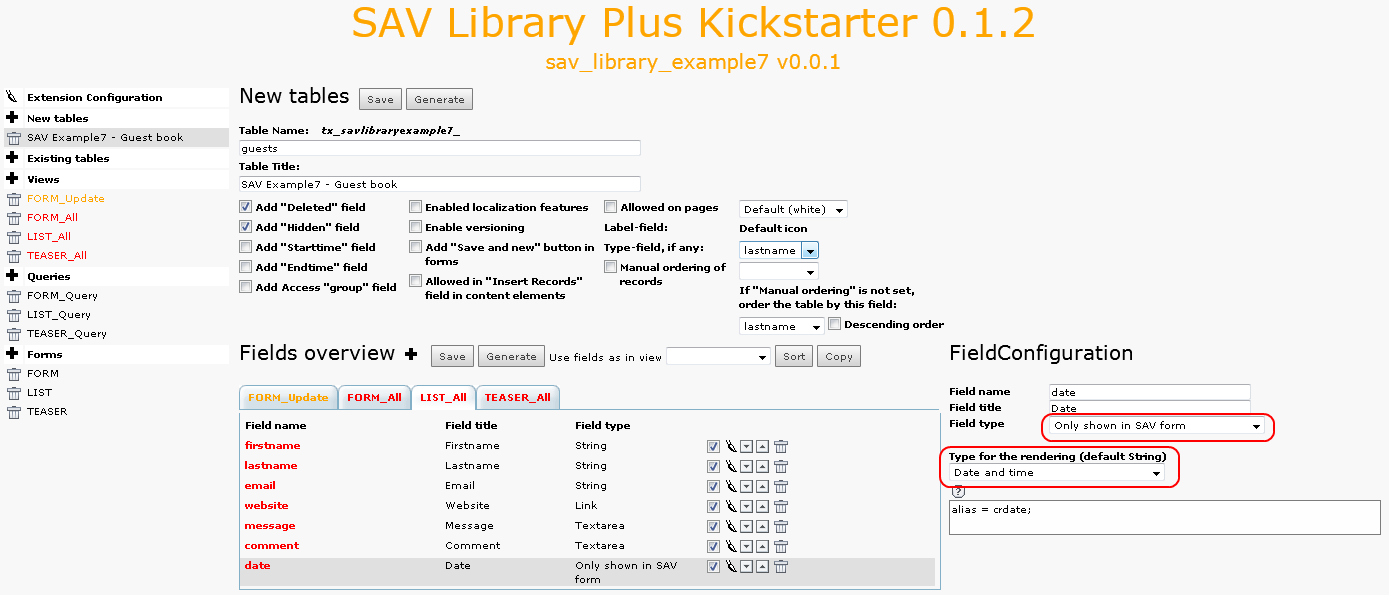
This field has a special type “0nly shown in SAV form”. It means that it will not be present in the table but you may use it as marker ###date### in forms. It has one attribute:
- “alias = crdate;” means that this field is an alias for the field “crdate” that already exists in the table (it is created by the Kickstarter).
Below is the screen shot obtained for the LIST form when the extension is correctly installed.