DEPRECATION WARNING
This documentation is not using the current rendering mechanism and is probably outdated. The extension maintainer should switch to the new system. Details on how to use the rendering mechanism can be found here.
Installation and configuration
Installation
- Download the extension “sav_library_example7” from the TER and install it.
- Download the extension “sav_filter_pageaccess” from the TER and install it.
- Download the extension “sr_freecap” from the TER and install it.
Guest input
- Create a page for the guest input.
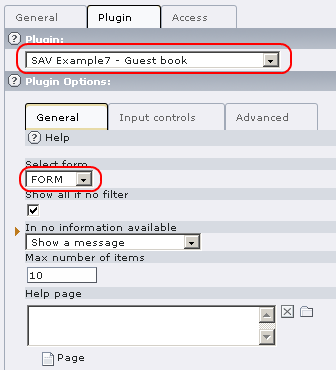
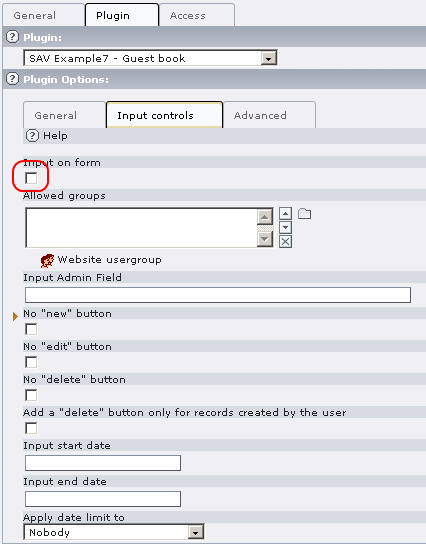
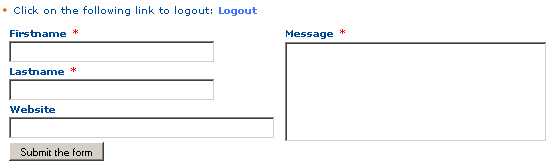
- In this page, insert a plugin content. Select “SAV Example7 – Guest book”, select “FORM” in the “General” folder, then in the “Input Controls” folder, uncheck “input on form”.
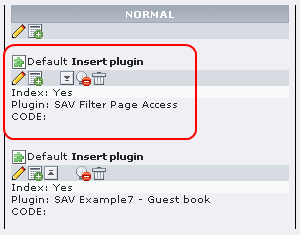
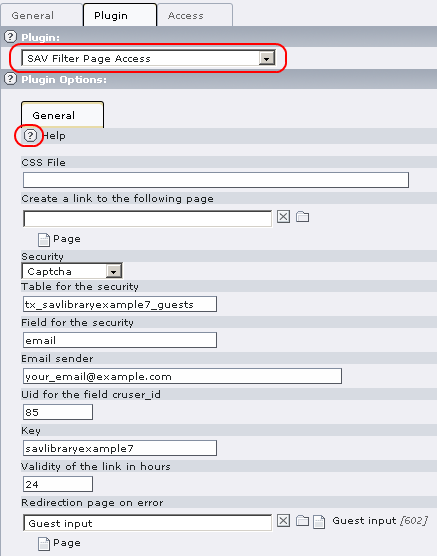
- In the same page, before the previous plugin (see below) , add a new plugin content. Select “SAV Filter Page Access”. Read the Context Sensitive Help by clicking on the icon. You may also read the documentation associated with this extension. Fill the fields as shown below. Replace your_email@example.com by a valid email . The value in “Uid for the field cruser_id” will be the default value for the “cruser_id” field of each record in the table “tx_savlibrary_example7_guests”. For example, put your FE user uid. Provide a key which will be used to crypt the link. Finally provide a redirection page for errors ( this field is required ). When using captcha, you can set this field with the current page.
- Save and go to the page in the Front End. Answer to the captcha and submit.

- Fill the field with your email and submit.

- An information message is displayed and you should received an email with a personal link.
Click on the following link to access to the service
Guest input
This link is valid only for one request.
The link is “Your_page_title” (“Guest input” is the page title used for the tutorial). Click on the link to access to the input form, fill the form and submit it.
Guest input validation
- Create a FE group, for example “savlibrary_test”. It will be use to protect the page and define the “Admin” group. Apply this group to you, that is to your FE user record.
- Create a page for the guest input validation. Protect the page with the FE group.
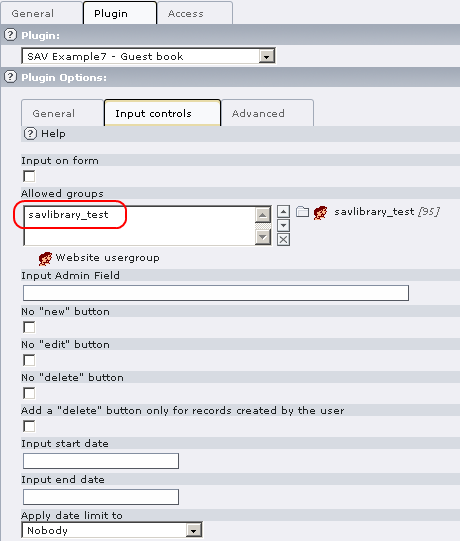
- Insert a plugin content. Select “SAV Example7 – Guest book”, select “FORM” in the “General” folder. In the “Input Controls” folder, uncheck “input on form” and add the FE Group to the “Allowed groups” field.
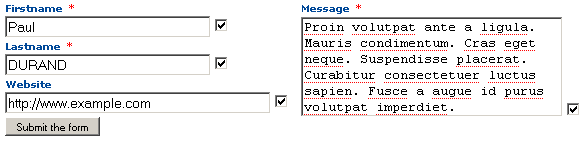
- Save and go to the page in the Front End and click on the email associated with your last input.

List view
- Insert a plugin content. Select “SAV Example7 – Guest book”, select “LIST” in the “General” folder. Set the field “Max number of items” to the number of items you want in the list (10 is the default). Uncheck “input on form” in the “Input Controls” folder. Save and go to the page in the Front End.