Quickstart: From zero to a basic website in TYPO3 v14
New in version 14.1
The default theme "Camino" was introduced with TYPO3 14.1.
This tutorial does not work with earlier TYPO3 versions.
In this quickstart tutorial, we demonstrate how to install TYPO3 and set up a basic website using the default theme "Camino".
Installing TYPO3 v14 (short version)
To follow these steps, you need either Docker and DDEV for local development (Installing and using DDEV) or a Linux system with a web server (Apache or Nginx), a database, Composer, and at least PHP 8.2.
(See also the system requirements.)
# Create project directory
mkdir my_project && cd my_project

# Initialize DDEV project
ddev config --php-version 8.4 --docroot public --project-type typo3

# Start DDEV
ddev start

# Install TYPO3 via Composer
ddev composer create-project "typo3/cms-base-distribution:^14"
# Recommended: Require the default theme
ddev composer req typo3/theme-camino
# Run TYPO3 CLI setup (database credentials are pre-filled)
ddev typo3 setup --server-type=other --driver=mysqli --host=db --port=3306 --dbname=db --username=db --password=db --create-site <sitename>

# Open the Backend login in a browser
ddev launch /typo3/
The directory in which you run these commands must be empty. Do not initialize Git or open the folder in an IDE before running the commands, as the installation process expects no pre-existing files.
See also
There are multiple strategies to install TYPO3 depending on your needs:
- Step-by-step: TYPO3 Installation with DDEV
- TYPO3 installation overview
- Classic TYPO3 demo installation using Docker Compose (Docker only, no DDEV or Composer required)
TYPO3 v14 backend overview
Open the TYPO3 backend (Backend login) using the credentials you entered during installation.
Open the backend URL of your installation, for example
https://my-site.ddev.site/typo3 when using DDEV.
You should see something like the following:
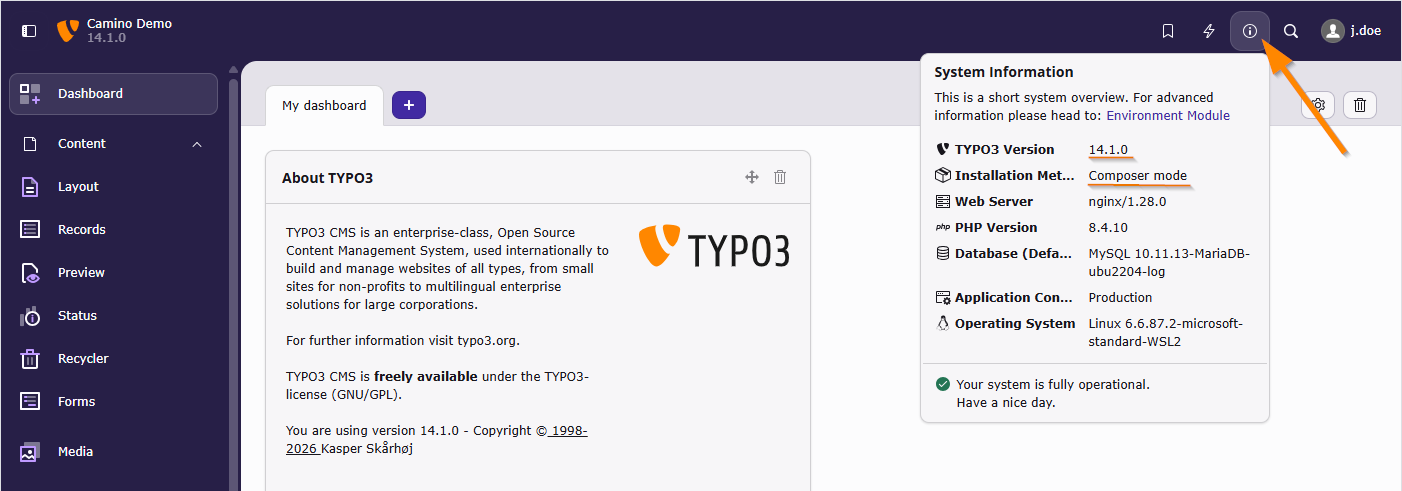
Check the system information: Version at least 14.1? Composer mode or Classic mode?
If you see an error message instead, see Troubleshooting.
Adding content to your website
If you selected the default site preset during installation, a basic website should have been created.
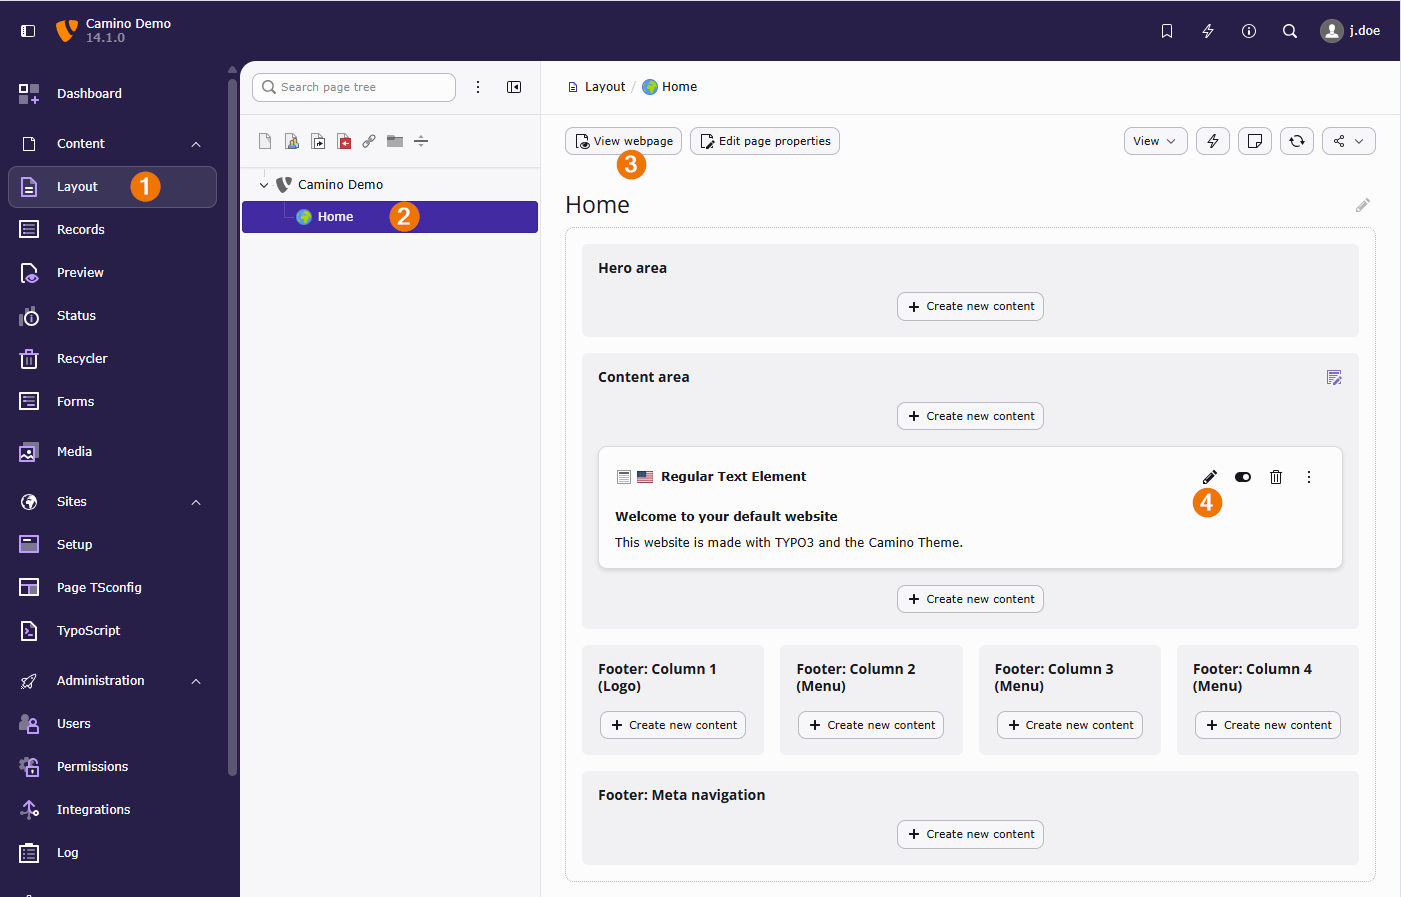
Go to module Content > Layout and choose the "Home" page. View the webpage and edit some content.
If no root page was created during setup, you will need to create a page on root level and configure it.
You will also need to edit the site configuration in order to add the "Theme:Camino" site set.
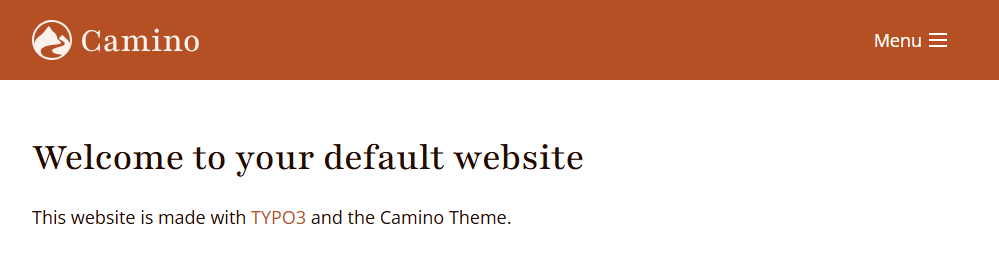
After clicking View webpage, you should see the frontend of the website.
Edit the content and save your changes.
The TYPO3 Editors Guide provides detailed information on how to work with content.
Adding subpages
In the page tree, you can add new pages via drag and drop:
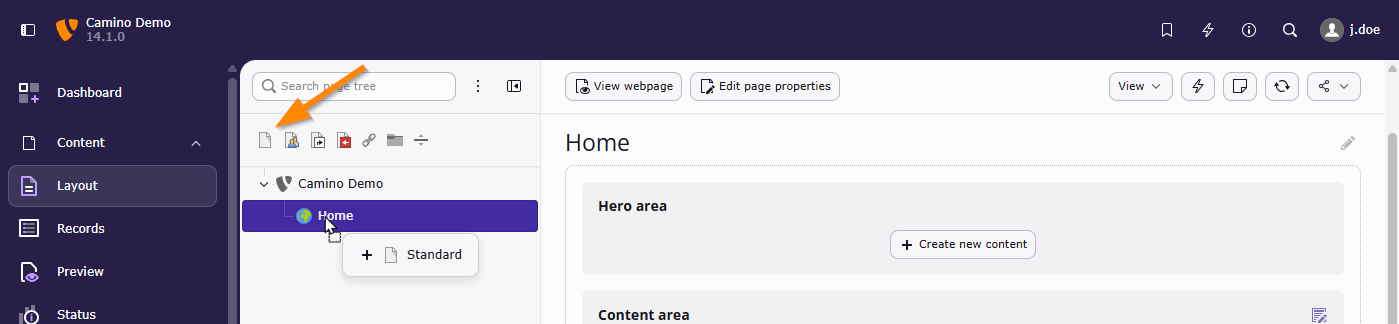
Drag a standard page into the page tree.
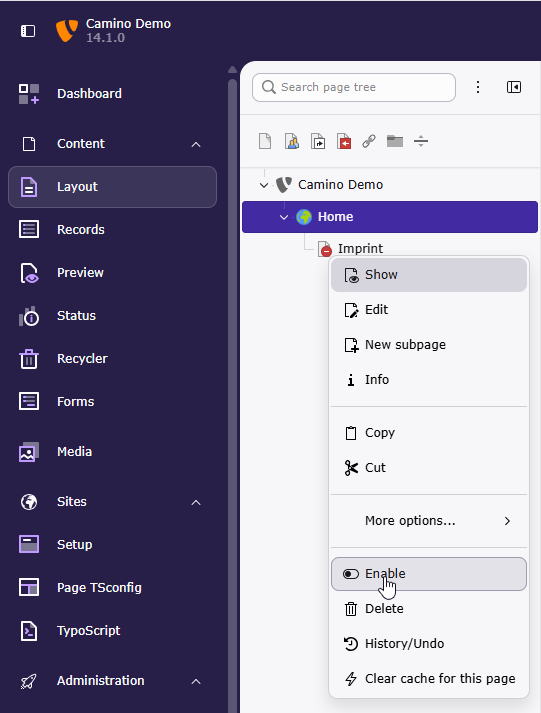
By default, newly added pages are hidden; therefore, you must enable them to make them visible.
In the default theme (Camino), a main menu is displayed automatically when you add pages below the root page.
Some editors prefer pages to be visible immediately. You can configure this behavior via page TSconfig: Example: Do not hide newly created pages by default.
Configuring the default theme (Camino)
In the module Sites > Setup, you can edit the site configuration and settings:
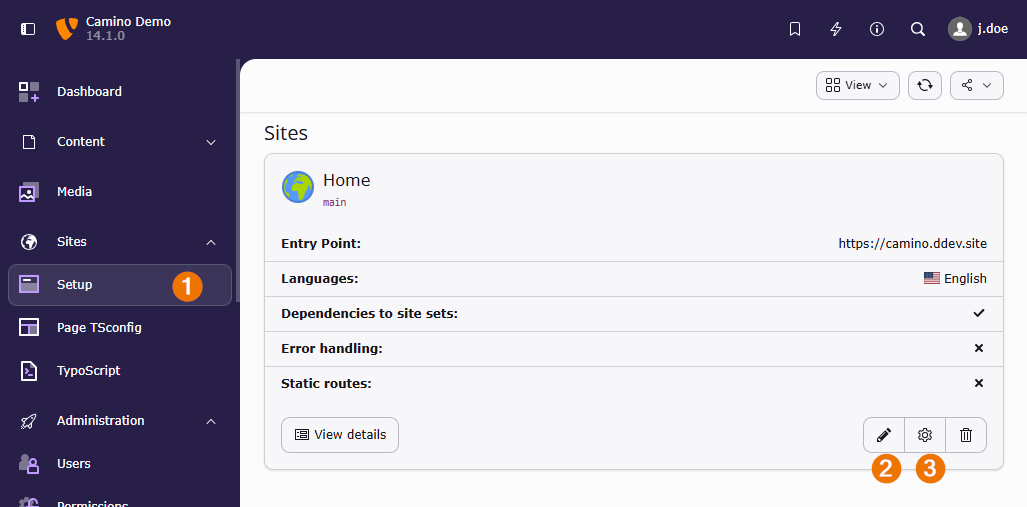
Go to module Sites > Setup (1), and edit the site configuration (2) or settings (3).
In the site settings, you can change settings provided by the theme and installed extensions. You may need to clear the caches to apply changes.
Choose a different color theme and adjust other settings.
Clear the frontend cache after saving the site settings.
Customizing the default theme (Camino)
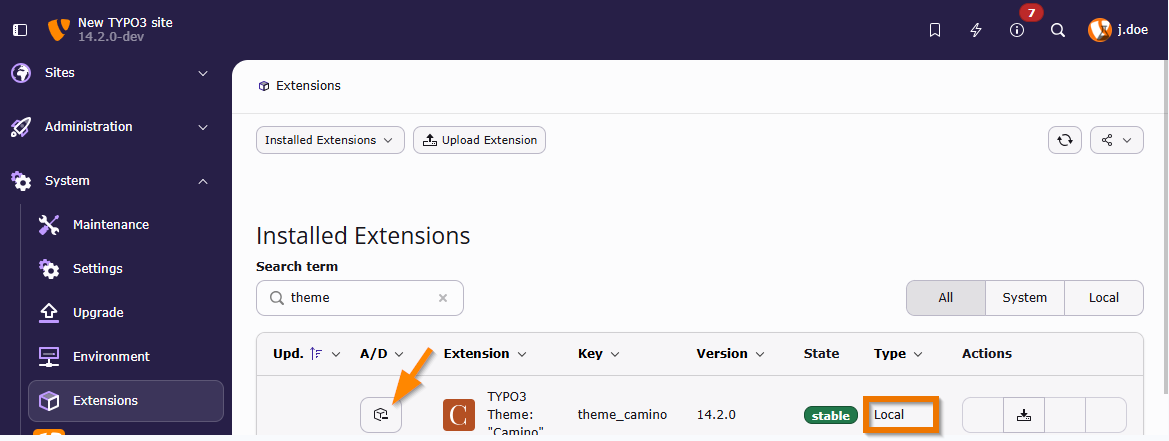
The files belonging to the default theme can be found in the folder
vendor/ in Composer mode, or in
typo3/ in Classic mode installations.
Warning
Even if it technically works: Do not change files in the vendor/
directory. Changes will be lost with the next update.
If you want to modify the theme but continue using it, you can either copy it and edit the copy, or create a custom site package that extends Camino.
Edit a copy of the default theme
If you copy the theme and modify the copy, future changes to the original theme will not be applied to your customized version.
Copy the default theme:
You can now edit files in this new location, for example CSS files in
packages/.
Extend the default theme
You can use the development extension friendsoftypo3/kickstarter to create a custom theme that extends the default theme:
ddev composer req friendsoftypo3/kickstarter

ddev typo3 make:extension
# [...]
# Composer package name:
#  > myvendor/theme_pluto

Keep the default values for all other questions.

ddev typo3 make:site-set

# Please enter the site set identifier (must be "myvendor/theme_pluto" or "myvendor/theme_pluto-<suffix>") [myvendor/theme_pluto]:
#  >
# [...]
#
# Enter site set identifiers for dependencies (press Enter with empty input to finish).
#
#  Dependency (vendor/package):
#  > typo3/theme-camino
Edit the newly created packages/ and update
the require section to add
typo3/theme-camino
:
 "require": {
     "typo3/cms-core": "^14",
+    "typo3/theme-camino": "^14"
},Then require the new theme using its Composer name, for example:
ddev composer req myvendor/theme-pluto:@devYou can now create a file
packages/
to override the default theme’s TypoScript and add additional paths for templates
and custom CSS styles and/or JavaScript files:
# Override page templates, use UNIX timestamp so your template is loaded last
lib.fluidPage {
    paths.1770975481 = EXT:theme_pluto/Resources/Private/Templates/
}

page {
    includeCSS {
        theme_pluto_styles = EXT:theme_pluto/Resources/Public/Css/styles.css
    }
    includeJS {
        theme_pluto_hello = EXT:theme_pluto/Resources/Public/JavaScript/hello.js
    }
}

# Override content element templates, use UNIX timestamp so your template is loaded last
lib.contentElement {
    layoutRootPaths.1770975481 = EXT:theme_pluto/Resources/Private/Templates/Layouts/
    partialRootPaths.1770975481 = EXT:theme_pluto/Resources/Private/Templates/Partials/
    templateRootPaths.1770975481 = EXT:theme_pluto/Resources/Private/Templates/Content/
}
Now add the new theme as a dependency in the site configuration:
Go to module Sites > Setup and edit the configuration of your site. Add the new theme to the sets for this site.
You can now copy any Fluid template, partial, or layout from the folder
vendor/ into
packages/ and override it.
See also
- TypoScript Explained
- Fluid ViewHelper Reference
- If you want an individual theme not based on the default theme, see TYPO3 site package tutorial