Webhook
This section explains how to configure webhooks for automatic documentation rendering in a repository.
TYPO3 documentation rendering supports Git as a Version Control System (VCS) and integrates with the following repository hosts:
- GitHub
- Bitbucket Cloud and Bitbucket self-hosted
- GitLab Cloud and GitLab self-hosted
Table of Contents
Approval
Before your documentation is rendered, the TYPO3 Documentation Team must approve the repository the first time you request rendering.
For approval, ensure the following:
- The extension must be published in the TYPO3 Extension Repository (TER) under the same extension key specified in composer.json.
- The Git repository should be referenced on the TER detail view page.
These steps help prevent misuse of the infrastructure and ensure extension name consistency.
If the approval process takes too long, request approval via the Slack channel #typo3-documentation. Register for Slack at my.typo3.org.
Foreign setups
If your repository is hosted outside the supported platforms (GitHub, GitLab, Bitbucket) or its structure differs from a typical TYPO3 extension, you must create a mirror on a supported platform. Otherwise, automatic rendering will not be possible.
How webhooks work
If you are new to webhooks, refer to the GitHub Webhooks Guide.
The webhook setup described below ensures that rendering is triggered only on push events.
To test the webhook integration, push changes to
the main or documentation- branch (see Supported branches).
Note
Documentation rendering is triggered only for the version affected by the
push event, not the entire repository. For example, a push event on
branch 13. will render only that version.
Legacy webhook
If a webhook was previously configured, it may be using a deprecated method. A compatibility layer is still in place but will be removed in the future.
GitHub
To enable automatic documentation rendering using GitHub webhooks, follow these steps:
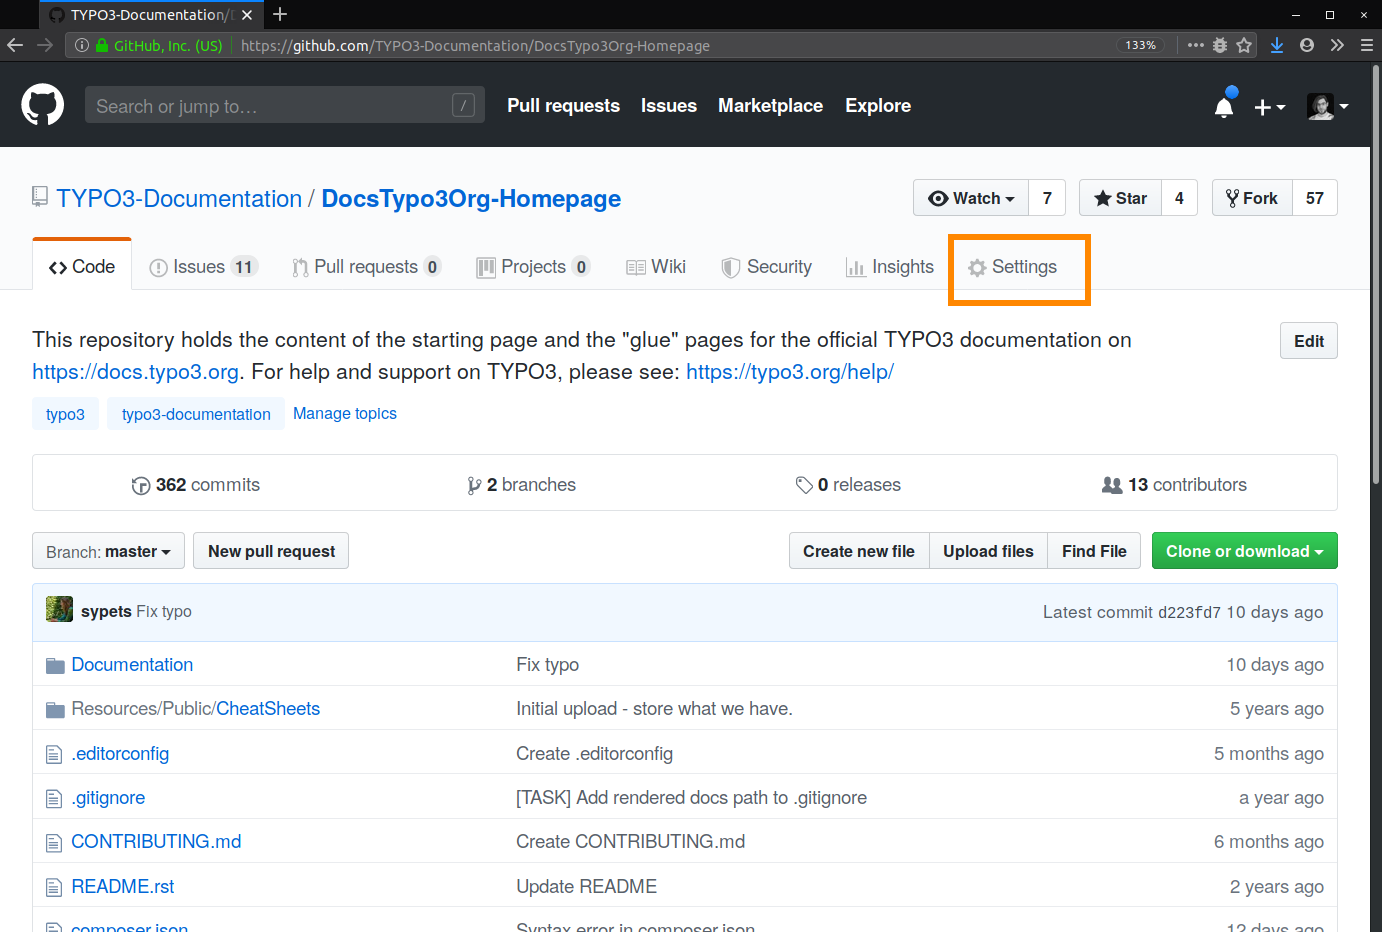
-
Navigate to the repositories Settings tab.
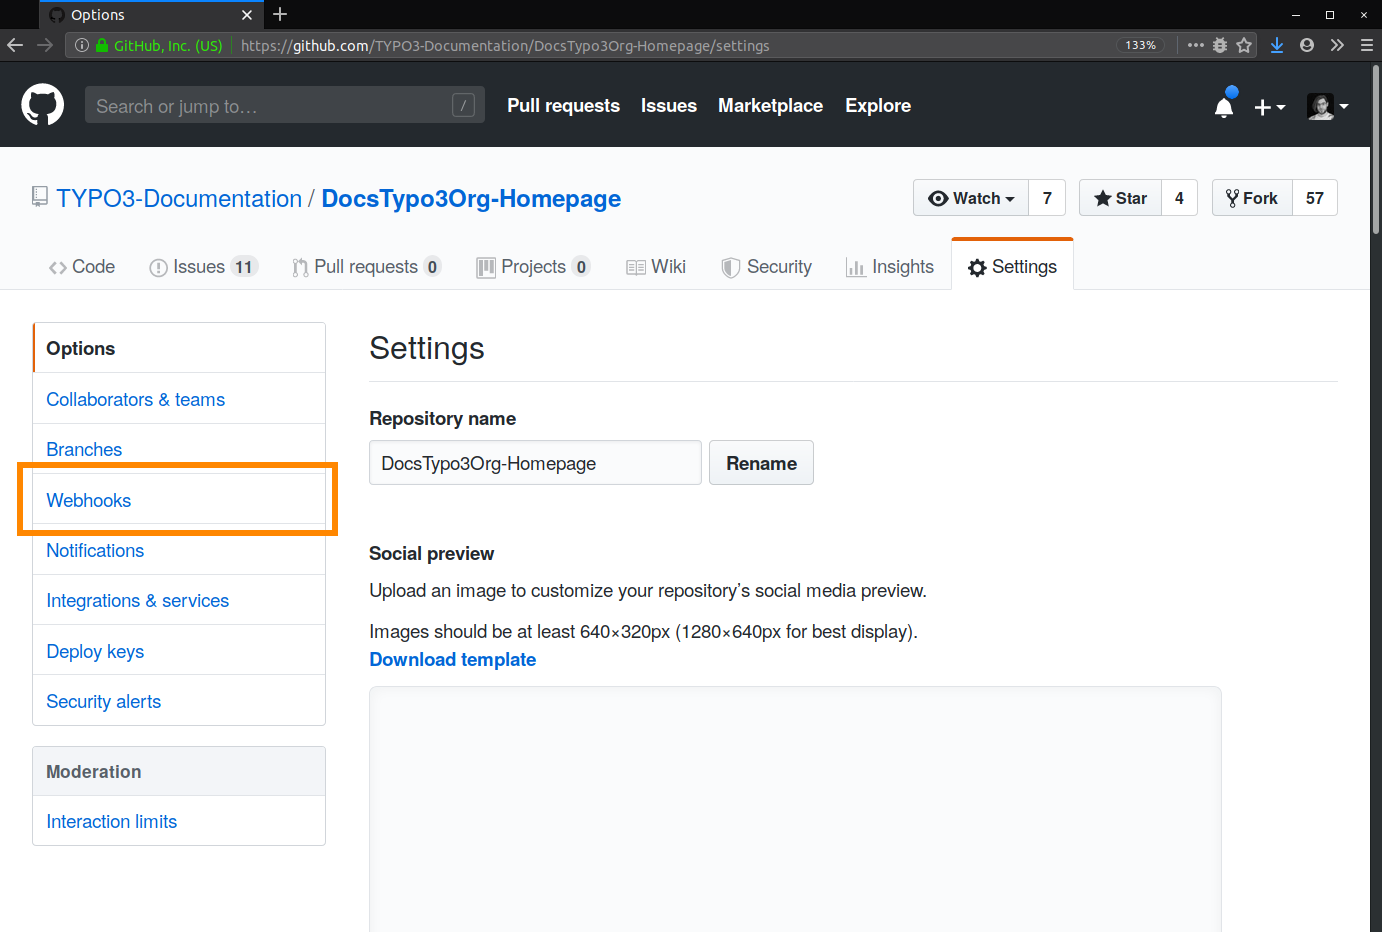
-
Open the Webhooks section.
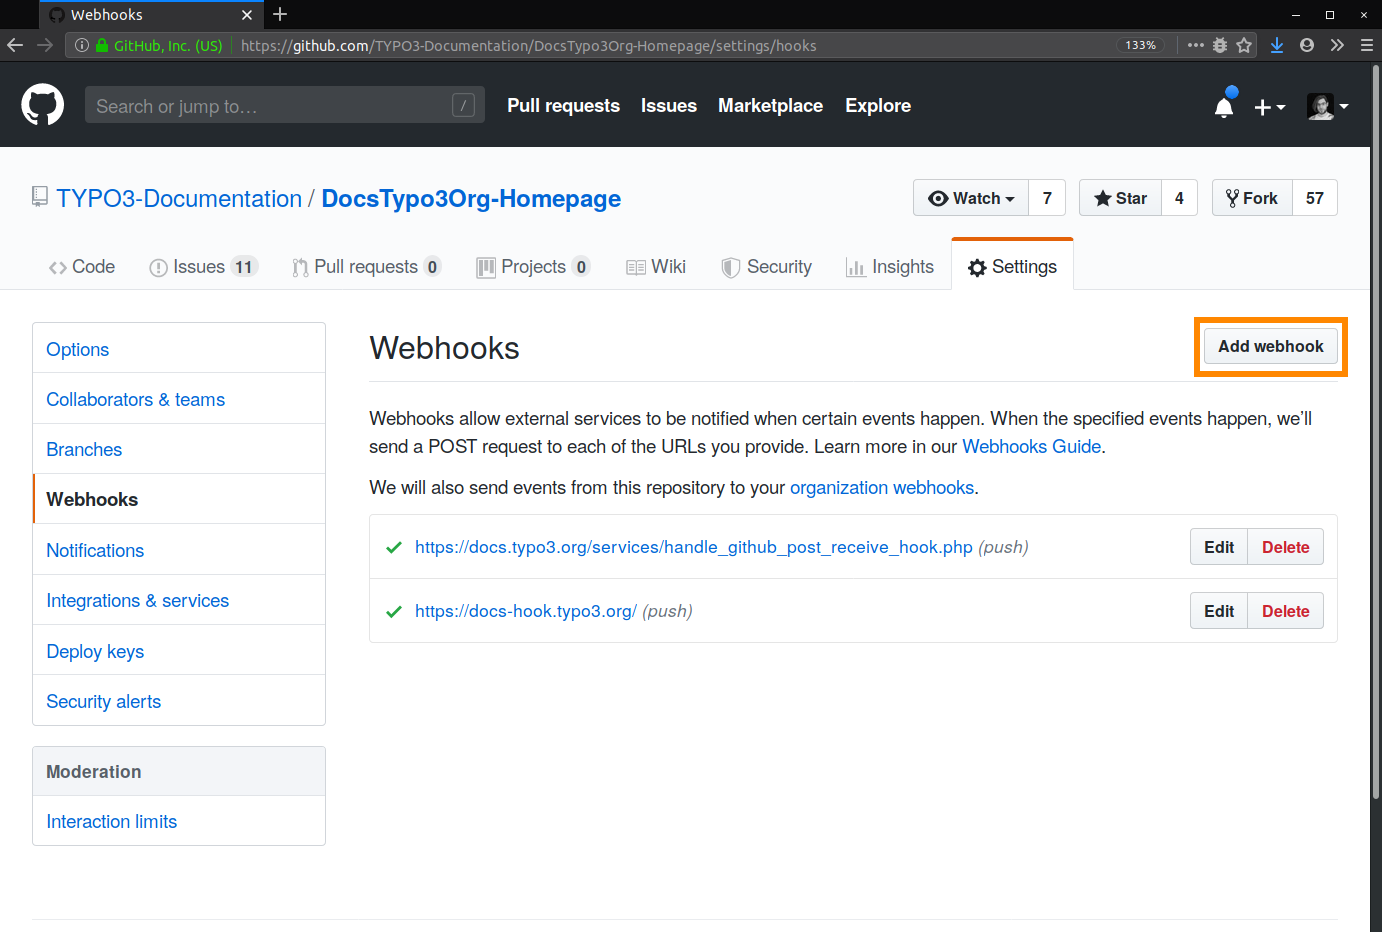
-
Click Add webhook.
-
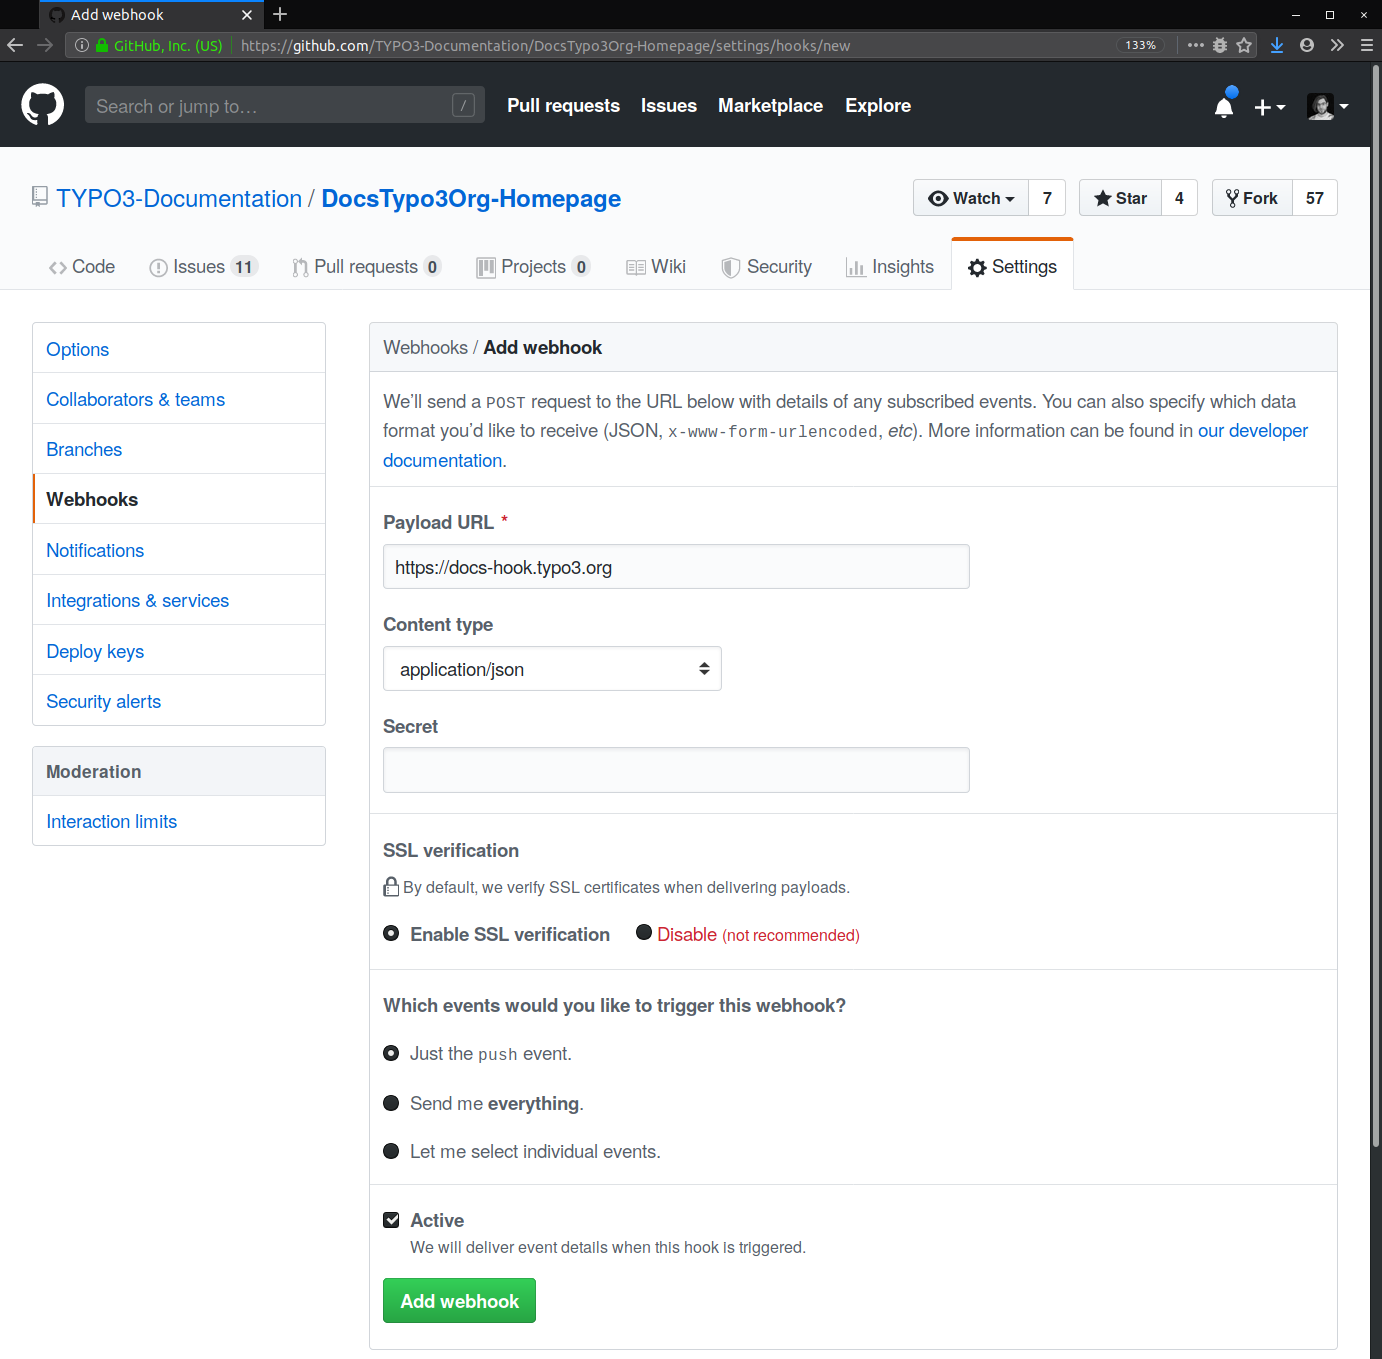
Configure the webhook settings:
- Payload URL:
https://docs- hook. typo3. org - Content type:
application/json - SSL verification: Enabled
- Events:
Just the push event - Active: Checked
Click Add webhook.
- Payload URL:
-
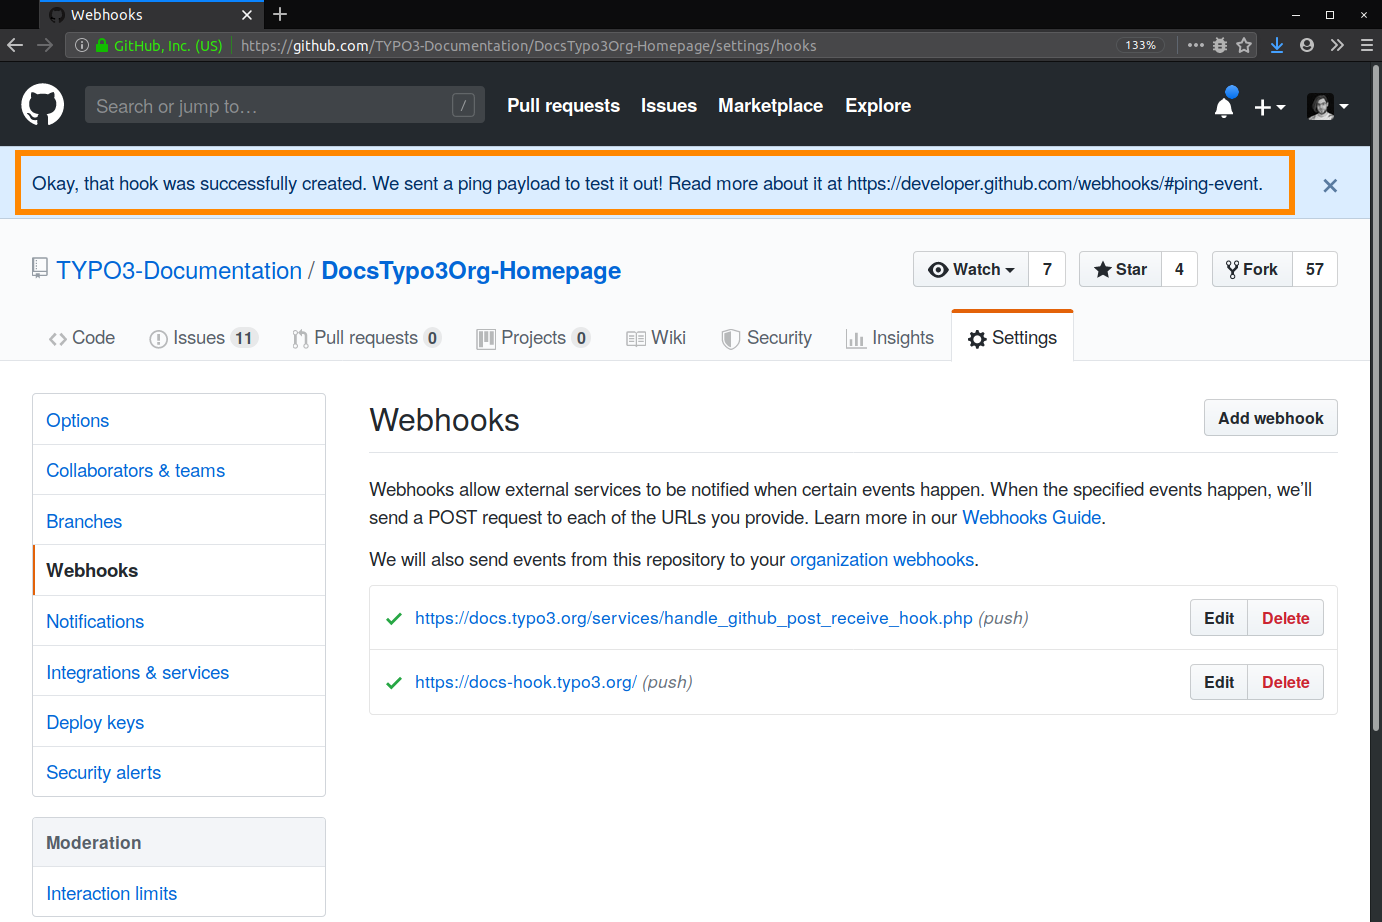
Verify webhook creation.
GitHub will confirm that the webhook was successfully added.
-
Test the webhook.
Visit intercept.typo3.com and check the Recent actions section. Push a commit to
mainordocumentation-to trigger the webhook.draft 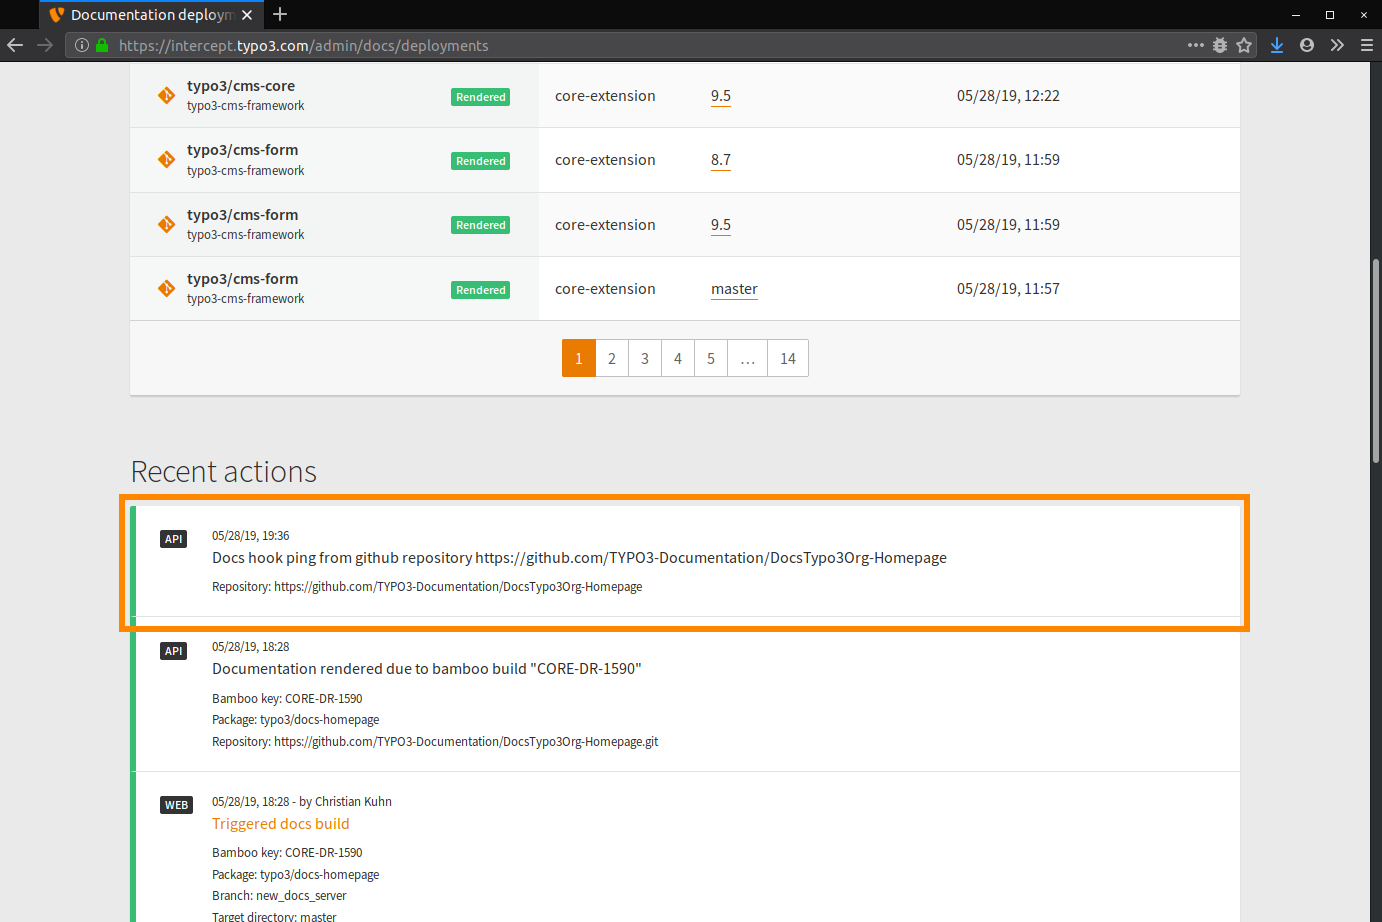
Bitbucket Cloud
To configure a webhook for a Bitbucket repository:
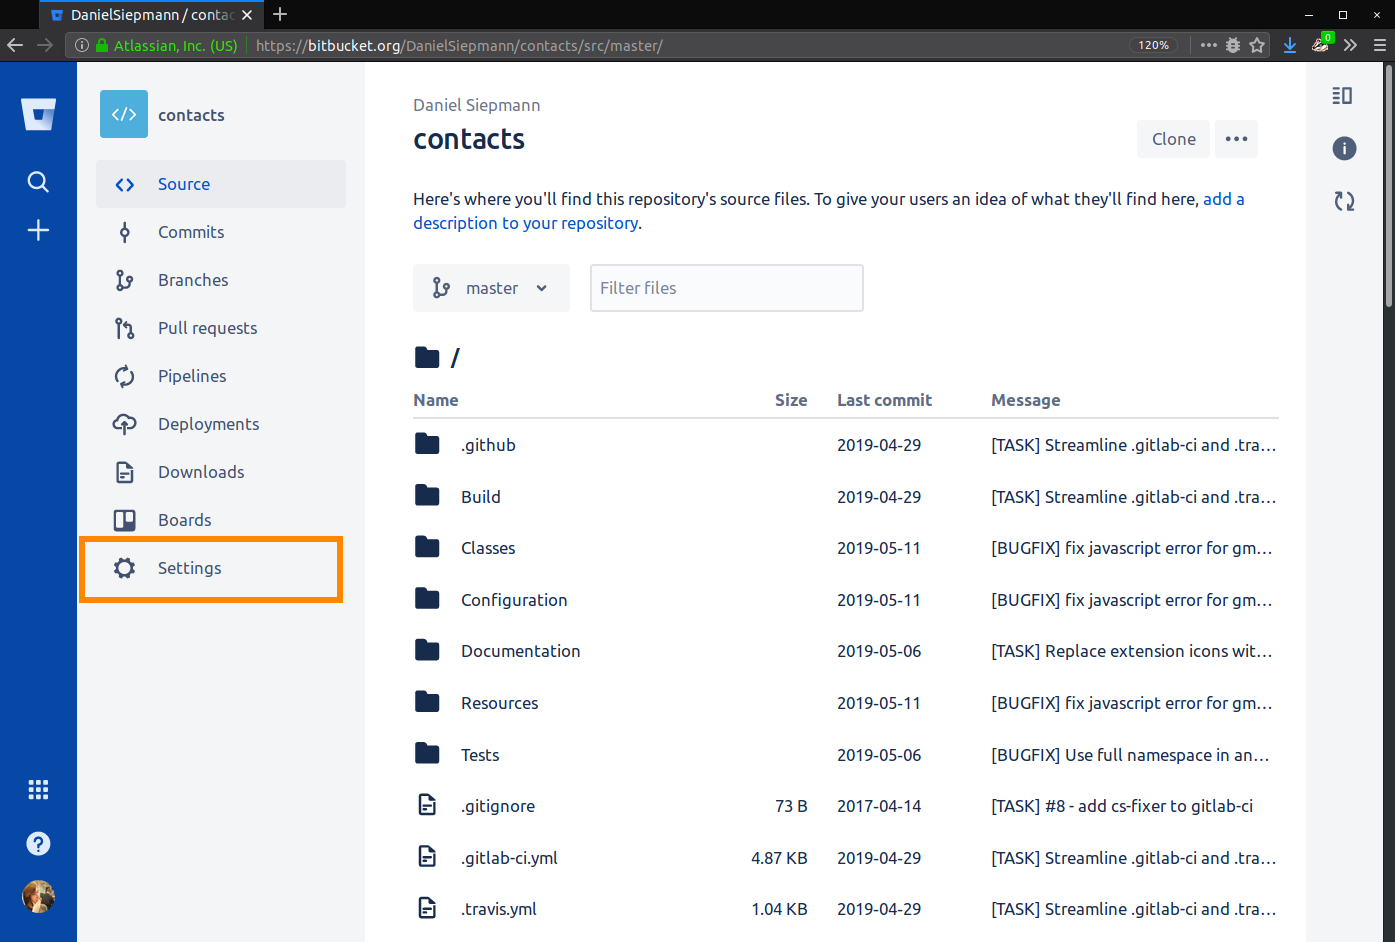
-
Open the repository Settings.
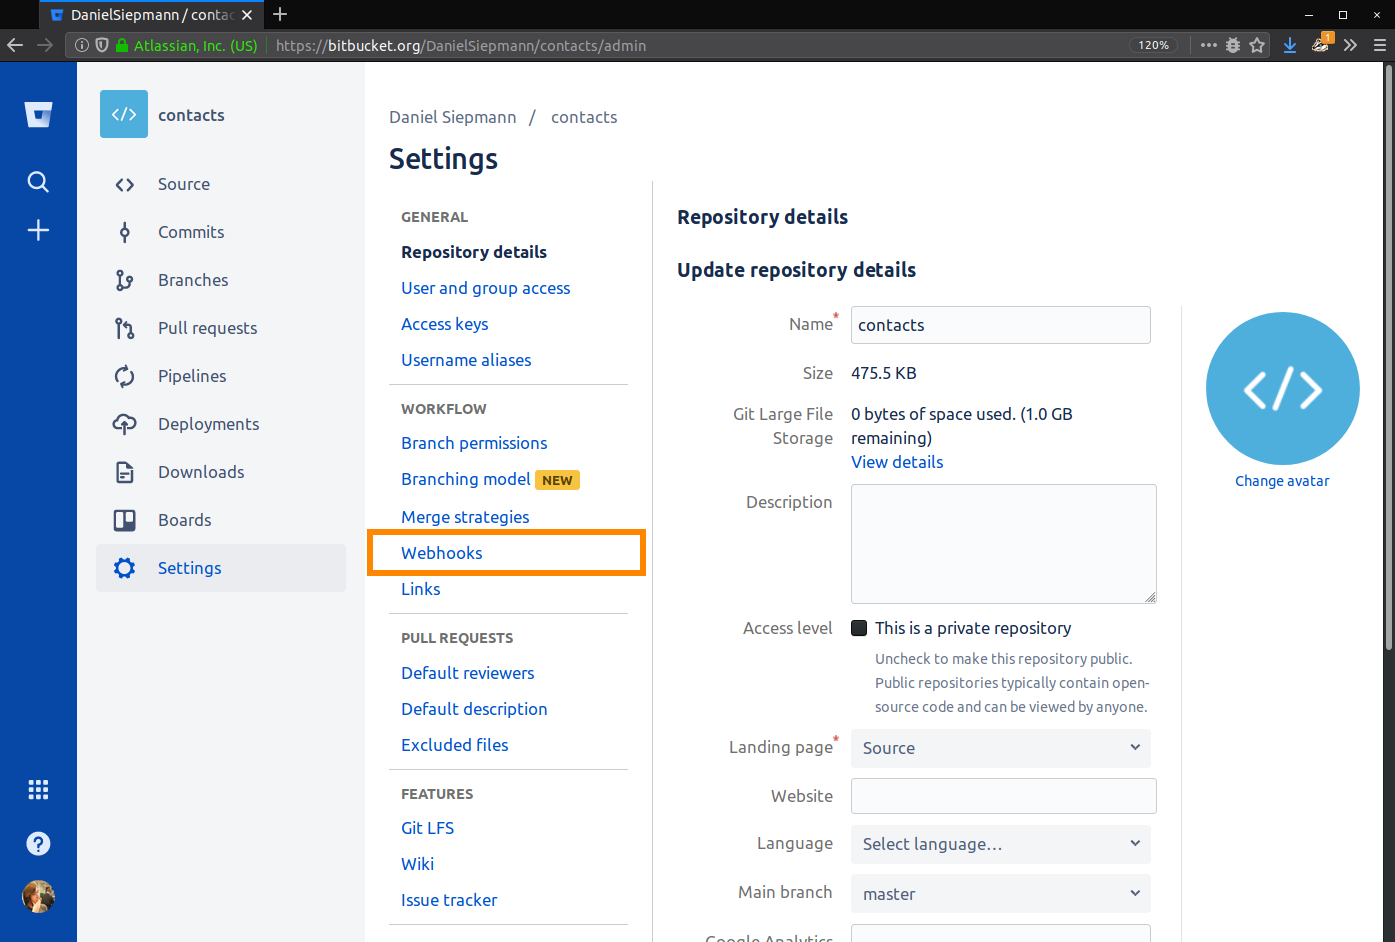
-
Go to the Webhooks section.
-
Click Add webhook.
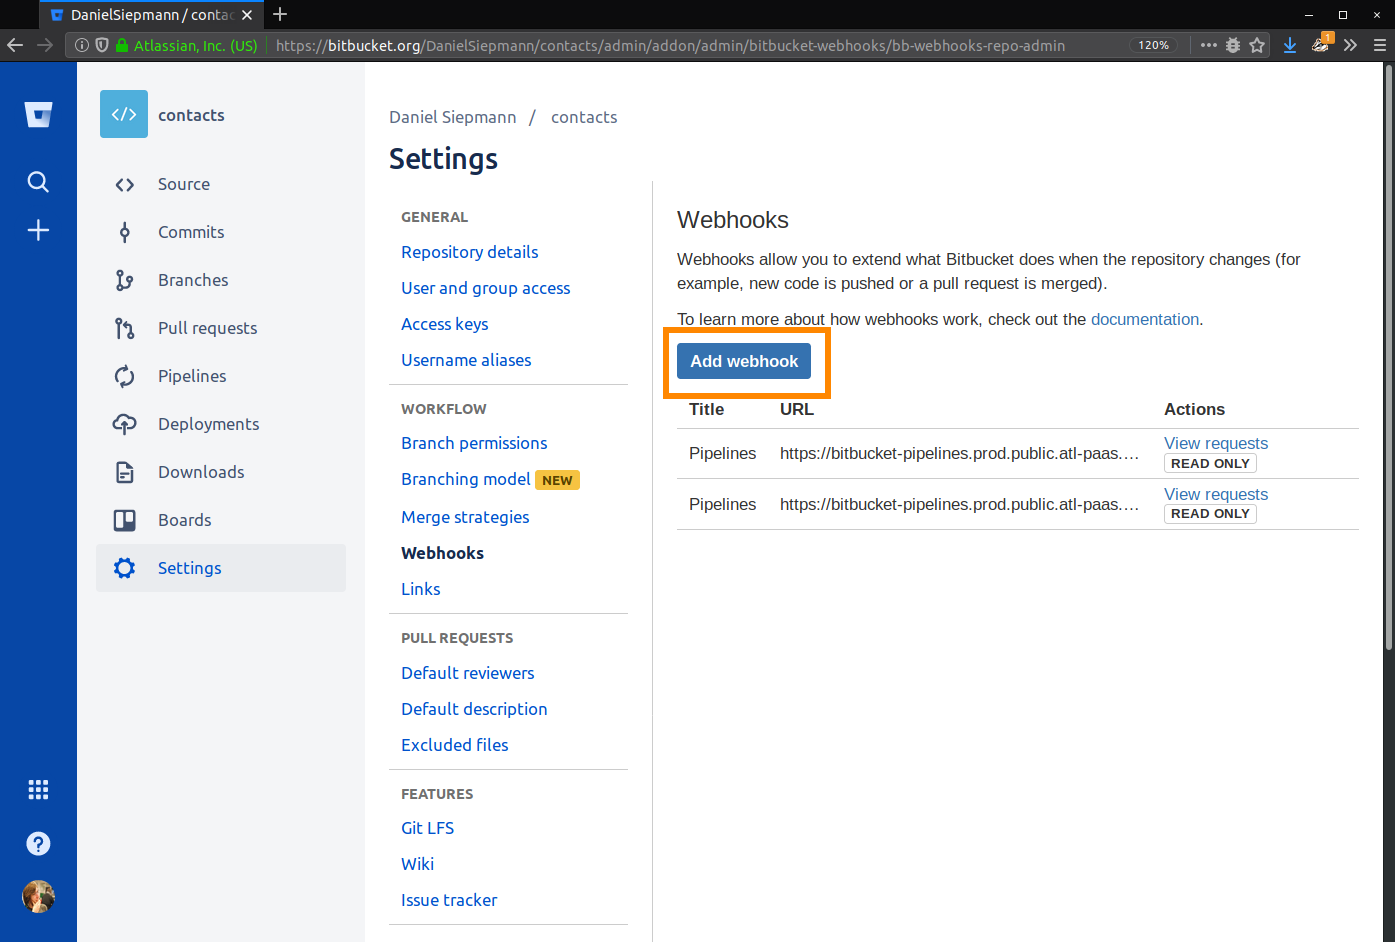
-
Configure the webhook:
- Title:
TYPO3 Docs - URL:
https://docs- hook. typo3. org - Active: Checked
- Triggers:
Repository push
Click Save.
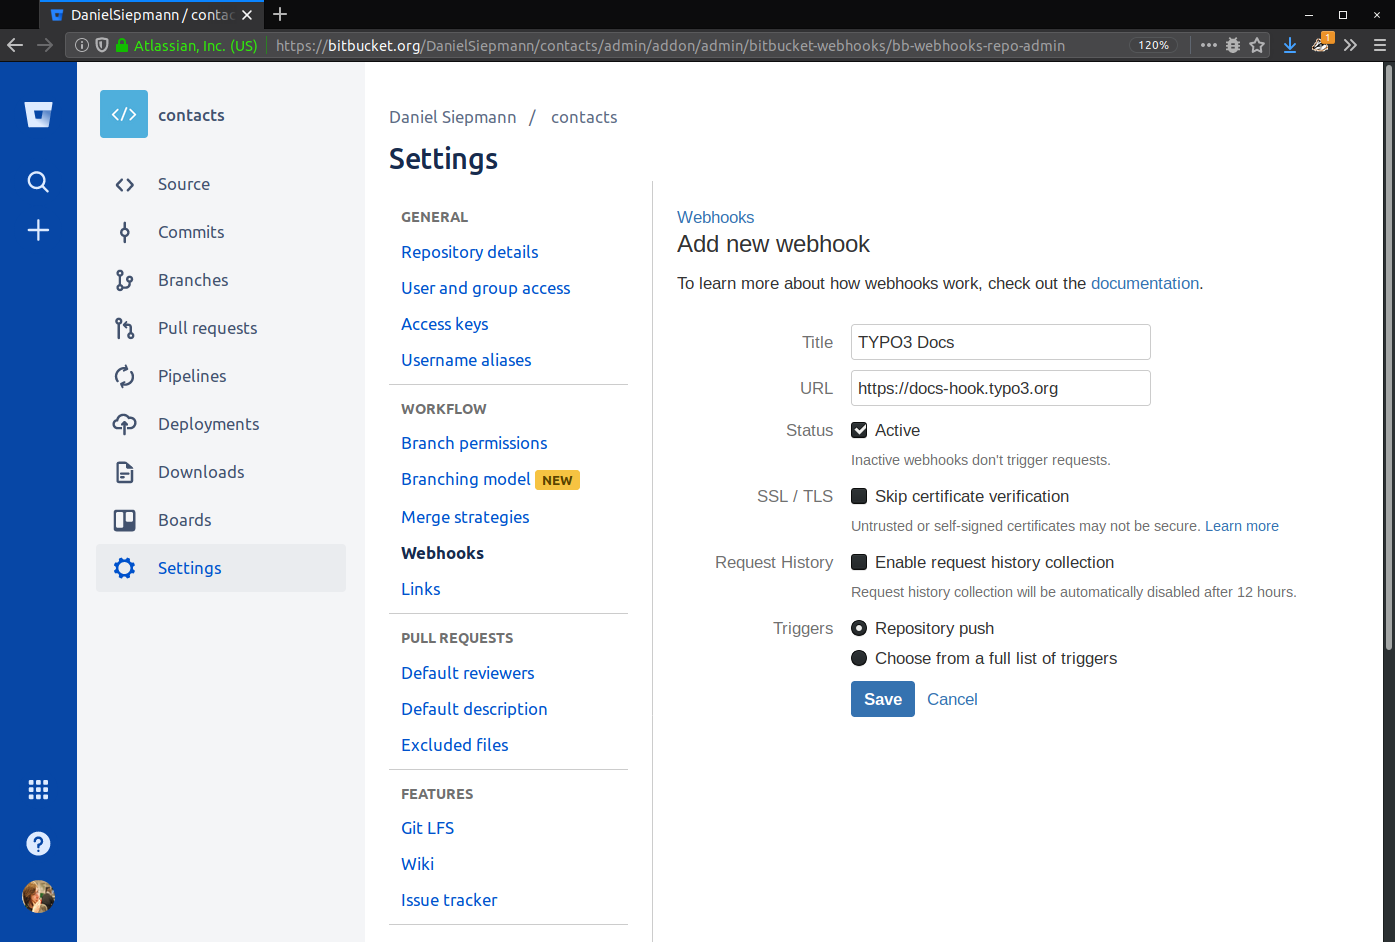
- Title:
-
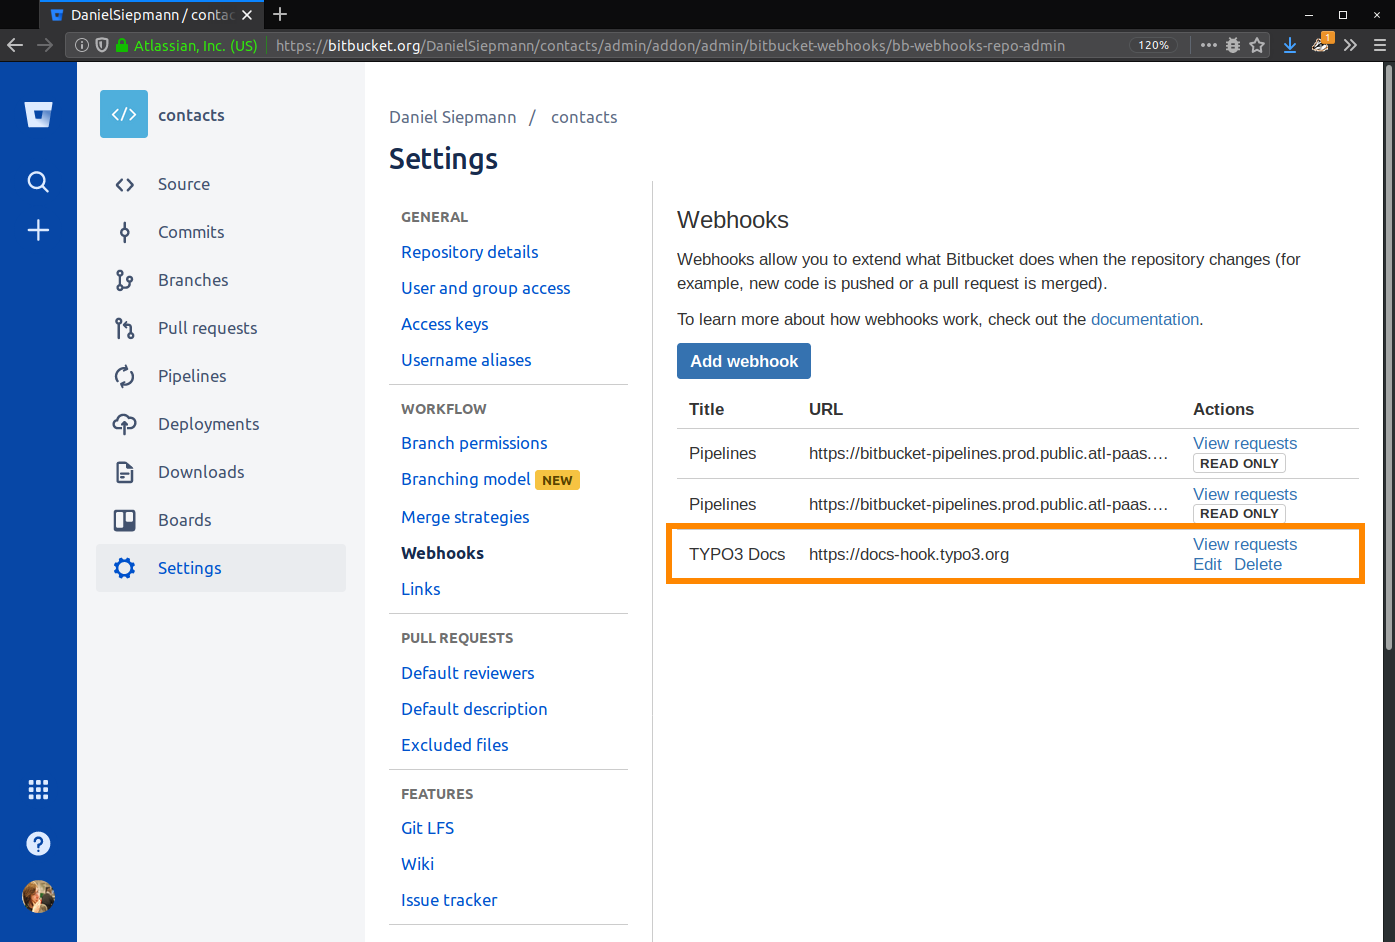
Verify webhook creation.
Bitbucket will confirm webhook addition.
-
Test the webhook.
Visit intercept.typo3.com and check Recent actions. Push a commit to
mainordocumentation-to trigger the webhook.draft 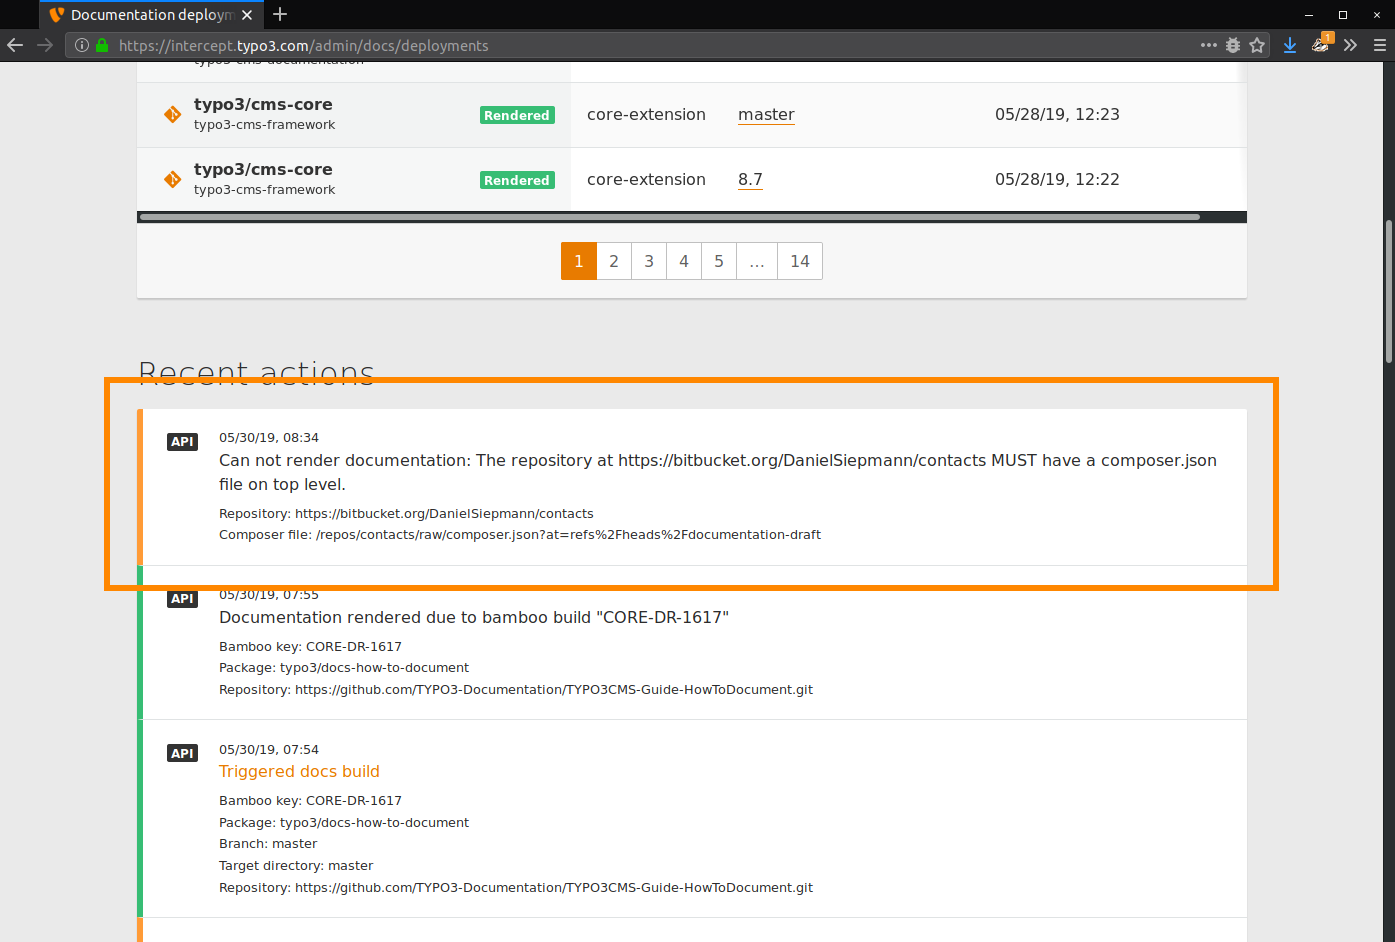
GitLab Cloud and Self-Hosted
To set up a GitLab webhook:
-
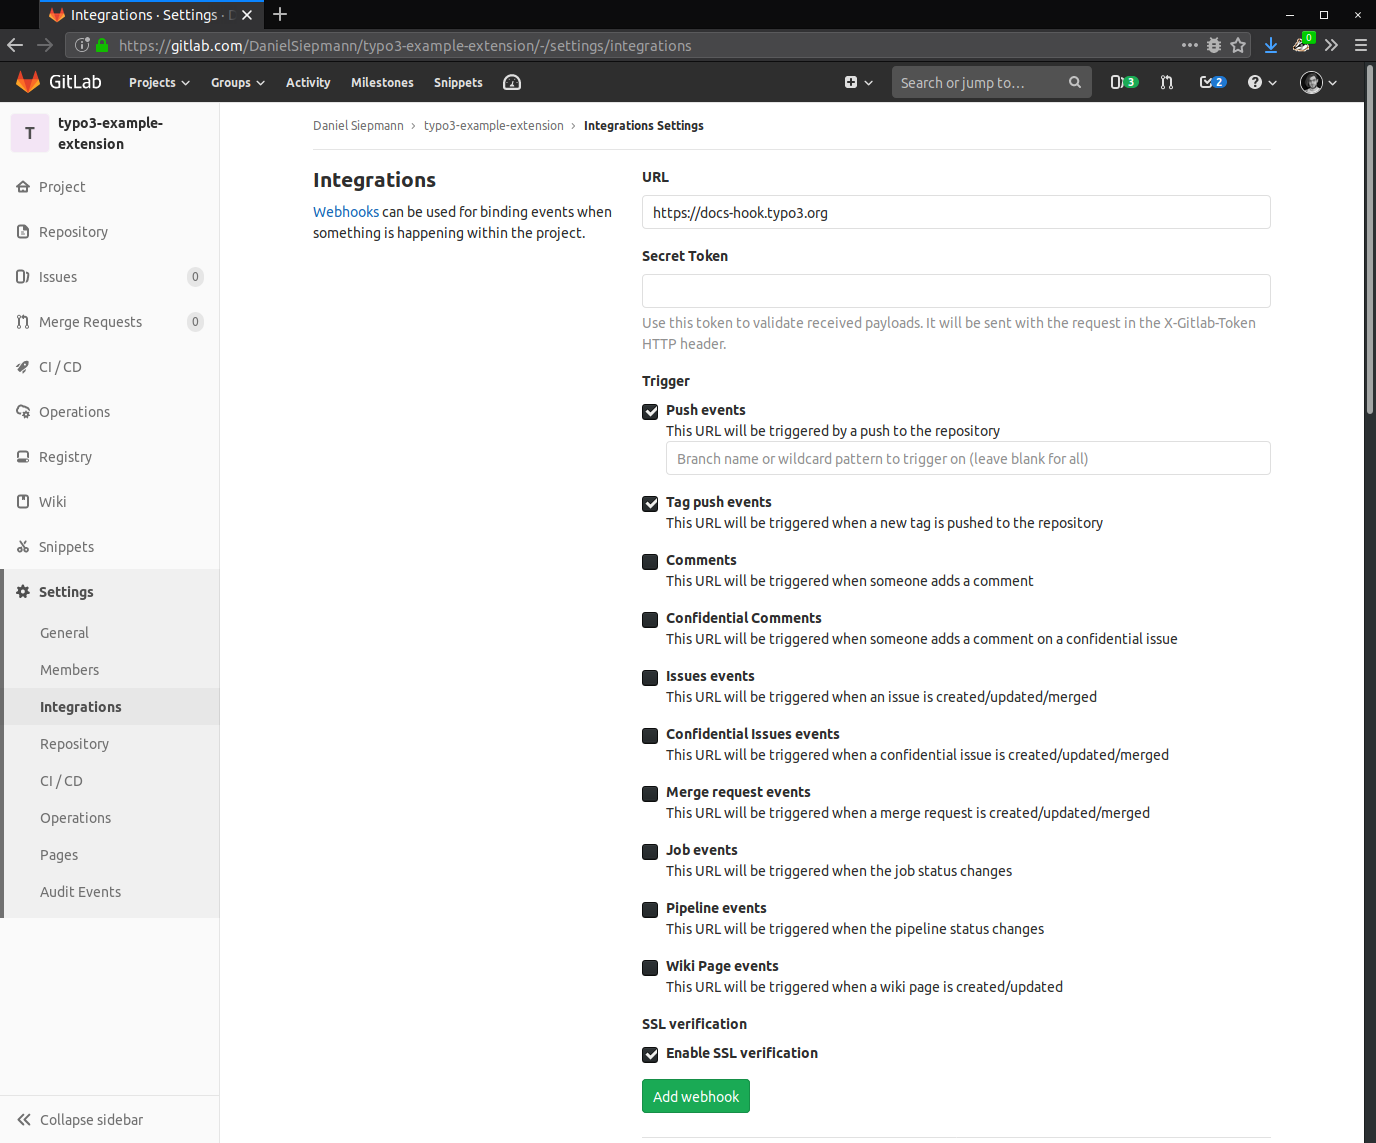
Open the Integrations section of the repository.

-
Add a webhook with the following settings:
- URL:
https://docs- hook. typo3. org - Triggers:
Push eventsandTag push events
Click Add webhook.
- URL:
-
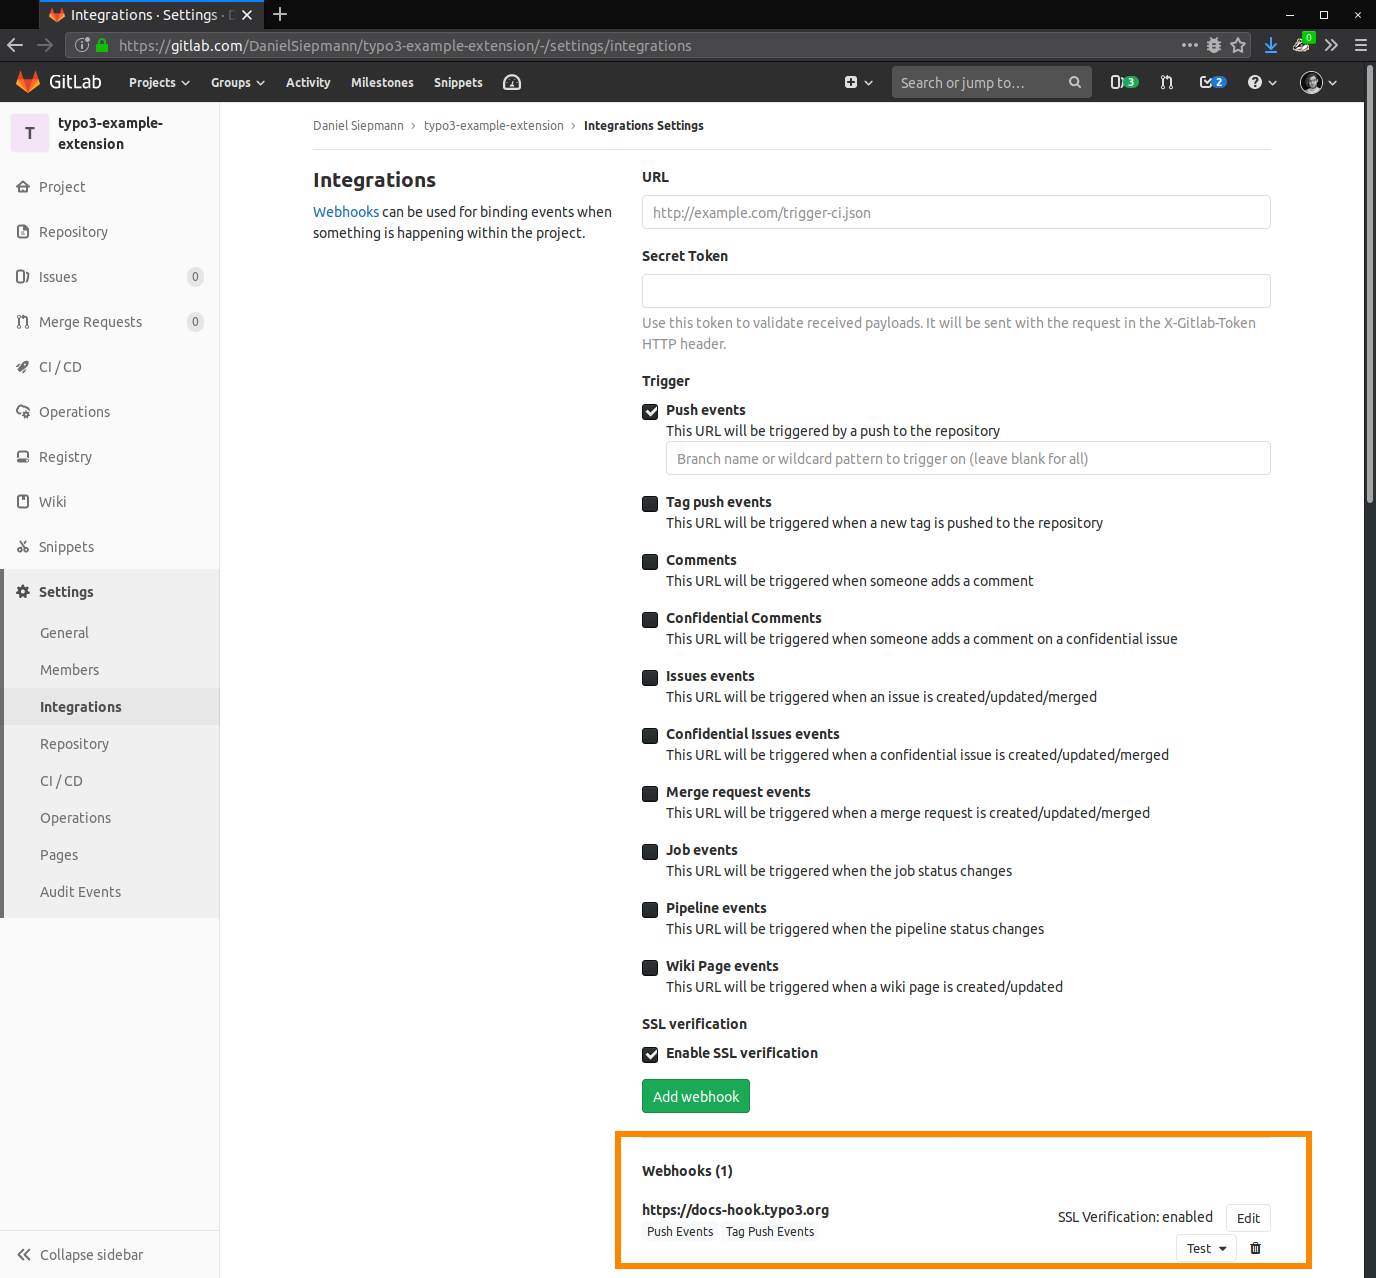
Verify webhook creation.
The webhook will appear in the list.
-
Test the webhook.
Visit intercept.typo3.com and check Recent actions. Push a commit to
mainordocumentation-to trigger the webhook.draft 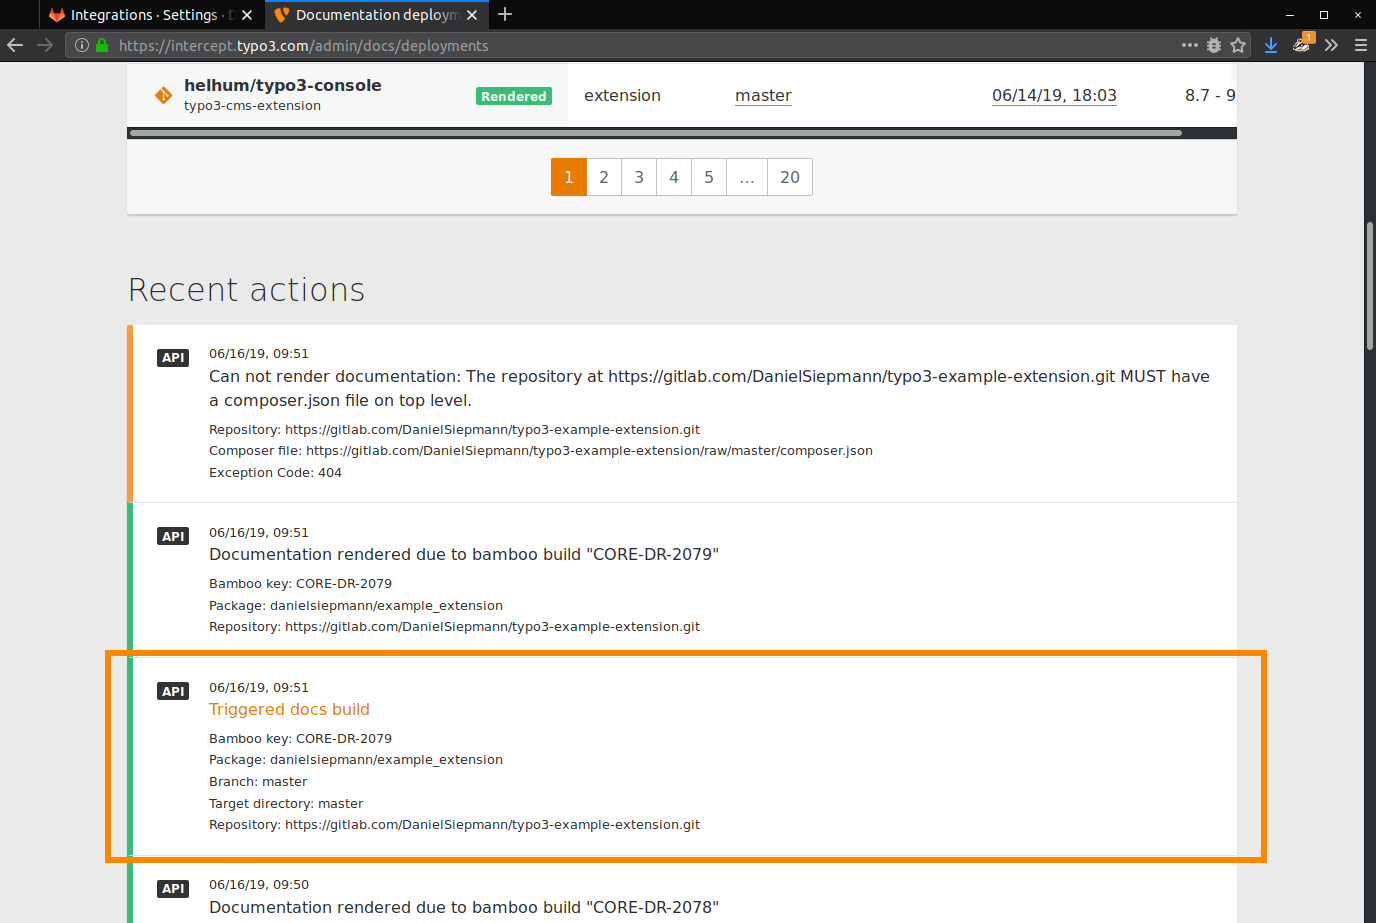
Testing Webhooks
To test webhook configurations before integrating with TYPO3, use:
- Beeceptor for quick API testing.
- Webhook.site to inspect webhook payloads in real-time.
These tools help debug webhook calls and ensure correct configuration before enabling documentation rendering.