Add Content Elements to a Page
Tested in: TYPO3v13 Categories: Beginner ContentElements Backend Editing Configuration Author: @ninaaline
Once you have created pages on your TYPO3 website, the next step is to fill them with content. TYPO3 uses content elements to build page content in a flexible and modular way. Content elements can be text blocks, images, headers, lists, or more complex components like forms or videos.
This guide shows you how to add content elements to a page using the TYPO3 Backend's Page module.
Learning Objective
In this step-by-step guide, you will add content elements to a page in TYPO3 and explore the different types of content elements available.
Prerequisites
Tools and technology
- A web browser
- A computer with a local TYPO3 installation or access to a TYPO3 instance
- A TYPO3 Backend user with editor or administrator privileges
- At least one existing page where you want to add content (see Create a Page with Drag and Drop)
Knowledge and skills
- You know how to Log In to the TYPO3 Backend
Open the Page Module
- Log in to the TYPO3 Backend.
-
Open the Page module from the left-hand menu.

- In the page tree on the left, click on the page where you want to add content.
Add a Content Element
-
In the main content area, locate the area where you want to add your content element. You will see a + Content button or a similar placeholder.

-
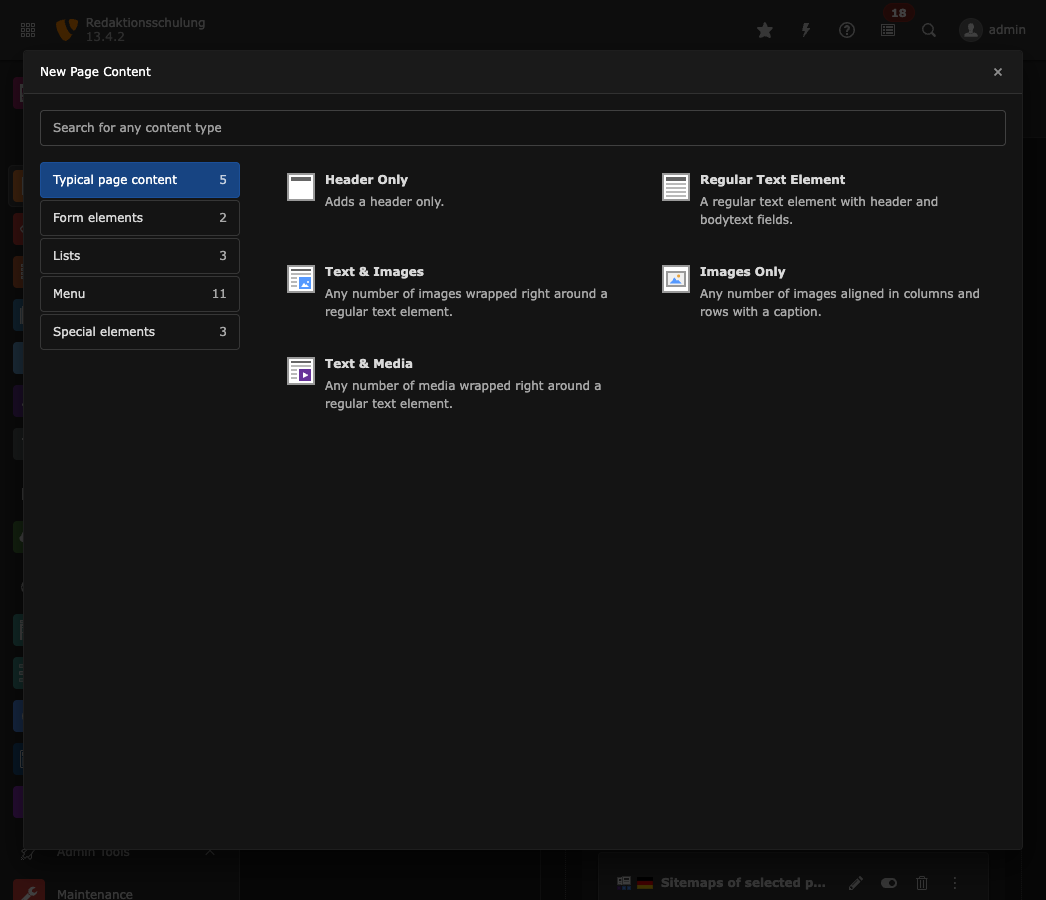
Click on the + Content button. This opens the New Content Element Wizard, which displays all available content element types organized by category.
-
Browse through the available categories:
- Typical Page Content – Standard elements like text, text with images, lists, and tables
- Form Elements – Contact forms and other form-related components
- Lists - Elements that display categorized content or pages from your site structure
- Menu - Navigation elements like page menus, sitemaps, and section indexes
- Special Elements – Advanced elements like HTML code, menu sections, or dividers
- Select a content element type by clicking on it. For this guide, we will select Regular Text Element from the Typical Page Content category.
Configure the Content Element
-
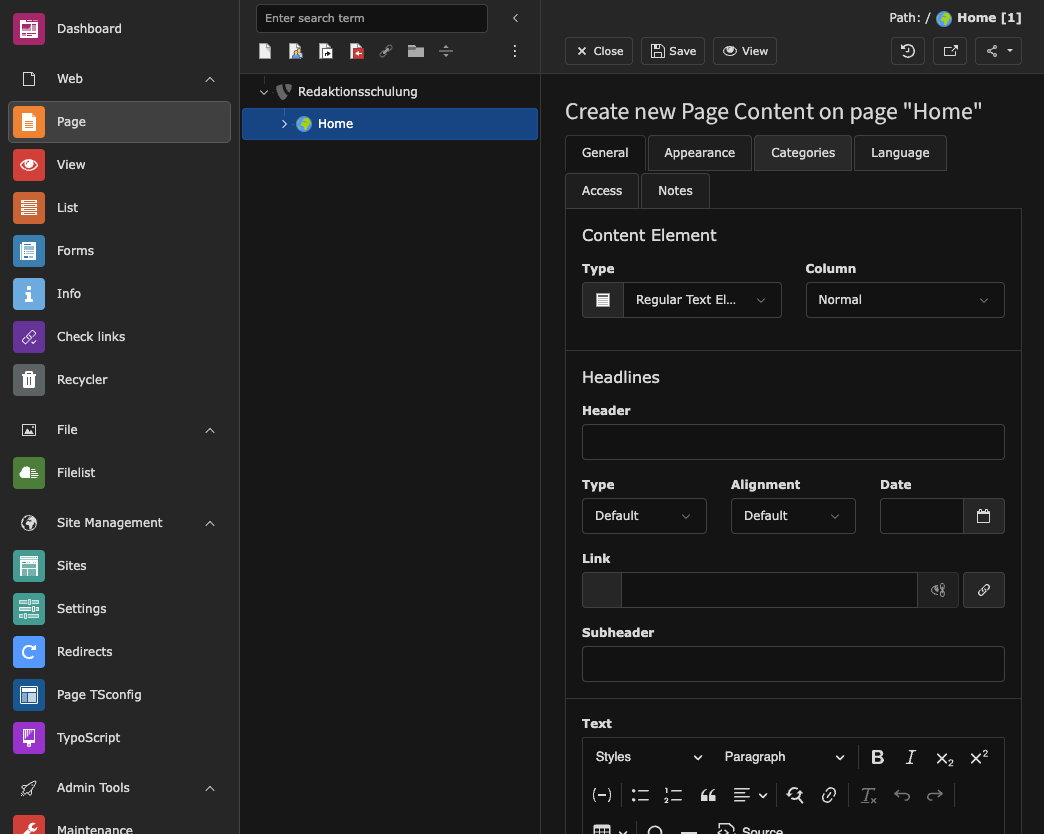
After selecting a content element type, TYPO3 opens the content element editor.
-
Fill in the fields:
- Header – Enter a headline for your content element (optional)
- Text – Enter your content in the Rich Text Editor (RTE). You can format text, add links, or insert images using the editor toolbar.
-
Optionally, configure additional settings in the tabs at the top:
- Appearance – Control the layout and styling of the element
- Access – Set visibility and access restrictions
- Language – Manage translations for multilingual sites
- Categories – Assign the element to content categories
- At the top of the form, click Save to save your content element.
- At the top of the form, click Close to return to the Page module.
After saving, your new content element appears in the Page module's content area.

View the Content Element on a Website
-
To view your content element on the frontend, click the View webpage button in the top toolbar or navigate to your website in a new browser tab.

Note
If your changes do not appear immediately on the frontend, you may need to clear the frontend cache. See Clearing the Frontend Cache in the TYPO3 Backend.
Summary
You have successfully added a content element to a page in TYPO3. You opened the Page module, selected a content element type from the New Content Element Wizard, configured the element, and viewed it on a website.
Next Steps
Now that you've added content to your page, you might like to: