DEPRECATION WARNING
This documentation is not using the current rendering mechanism and is probably outdated. The extension maintainer should switch to the new system. Details on how to use the rendering mechanism can be found here.
Setting up Frontend-Editing with YAG
Since version 2.0 we have re-introduced frontend editing in yag. Here comes a short introduction on how to set up frontend editing.
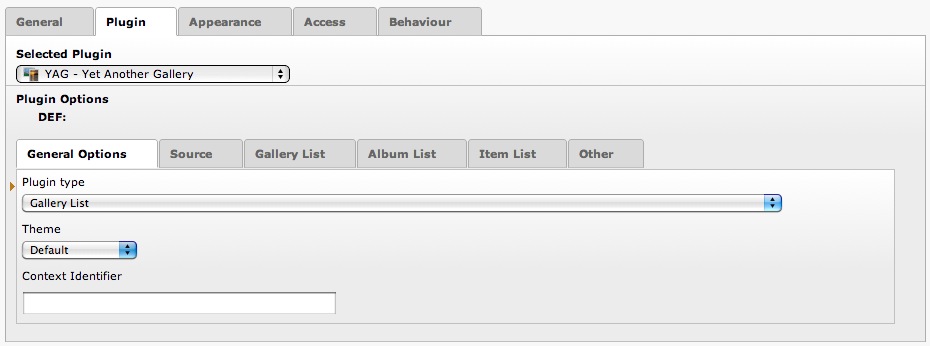
First insert a plugin with type “Gallery List” with theme “Default”:
After that you have to make some changes in the TypoScript settings for the page on which you want to enable FE editing. You will find the configuration for the role based access controll in EXT:yag/Configuration/TypoScript/Frontend/Security.ts. This is automatically included with the yag static template.
The next thing you have to do is create Frontend-User-Groups that will be enabled to edit your yag contents in the frontend. Create a group and set
plugin.tx_ptextbase.settings.rbac.extensions.yag.feGroups {

        # Do the group <=> role asignement here
        #<groupUid> {
        #       10 = <ROLENAME>
        #       20 = <AnotherRoleName>
        #}

        1 {
                10 = admin
        }

}
In our example, we made the user group with UID 1 to be an admin on our site. If you want to get an impression on what you can do with the RBAC settings in the security.ts file, take a look at the file. It is self-explaining and well documented.
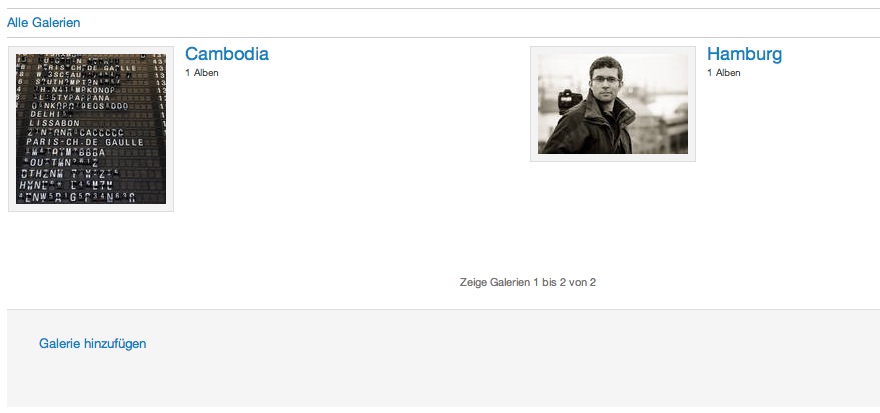
That’s it. If you open up the frontend now, you will see some additional links that let you edit the gallery content:
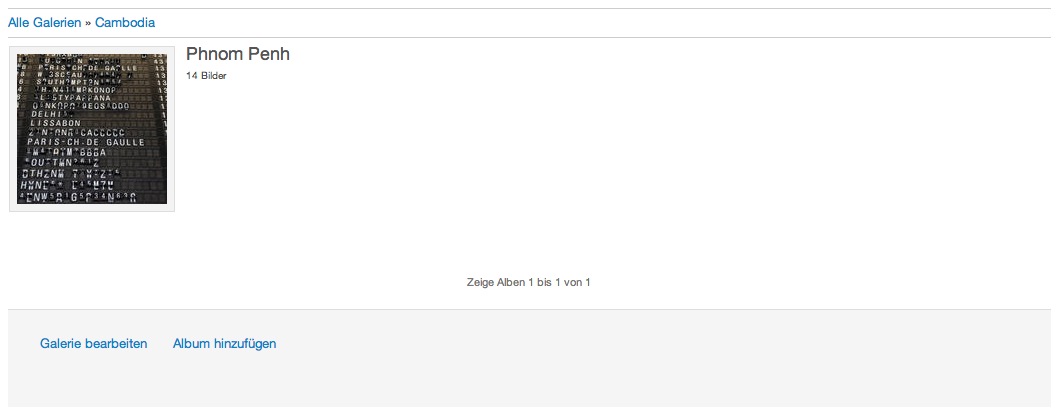
There are more links, once you select a gallery:
Once you opened an album, you have a link for uploading images:
|img-67|