Form manager
What does it do?
You will find the form manager in the backend Web > Forms backend
module. Editors can use the form manager to administer forms stored on file
mounts that they have access to. The form manager:
- lists all forms
- allows users to create, edit, duplicate, and delete forms
- identifies the storage folder
- gives an overview of which pages the forms are on.
Creation and duplication of forms is made easier by a form wizard.
The wizard guides the editor through form creation and offers a
variety of settings, such as the file
mount, the prototype, and start templates.
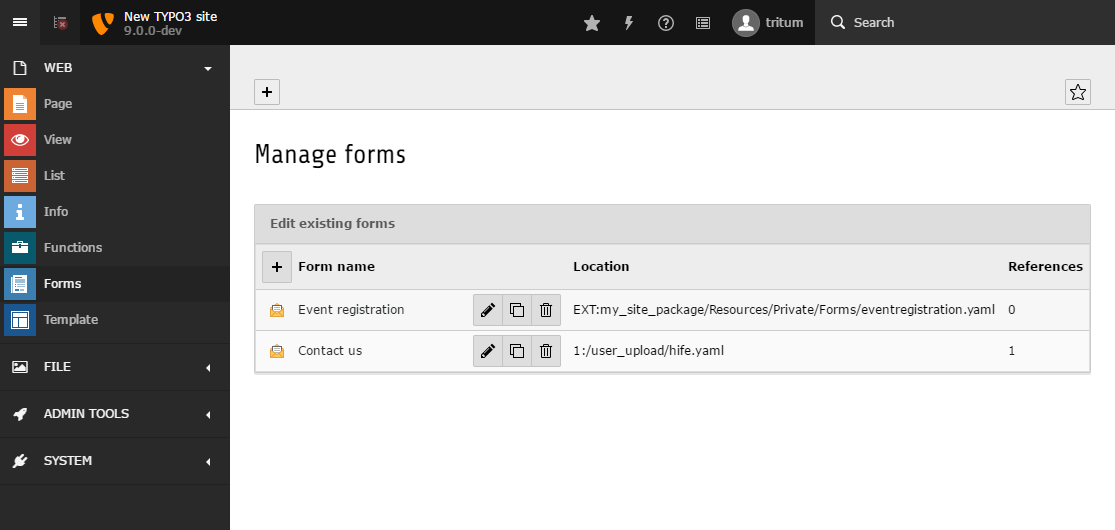
TYPO3 Backend with opened module 'Forms' displaying the form manager.
Start templates
Editors can select a Start template when they are creating a new form. A
Start template is a form definition which hasn't been assigned a
prototypeName (the prototypeName property is normally used as the
foundation of a new form).
An integrator can create as many Start templates as they wish for a particular
prototype. After the Start templates have been defined the integrator can then:
- open Web > Forms
- create a new form by clicking on the appropriate button
- enter the 'Form name' and click the 'Advanced settings' checkbox
- select a
Start templateduring the next steps
Integrators have to define Start templates so that they can be selected
by editors. Also, the same Start template
can be used for several prototypes. To do this, make sure the
start template form elements are defined in the corresponding prototypes.
For example, imagine an integrator has configured
a prototype called 'routing' which contains a form element of type
<formElementTypeIdentifier> 'locationPicker'. The element is only
defined in this prototype. The integrator has created a Start template
which contains the 'locationPicker' form element. A backend editor could now
select and use this Start template with the 'locationPicker' form element,
as long as the prototype is 'routing'. If the integrator
adds this form element to another prototype, the process would
crash. The 'locationPicker' form element is only known to the 'routing'
prototype.
The following example shows a Start template. A
Start template requires at least the root form element
('Form') and a 'Page'.
type: 'Form'
identifier: 'blankForm'
label: '[Blank Form]'
renderables:
  -
    type: 'Page'
    identifier: 'page-1'
label: 'Page'The form manager form wizard displays
a list of all pre-configured
Start templates.When a backend editor creates a form using a
Start template, a new form definition is generated based on that
Start template. The form definition propertyName will be that of the
chosen prototype.The identifier of the root form element ('Form') is set
to the entered "Form name". This name is also used for the
property label of the 'Form' element. Finally, the form editor is
loaded and displays the newly created form.
Translation of the form manager
All option values below the form editor key in the form configuration can be
translated:
formManager:The form manager translation files are loaded as follows:
formManager:
  translationFiles:
    # custom translation file
20: 'EXT:my_site_package/Resources/Private/Language/Form/Database.xlf'The process searches for each option value within all of the defined translation files. If a translation is found, the translated option value will be used in preference.
For the following option value:
...
label: 'formManager.selectablePrototypesConfiguration.standard.label'
...the process searches for the translation key formManager.selectablePrototypesConfiguration.standard.label
in the file under key 20 20: 'EXT:my_site_package/Resources/Private/Language/Form/Database.xlf'
and then the file in EXT:form 10: 'EXT:form/Resources/Private/Language/Database.xlf'
(loaded by default). If nothing is found, the option value will be
displayed unmodified.