Creating a new site configuration
A new site configuration is automatically created for each new page on the rootlevel (pid = 0) and each page with the "is_siteroot" flag set.
To customize the automatically created site configuration, go to the Site Management > Sites module.
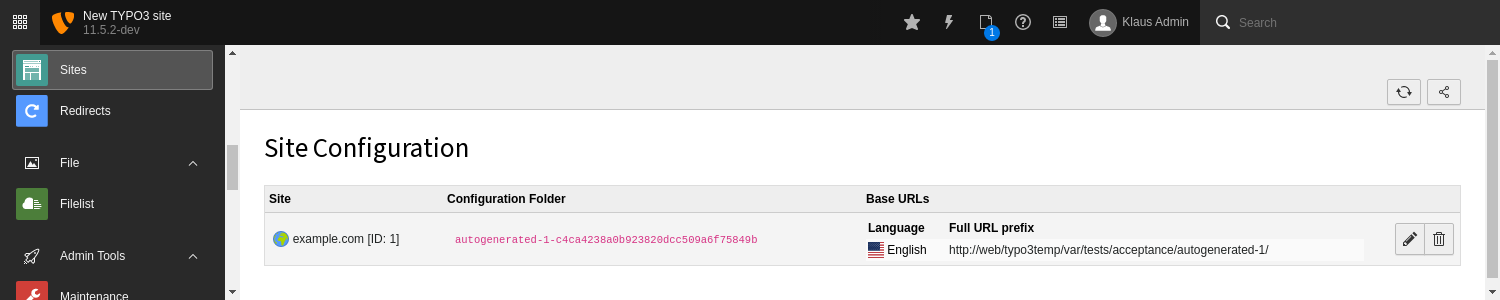
Autocreated site configuration
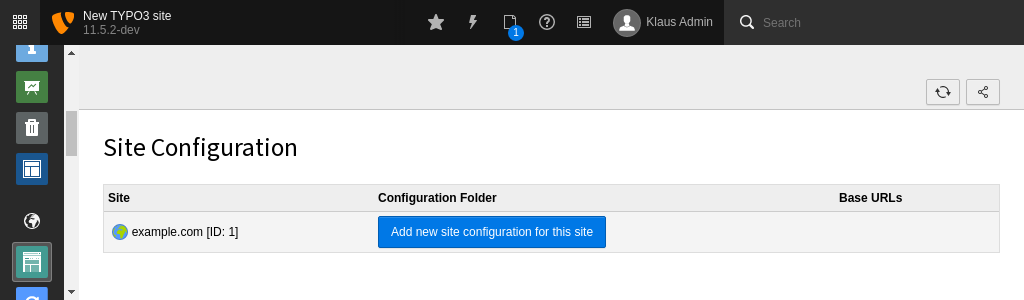
You can edit a site by clicking on the Edit icon (the pencil). If for some reason no site configuration was created, there will be a button to create one:
The site configuration form looks like this:

A new site creation form.
It is recommended to change the following fields:
- Site Identifier
-
The site identifier is the name of the folder within
<project-that will hold your configuration file(s). When choosing an identifier, make sure to stick to ASCII, but for convenience you may also useroot>/ config/ sites/ -,_and..Examples:
main-andsite landing-.page - Entry Point
-
Be as specific as you can for your sites without losing flexibility. So, if you have a choice between using
https://,example. org example.ororg /, then choosehttps://.example. org This makes the resolving of pages more reliable by minimizing the risk of conflicts with other sites.
If you need to use another domain in development, for example
https://, it is recommended to use
base variants.
The next tab, Languages, lets you configure the default language settings for your site. You can also add additional languages for multilingual sites here.
These settings determine the default behavior - setting
direction and
lang tags in frontend as well as locale settings.
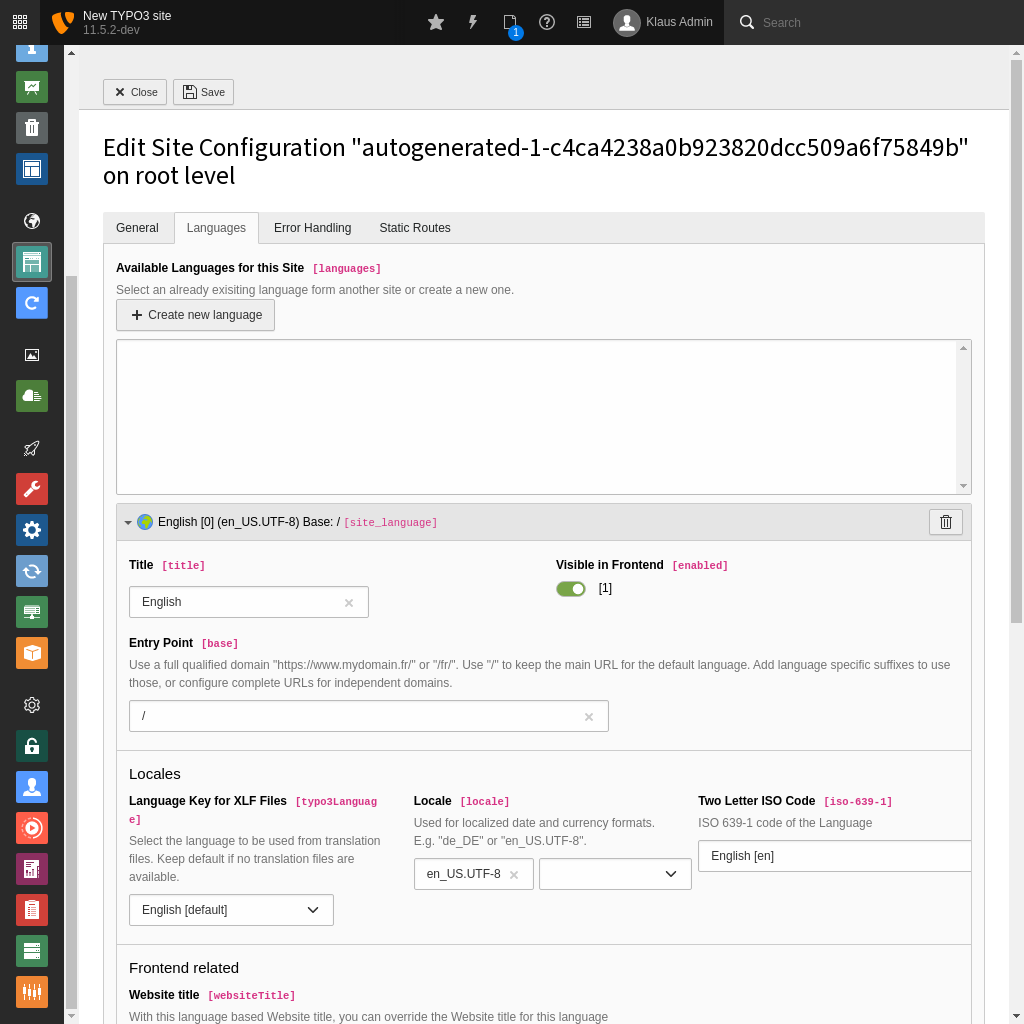
Set default language settings
Check and correct all other settings as they will automatically used for
features like
hreflang tags or displaying language flags in the
backend.
That is all that is required for a new site.
Tip
Just by having a site configuration, you get readable page URLs out of the box. Read more about how to configure routing.
Learn more about adding languages, error handling and routing in the corresponding chapters.